Repair a Dishwasher: A Comprehensive DIY Guide
A practical, educational guide to diagnosing and repairing common dishwasher problems, with safety tips, DIY steps, and maintenance advice from Dishwasher Tips.

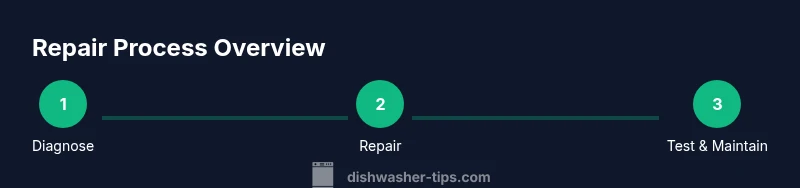
You're about to repair a dishwasher. This guide walks you through safety checks, diagnosing symptoms, and step-by-step repairs for common problems like drainage, clogged spray arms, and faulty door latches. Before you begin, unplug the unit, turn off water supply, and have basic tools ready. Follow these steps carefully to avoid further damage.
Why It Fails: Common Causes
According to Dishwasher Tips, many dishwasher failures stem from a small set of repeat issues. Clogged filters and partial blockages in the drainage path are responsible for standing water and poor drainage. A worn door latch or malfunctioning float switch can prevent a cycle from starting or fully completing. Hard water mineral buildup can also reduce cleaning performance and clog spray arms. By understanding these frequent culprits, you can triage effectively without replacing major components. In most homes, the path to a quick fix begins with a thorough inspection of the interior filter, the drain hose, and the sump area. A systematic approach saves time and avoids unnecessary part purchases. Always check the user manual for model-specific quirks that affect drain routing or safety interlocks.
Safety First: Power, Water, and Handling
Repair work on a dishwasher requires you to control electricity and water exposure. Begin by unplugging the machine at the outlet or shutting off the dedicated circuit breaker. Turn off the water supply valve to prevent leaks when disconnecting hoses. Wear protective gloves to guard against sharp edges inside the sump and spray arms. If you suspect a failed electrical component, do not test voltage with wet hands or while the appliance is energized. Place towels or a small bucket beneath areas where water may spill during removal of panels. Clear the area of pets and children to reduce distractions during the repair. After you finish a repair, re-check connections for leaks and ensure the door latch aligns properly so the machine can seal during a cycle.
Diagnosing Symptoms: How to Identify the Issue
Start with the symptom you observe—leaking, not draining, not cleaning, or not starting—and list potential causes related to that symptom. A bottom-fill of water with no drain often points to a clogged filter or blocked drain hose. Dishes that come out dirty despite a cycle suggest spray arms or filters blocked by debris. A dishwasher that won’t start can indicate a faulty door latch, control board, or timer. Use the built-in features of your dishwasher—let the cycle complete and observe error codes if present. A quick visual check of the filter screen and pump area can reveal obstructions that block water flow. Keep a notebook of what you observe and compare it against a model-specific troubleshooting guide. This method keeps you focused and prevents random guessing.
DIY Repairs You Can Try Safely
If the issue appears limited to cleanliness or drainage, you can often fix it without replacing major parts. Start by removing and cleaning the filter and sump screen; rinse under running water to remove sludge and food particles. For drainage problems, inspect the drain hose for kinks or clogs and clear any build-up. If the spray arms don’t distribute water evenly, remove them and clean the holes with a pin or toothbrush. A door-latch repair may involve adjusting the strike plate or replacing a worn latch. When reseating panels, ensure screws are snug but not over-tightened to avoid warping. If you identify a failed pump or a damaged seal, you may opt to replace only the faulty component rather than the entire unit. Always test the dishwasher empty after any repair to confirm proper operation before loading dishes again.
When to Replace Components vs. the Entire Unit
Some failures are cheaper and safer to fix at the component level than to replace the entire machine. A clogged pump or a worn seal can often be solved with a new gasket or impeller kit. If the control board or motor shows signs of failure, replacement parts are available for many models, but the cost and availability vary. If repeated repairs are required within a short time frame, compare the cumulative repair cost against the price of a new, more energy-efficient unit. Look for energy-efficient models with longer warranties to maximize savings over time. In some cases, a failing dishwasher is a signal to upgrade to a model that uses less water and energy per cycle, reducing ongoing operating costs. Consider compatibility with existing cabinets and your water hardness when shopping for a replacement.
Tools, Parts, and How to Source Replacements
Before you start, assemble a basic toolkit: a Philips and flathead screwdriver, adjustable wrench, pliers, flashlight, a bucket or tray, towels, and a work surface with room to maneuver. For parts, use your model number to verify compatibility. Common replacement items include filters, door latches, and drain pumps; order OEM or reputable aftermarket parts to ensure performance and safety. If you’re unsure about part compatibility, consult the manufacturer’s site or a reliable parts retailer. Keep the receipt and note the warranty on any replacement components. When buying parts, consider whether you prefer a full kit (filters, gaskets, and seals) or individual pieces based on your diagnosis. Always verify the return policy in case the part is not a match.
Maintenance Practices to Prevent Future Breakdowns
Proactive maintenance reduces the likelihood of unexpected breakdowns. Clean the filter and spray arms monthly to prevent mineral buildup and debris accumulation. Run an empty hot cycle with a dishwasher cleaner or vinegar every few months to dissolve mineral deposits, but avoid excessive vinegar use, which can degrade rubber seals over time. Check hoses for signs of wear or leaks and replace damaged sections promptly. Use the recommended detergent and avoid overloading the dishwasher to maintain optimal water flow. Finally, store the machine with access to the drain and inlet area to facilitate future service calls. A regular maintenance schedule saves money and keeps dishes sparkling clean.
Professional Help: What to Expect
If your diagnosis points to a failed motor, a cracked tub, or a malfunctioning control board, a professional technician is often the most cost-effective option. A pro can confirm diagnoses with diagnostic tools, order the correct replacement parts, and perform qualified warranty-compliant repairs. Ask about their training, parts warranty, and expected repair timeline before booking. A service call typically includes a written estimate and a post-service test run to ensure everything operates correctly. If you rely on a warranty or extended service plan, verify coverage and any deductibles to avoid surprises.
Authority Sources
- Energy.gov: Dishwasher efficiency and maintenance tips. https://www.energy.gov/
- Consumer Product Safety Commission: Appliance safety guidelines. https://www.cpsc.gov/
- OSHAsafety.gov: Home appliance safety recommendations. https://www.osha.gov/
Tools & Materials
- Flathead screwdriver(Used to release clips and access internal components.)
- Phillips screwdriver(Screws securing panels and parts.)
- Adjustable wrench(Loosen hoses and fittings without rounding nuts.)
- Pliers(Grip clamps and remove stubborn parts.)
- Bucket or tray(Catch water and protect the floor.)
- Towels or rags(Mop up spills and keep work area dry.)
- Flashlight(Inspects dark sump area and hoses clearly.)
- Work gloves(Protect hands from sharp edges.)
- User manual for your dishwasher model(Model-specific instructions and part numbers.)
- Replacement parts (filters, seals, door latch, drain pump)(Only if you identify a failed component.)
Steps
Estimated time: 90-120 minutes
- 1
Unplug and shut off power and water
Disconnect the dishwasher from power at the outlet or the circuit breaker. Close the water supply valve to prevent leaks when you remove access panels. This initial safety step prevents shocks and water damage during inspection.
Tip: Double-check there’s no power at the outlet by testing with a simple device before touching wires. - 2
Access the interior and inspect the filter
Open the lower access panel and remove the filter and coarse screen. Rinse debris under warm water. A clear filter improves drainage and cleaning performance.
Tip: Take a photo of the filter orientation before removal to ensure correct reinstallation. - 3
Check the drain hose and pump area
Trace the drain hose from the tub to the sink or disposal connection. Detach and inspect for kinks or clogs. Use a flexible brush or pipe cleaner to clear obstructions around the pump impeller.
Tip: Do not yank hoses; support clamps and fittings to avoid leaks. - 4
Inspect spray arms and nozzles
Remove spray arms and inspect for mineral buildup. Clean holes with a pin or brush. Reinstall and rotate by hand to confirm free movement.
Tip: Soak spray arms in warm vinegar solution if buildup is heavy. - 5
Test the door latch and seals
Check the door latch alignment and gasket for wear. A poor seal can prevent cycles from starting or cause leaks during operation.
Tip: Apply a thin bead of silicone grease to the gasket if it feels dry, but avoid over-lubing. - 6
Electrical checks if indicated
If the unit still won’t start, inspect accessible wiring and terminals for corrosion or loose connections. Use a multimeter only if you’re comfortable and have training.
Tip: If in doubt, stop and consult a professional to avoid shock or further damage. - 7
Reassemble and run a test cycle
Carefully reinstall all panels and run an empty cycle on hot to verify drainage and cleaning. Listen for unusual noises and check for leaks.
Tip: Keep an eye on water level and listen for pump operation during the test run. - 8
Evaluate results and plan maintenance
If the problem persists, document symptoms and revisit the diagnosis. Schedule maintenance every 3-6 months to prevent recurrence.
Tip: Use a maintenance log to track parts replaced and cycles run.
People Also Ask
Why won't my dishwasher start after plugging in?
Common causes include a faulty door latch, control board, or timer. Check power at the outlet and verify the door is securely latched. If the issue remains, consult your manual for model-specific diagnostics or seek professional help.
Common causes include a faulty door latch or control board. Check power and latch, and consult your manual if the issue remains.
Why is there standing water in the bottom after a cycle?
Standing water usually means a clogged drain, filter, or drain hose. Inspect and clean these components, then run a test cycle to confirm drainage.
Standing water usually means a clogged drain or filter. Clean them and test again.
My dishes come out dirty even after a cycle—what should I do?
Check the filter and spray arms for debris and mineral buildup. Clean or replace clogged components and run a hot empty cycle with a cleaner to dissolve residue.
Clean the filters and spray arms, then run a hot cycle with cleaner.
Is it safe to repair a dishwasher myself?
Basic fixes with power off and water shut are generally safe. Avoid electrical testing unless you have training. If unsure, contact a pro.
Basic fixes can be safe, but avoid electrical testing if you’re unsure.
How often should I service the dishwasher's filter?
Clean the filter at least monthly and inspect seals for wear. Replace damaged parts promptly to maintain performance.
Clean the filter monthly and check seals for wear.
When should I replace the entire unit instead of repairing it?
If repairs exceed a practical portion of the replacement cost or the unit is energy-inefficient, consider upgrading. Compare total repair costs to a new model with a warranty.
If repairs cost more than a new unit or it's very energy-inefficient, consider upgrading.
Watch Video
What to Remember
- Identify the symptom before repairs.
- Safety comes first: unplug and shut off water.
- Clean filters and spray arms to regain performance.
- Use the right tools and parts for your model.
- Call a pro if the problem persists or involves electrical faults.