Dishwasher Not Spraying Water: Quick Fix Guide for Home
Urgent guide to diagnose and fix a dishwasher that's not spraying water. Step-by-step checks, common causes, safety tips, and maintenance, from Dishwasher Tips, to restore spray performance fast.

Most likely, a clogged spray arm or failing water inlet is causing the dishwasher is not spraying water. Start by inspecting both spray arms for blockages, verify the water supply is on and at proper pressure, and ensure the float and inlet valve are functioning. If the issue persists, continue with the diagnostic steps below.
Why the dishwasher is not spraying water
When your dishwasher is not spraying water, the issue is usually mechanical rather than electrical. The most common culprits are clogged spray arms, blocked filters, a flooded sump, or a weak water inlet. In many homes, this symptom appears after mineral buildup or after loading dishes too tightly. According to Dishwasher Tips, this symptom is most often caused by a clogged spray arm or a misbehaving water inlet. If you notice dishes still wet after the cycle, you’ll want to inspect spray arms for debris and check the water inlet valve and float assembly. Addressing these areas often restores spray performance without replacing major components. In addition, ensure you’re using the correct detergent and not overloading the racks, which can block spray patterns and reduce effectiveness. By starting with the most common issues, you can often restore spray power quickly and avoid unnecessary parts replacement.
Start with the basics: water supply, filters, and spray arms
Before taking things apart, verify basic system readiness. Ensure the hot water supply line to the dishwasher is fully open and that the kitchen faucet connected to the same supply has adequate flow. Check the built-in filter and sump screen for obstructions; a blocked filter reduces water pressure at the spray arms. Inspect the lower spray arm for cracks or detached connectors. Properly seated spray arms rotate freely and distribute water across all racks. Dishwasher Tips emphasizes starting with simple checks; often these basic adjustments resolve the problem without tools. If you partially fix the issue but still see weak spray, the next step is to test the water inlet and float mechanism. A clean, clear path for water ensures consistent spray pressure throughout the cycle. Also confirm the door latch is firmly closed, as a loose latch can halt spray operations in some models.
Inspect spray arms for clogs and damage
The spray arms are the nozzle network that delivers water to your dishes. Debris such as broken glass shards, food particles, or mineral scale can clog small nozzles, reducing spray pressure or stopping spray entirely. Remove the arms per your model’s manual and rinse under running water while inspecting each hole. If you see cracks, bent holes, or a spray arm that won't rotate, replace it. After cleaning, reassemble and run a diagnostic cycle with a full rack of cups to observe distribution. Keep in mind that even small blockages can drastically reduce cleaning power. Regular checks prevent buildup and keep spray patterns even across cycles. If your model uses multiple arms, repeat the inspection on all arms to avoid a hidden clog that only affects one side.
Inspect the water inlet valve and float switch
The water inlet valve controls supply to the tub. A worn or stuck inlet valve can limit water entering the dishwasher, so the spray arms never get the needed pressure. The float assembly tracks water level; if the float is jammed, the valve may close prematurely. With the power off, locate these components and test for smooth movement. If you can't feel a free float or hear the valve click when you plug in power, service may be required. For safety, do not bypass safety features. Replacing a faulty inlet valve is a common repair that often restores full spray performance. If your kitchen water supply is mineral-rich, consider a pre-filter to reduce mineral buildup that can affect the inlet.
Common symptoms and cause mapping
Different symptoms map to specific causes. Weak spray on the lower rack often points to a clogged spray arm or a restricted filter. If water comes in but splashes unevenly, the issue is likely a clogged arm or a faulty pump impeller. If no spray at all, the inlet valve, float switch, or water heater may be involved. Keep a notebook of symptoms (noise, cycle duration, water level) to help you identify likely failures. Regular maintenance reduces the chance of these failures and keeps your dishwasher operating at peak efficiency. As you diagnose, remember to check for mineral buildup on the sump screen and around the pump seal, which can silently degrade spray performance over time.
Diagnostic flow: symptom → diagnosis → solutions
Using a logical flow helps you pinpoint the root cause without unnecessary parts testing. Start with visible, easy-to-check items (arm clog, filters, loading). If those checks don’t fix the issue, move to the water inlet valve and float switch. If the problem remains, inspect the pump assembly and spray arm drive gears. For each symptom, the suggested solution follows naturally: clean or replace the affected component, then re-test with a short cycle and observe spray coverage. Always power down and unplug before handling electrical components, and consult the user manual for model-specific procedures. If you see signs of electrical damage or if you suspect a faulty motor or controller, call a professional to prevent safety hazards.
Step-by-step fixes for the most common causes
This section provides actionable steps for the most frequent culprits. First, remove and clean the spray arms, clearing any sediment from all nozzles. Next, clean or replace the sump filter and ensure the impeller spins freely. Then, inspect the water inlet valve and float switch for smooth operation and replace if necessary. Check hoses for kinks and ensure the supply line isn’t partially blocked. Finally, run a test cycle with a full rack to confirm spray distribution across all levels. If spray patterns remain irregular after these steps, the issue may involve the pump or electronics, which typically requires professional service. Remember to disconnect power before every disassembly and to handle components gently to avoid damage.
Safety precautions and when to call a pro
Electrical components, water connections, and the pump area pose safety risks. Always unplug the machine before inspecting internal parts and wear eye protection when handling sharp or heavy components. Use a bucket or towel to catch water when disconnecting hoses. If you notice burning smells, buzzing noises, or scorched wiring, stop and call a licensed technician. Some fixes, like testing with a multimeter or replacing a valve, require specialized tools and knowledge. If your unit is still under warranty, contact the manufacturer to avoid voiding coverage. Dishwasher Tips recommends a professional evaluation if you feel unsure at any step or if the issue involves the control board, motor, or leak-prone seals.
Prevention and maintenance to avoid future clogs
Preventive maintenance helps keep spray performance high over time. Regularly clean filters and screens, inspect spray arms for wear, and use a mineral- and residue-reducing detergent. Run hot-water cycles with a dishwasher-safe cleaner every few months to dislodge mineral buildup. Check the drainage hose for kinks and ensure proper installation. Load dishes according to the manufacturer’s guidelines to maximize spray coverage and minimize blocked nozzles. A proactive maintenance routine saves energy, reduces cycle times, and extends the life of your dishwasher. Finally, keep a small maintenance log so you know when you last serviced the spray system and when to schedule a professional inspection.
Steps
Estimated time: 60-90 minutes
- 1
Power off and unplug the dishwasher
Unplug the unit and turn off the circuit breaker to ensure no electrical current is present while you inspect components. Remove the lower kick panel if accessible to reach the inlet valve and filters. Have a towel ready to catch any residual water.
Tip: Use a non-contact voltage tester to confirm no live circuits before touching wires. - 2
Remove and inspect spray arms
Take out the spray arms following your model’s manual. Rinse under warm water and look for blocked nozzles or cracks. Spin the arms to ensure they rotate freely. Re-seat firmly before testing.
Tip: Take photos during disassembly to ensure correct reassembly. - 3
Clean filters and sump area
Remove the filter assembly and sump screen; rinse thoroughly with running water. Remove any food debris, mineral buildup, or sediment. Reinstall the filter, ensuring a proper seal to prevent leaks.
Tip: A clogged filter is a common hidden cause of poor spray performance. - 4
Inspect the water inlet valve and float
Locate the inlet valve and float switch; make sure the float moves freely. If the valve does not click when powered, or if the float sticks, replace or service the part. Ensure all wiring connections are dry before testing.
Tip: Test with the unit on its side to access hard-to-reach valves—just remember to unplug first. - 5
Check hoses and water supply
Trace the water supply hose for kinks, leaks, or partial blockages. Ensure the supply line from the wall valve is fully open and that there is adequate water pressure. A weak supply can starve the spray system.
Tip: If your house has hard water, consider periodic mineral buildup mitigation. - 6
Run a test cycle and observe spray
Reconnect power and run a short hot-water test cycle with a small load. Observe spray arms for full rotation and even water distribution across racks. If spray remains weak, proceed to component replacement.
Tip: Keep a log of what you tested and the results for future reference. - 7
Consider professional service if unresolved
If you still see no or weak spray after these steps, the issue may involve the pump, motor, or control board. A licensed technician can diagnose electrical or mechanical faults with specialized tools.
Tip: Avoid risky repairs that involve high-voltage components or refrigerant lines.
Diagnosis: Dishwasher is not spraying water
Possible Causes
- highClogged spray arm or spray tower
- mediumBlocked water inlet valve or faulty float switch
- lowInsufficient water pressure from supply line or dirty filter
Fixes
- easyClean spray arms and remove debris from all holes; replace if cracked
- mediumInspect and clean the water inlet valve and test the float switch; replace faulty parts
- easyClean or replace filters and verify water pressure; check supply line for kinks or blockages
People Also Ask
What is the most common cause when a dishwasher is not spraying water?
The most common causes are a clogged spray arm or a faulty water inlet valve. Cleaning the arms and verifying the valve often restores spray without more extensive repairs.
Most common cause is a clog in the spray arm or a faulty inlet valve. Cleaning the arms and checking the valve usually fixes it.
How do I test the water inlet valve on a dishwasher?
Unplug the unit, access the inlet valve, and check for continuity with a multimeter if you’re comfortable. Replace the valve if there’s no click or if the resistance readings are out of spec. Always follow the manufacturer’s safety guidelines.
Unplug the unit and test the inlet valve with a multimeter if you know how. Replace if it’s not working.
Can a clogged filter prevent spraying water?
Yes. A clogged filter reduces water flow and spray pressure. Clean or replace the filter according to the model manual and run a test cycle to confirm improvement.
Yes, a clogged filter can prevent proper spraying. Clean it and test again.
Is it safe to operate with a faulty float switch?
No. A faulty float switch can cause overfilling or improper valve operation, risking leaks or overflow. If you suspect a float issue, repair or replace the switch promptly and test with care.
No, float switch failure is unsafe. Replace it and test.
When should I call a professional?
If the spray problem persists after basic checks, or if you encounter electrical issues, leaks, or unusual noises, contact a licensed technician. They can diagnose pump, motor, or control-board faults safely.
If it still doesn’t spray after basic checks, call a professional for a safe diagnosis.
Watch Video
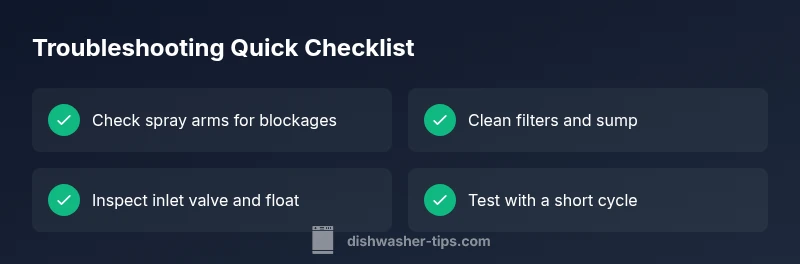
What to Remember
- Check spray arms first for clogs.
- Verify water supply and valve operation.
- Clean filters and sump routinely.
- Test after each fix with a cycle.
- Call a pro if unresolved.