Dishwasher Service Repair: Troubleshooting Guide for Homes
A practical, step-by-step guide to diagnosing and safely repairing common dishwasher issues at home, with tools, DIY fixes, and guidance on when to call a pro.

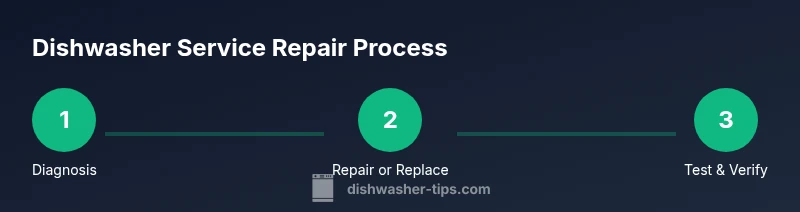
Learn how to diagnose and repair common dishwasher issues at home, or determine when to call a professional for service repair. This guide covers safety checks, basic troubleshooting, parts you may replace, and how to contact support if the problem persists. By following these step-by-step diagnostics, you'll save time, reduce costs, and extend the life of your appliance.
Why dishwasher service repair matters
According to Dishwasher Tips, a well-executed service repair can extend the life of your dishwasher, prevent water damage, and improve energy efficiency. The Dishwasher Tips team found that routine, targeted maintenance reduces the risk of costly breakdowns by addressing wear patterns before they escalate. For homeowners, investing time in a solid diagnostic approach pays off through fewer emergency calls and more consistent cleaning performance. When a unit starts leaking, sounds unusual, or stops draining, the impulse is often to replace it. Yet many issues are affordable to fix with a proper plan. This section explains why service repair matters beyond merely making the machine run again, including long-term savings, reduced waste, and improved safety in kitchens where kids and pets are present.
- Safety and reliability: repairing small faults early reduces the chance of electrical hazards or water leaks.
- Cost efficiency: targeted DIY fixes save labor costs and can extend warranty coverage for the parts you replace.
- Environmental impact: preserving a functioning appliance lowers embodied energy and waste.
Common failure modes and symptoms
Dishwashers present a handful of recurring problems that homeowners can recognize with a quick inspection. A machine that won’t start may indicate a door latch or control panel issue, while poor cleaning often points to clogged filters or spray arms. Leaks are commonly caused by worn door seals or loose hoses, and unusual noises may come from a failing pump or worn bearings. If the unit doesn’t drain, the drain pump or hose may be obstructed. This section outlines the key symptoms you’ll encounter and links each symptom to a likely root cause so you can prioritize your steps without unnecessary disassembly.
- Not starting or stopping mid-cycle often relates to door latch or control issues.
- Dishes come out dirty despite a full cycle usually means filters, spray arms, or detergent resonance problems.
- Water under the unit generally signals a seal, hose, or pump fault.
- Loud grinding or buzzing can indicate a failing pump or a blocked impeller.
- Not draining points to clogs in the pump, drain hose, or check valve.
Safety first: power and water precautions
Before you touch anything, power down the unit and shut off the water supply to prevent electric shock and flooding. If you are dealing with live electrical components, PPE such as gloves and eye protection is prudent. Never work inside the unit while it is plugged in, and avoid stepping on wet floors. Keep a bucket and towels on hand to manage minor leaks. If you smell burning insulation or see scorch marks, stop immediately and consult a professional. These precautions safeguard you while you diagnose common failure modes and perform maintenance.
- Unplug the dishwasher and turn off the water supply at the valve.
- Wear safety glasses and gloves to protect against sharp edges and hot steam.
- Keep the work area dry and organized to prevent accidental slips or short circuits.
Diagnostic workflow: symptom to cause
Create a simple decision tree to trace symptoms to root causes. Start with the symptom (e.g., not draining) and work through potential culprits in order of likelihood and ease of access. Keep a small log of tests and outcomes so you don’t repeat steps. Close the loop by testing the machine after each fix to confirm the root cause has been addressed. This structured approach reduces frustration and speeds up repair timelines.
- Document the symptom and observable clues (leaks, noises, odors).
- Test each potential cause in a logical order (doors, seals, filters, pumps).
- Verify fixes by running a full cycle with a small load first.
Cleaning and maintenance to prevent issues
Prevention is often cheaper than repair. Regular maintenance keeps a dishwasher performing at peak efficiency and minimizes the likelihood of failures that require service repair. Clean the filter and spray arms monthly, remove debris from the drain and sump, and inspect door gaskets for cracks or wear. Use a dishwasher-safe cleaner to dissolve mineral deposits and run an empty cycle periodically to prevent buildup that can impair cleaning and drainage. These practices extend the appliance’s life and preserve energy efficiency over time.
- Schedule monthly cleanings of filters, spray arms, and seals.
- Run a maintenance cycle with a washer-safe cleaner every 1–3 months.
- Use the correct detergent and avoid pouring it directly on the spray arms.
DIY fixes you can handle (parts and routines)
Many common failures can be addressed with simple part swaps or routine maintenance. Replacing worn door gaskets, cleaning the filter basket, or replacing damaged spray arms are straightforward tasks for a handy homeowner. Always verify compatibility with your model before purchasing replacement parts and follow the manufacturer’s instructions. If you encounter stubborn clogs or intermittent electrical issues, consider consulting a professional to avoid voiding warranties or causing further damage.
- Start with the simplest fixes: clean or replace filters and spray arms.
- Inspect door gaskets; replace if cracked or brittle.
- When replacing pumps or control boards, ensure you have model-specific parts and diagrams.
When to replace vs repair: economics and life expectancy
A critical decision after identifying a fault is whether to repair or replace the unit. If the repair involves major components (pump, control board, or motor) and the unit is already older, the cumulative repair costs may exceed the price of a new machine with better efficiency. Consider energy usage, warranty implications, and the dishwasher’s age. A cost-benefit view, rather than a knee-jerk replacement, often yields the best long-term outcome. This section helps you weigh the economics of repair versus replacement without guessing.
- Older units with multiple failures may justify replacement with a newer, more efficient model.
- For recent or under-warranty components, repair might be the smarter option.
- Factor in potential energy savings from modern models when calculating payback.
How to choose a service professional
When DIY isn’t enough, selecting a qualified service professional is crucial. Look for licensed technicians with experience in your brand and model, ask for written estimates, and request a service history. Check for reviews, confirm whether labor and parts are covered under warranty, and verify that the technician follows safety protocols. A reputable pro will provide a clear scope of work, an itemized quote, and a realistic timeline. This section guides you through the selection process to reduce risk and improve repair outcomes.
- Verify licenses, insurance, and manufacturer-authorized status.
- Ask for an upfront, written estimate with a breakdown of parts and labor.
- Confirm warranty terms on both parts and service.
Common missteps to avoid during DIY and repairs
DIY repairs can backfire if you rush, skip safety steps, or replace parts without confirming root causes. Common missteps include ignoring water shutoff valves, mixing up wires, using incorrect parts, and attempting to run cycles when components are unattached. Take your time, test incrementally, and if a fault persists after two or three attempts, pause and consult a professional. Remember, improper fixes can cause more damage or create safety hazards in busy kitchens.
- Do not bypass safety features or disable interlocks to test the machine.
- Avoid using non-specific parts or generic detergents that can clog channels.
- Refrain from running cycles with open access panels or exposed wiring.
Authoritative sources and further reading
For more in-depth guidance on appliance safety, energy efficiency, and best practices for home repairs, refer to trusted sources. While individual model instructions vary, the core principles of safe disassembly, proper testing, and routine maintenance stay consistent. This section provides curated resources to expand your knowledge and reinforce safe practices. The guidance here aligns with industry standards and consumer safety recommendations.
- Dishwasher safety best practices – U.S. Occupational Safety and Health Administration (OSHA): https://www.osha.gov
- General energy and appliance efficiency – U.S. Department of Energy: https://www.energy.gov
- Environmental and consumer safety insights – U.S. Environmental Protection Agency: https://www.epa.gov
Tools & Materials
- Phillips head screwdriver(Size #2 or #1 depending on screws in access panel)
- Flathead screwdriver(Used for prying panels and prying connectors gently)
- Nut driver set(Assorted sizes for hoses and clamps)
- Multimeter(For testing continuity and voltage with the unit unplugged)
- Needle-nose pliers(Grip small parts and remove stubborn hoses)
- Bucket and towels(Contain spills and protect the floor during work)
- Soft brush and cloth(Clean filters and spray arms without scratching surfaces)
- Model-specific replacement parts(Gaskets, spray arms, or filters may be required)
Steps
Estimated time: 60-90 minutes
- 1
Disconnect power and water
Begin by unplugging the unit from its outlet and turning off the water supply. This reduces the risk of electric shock and water spraying during inspection. Verify power is off by testing the outlet with a multimeter before touching any internal components.
Tip: Double-check the circuit and keep the plug in a safe location away from the work area. - 2
Access the interior and inspect the door latch
Remove the lower service panel to access the tub and door latch. A faulty latch can prevent the dishwasher from starting or closing properly. Inspect for corrosion, misalignment, or broken springs. If the latch visibly shows wear, plan for replacement.
Tip: Take a photo of the latch setup before removing screws to simplify reassembly. - 3
Clean and inspect filters and spray arms
Locate the filter and spray arms; remove them carefully and clean off trapped debris. Clogs reduce water flow and cleaning efficiency. Rinse thoroughly and inspect for cracks or excessive wear that could require replacement.
Tip: Pay attention to fans or impeller parts in the spray arm as they can be damaged by mineral buildup. - 4
Check the drain pump and drain hose for obstructions
Inspect the drain hose for kinks and the drain pump for debris or foreign objects. A clogged drain system can cause poor draining or standing water. Remove obstructions and test the pump by triggering a manual drain after reassembly.
Tip: If the pump is noisy, check bearings and impellers for damage before deciding on replacements. - 5
Test electrical connections and control panel safety checks
With the unit reassembled, inspect visible wiring for loose connectors or signs of damage. Confirm control panel responds to inputs and cycles through normal status lights. Look for burnt or melted insulation, which requires professional attention.
Tip: Only test with the unit powered on after all panels are secured to prevent shocks. - 6
Run a test cycle and observe results
Run a short, empty cycle first to verify drainage, spray action, and overall operation. If no errors appear, run a small load to confirm performance. Document any residual issues for future reference or to show a technician if needed.
Tip: Keep a log of noises, leaks, or cleaning performance to help diagnose recurring problems.
People Also Ask
Can I fix a dishwasher myself, or should I hire a pro?
Many common issues can be addressed by a confident DIYer, especially cleaning and simple part replacements. However, electrical faults, complex pump work, or failures with the control board may require a licensed technician to avoid safety risks and warranty issues.
You can try simple fixes, but for electrical or major component problems, a professional is safer.
What are the signs of a failing pump or motor?
Unusual grinding noises, failure to drain, or a loud hum during operation are typical indicators of pump or motor issues. If the cycle stops early or the motor overheats, seek professional assessment.
If you hear grinding or see water not draining, it’s likely the pump or motor needs attention.
Is it safe to run a dishwasher during diagnosis?
Running the dishwasher during diagnosis is not advised if you are actively inspecting or replacing components. Stop the cycle to check for leaks, then restart to test after repairs.
Better to stop the cycle while you diagnose to prevent damage or leaks.
How long does a typical service repair take?
A typical service visit takes about an hour or two, depending on the complexity and whether parts need to be ordered. Always request a time estimate and parts list before work begins.
Most service calls run a couple of hours, but it varies with parts availability.
Will a DIY fix impact my warranty?
DIY repairs can affect warranty terms. Check your warranty documentation and manufacturer recommendations. If a unit is under warranty, contact the maker or a certified technician to avoid invalidating coverage.
Check your warranty; some fixes might void coverage if done improperly.
What routine maintenance helps prevent future problems?
Regular filter cleaning, spray arm checks, and using manufacturer-recommended detergents can prevent buildup and keep cleaning performance high. Schedule periodic inspections, especially if you notice changes in noise or leaks.
Keep up with monthly cleaning and annual checks to prevent surprises.
Watch Video
What to Remember
- Diagnose with a safe, structured workflow.
- Regular maintenance prevents costly repairs.
- Know when to DIY and when to hire a pro.
- Document symptoms to guide future fixes.
- Use model-appropriate parts for reliable results.