How to Check If Your Dishwasher Is Getting Water
Learn how to check if your dishwasher is getting water, diagnose common supply problems, and safely test the fill cycle with a practical, step-by-step guide from Dishwasher Tips.

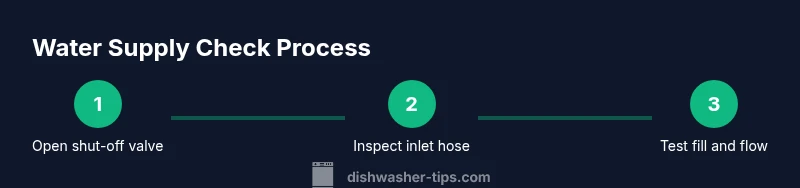
To determine if your dishwasher is getting water, start with two quick checks: confirm the shut-off valve behind the unit is fully open and inspect the inlet hose for kinks or blockages. If water flow seems normal and the tub still won’t fill, proceed with the step-by-step checks outlined below. This guide helps you isolate supply issues before calling a pro.
Understanding why water supply matters for dishwashers
If you're wondering how to check if dishwasher is getting water, start with the basic water-path in your machine: from the home supply, through the shut-off valve, into the inlet hose, to the dishwasher’s fill valve, and finally into the tub. If any link in that chain is blocked, kinked, or only partly open, the dishwasher may not fill properly, resulting in incomplete cleaning or a fault code. The Dishwasher Tips team notes that most fill-related issues stem from a simple loss of flow at the supply point or a clogged filter screen, rather than a failed pump. In practice, you’ll want to confirm two things first: that the water is actually reaching the valve, and that the valve is allowing water to pass through. By focusing on these two checkpoints you can often isolate the problem before tearing into wiring or replacing components. In this guide, you’ll see practical steps, safety reminders, and red flags that indicate you should bring in a professional. This approach aligns with Dishwasher Tips analysis and keeps your repairs affordable and predictable.
Quick checks you can do at the kitchen sink
Before diving deeper, do a few quick checks that you can safely perform at the sink. First, verify the home's hot and cold water lines are functioning and that the shut-off valve behind the dishwasher is fully open. If the valve is partially closed, even a healthy inlet valve won't fill the tub properly. Next, test the water flow by turning on your kitchen faucet and measuring steady flow for a minute; if you see a reduced stream, the issue may be upstream of the dishwasher. Inspect the hose connection at both ends for kinks or twists that could restrict flow. Finally, make sure the inlet screen on the valve isn't clogged; a simple rinse or gentle brush can remove mineral debris. If you’ve got a water-softener or hard-water program in your area, consider flushing the line to remove mineral scale that can block screens over time.
Inspect the dishwasher's water inlet valve and screen
The inlet valve is the gateway that controls water entry into the dishwasher. A faulty coil or a clogged screen can prevent water from flowing even when the valve receives a signal. Start by turning off power at the breaker and shutting the water supply. Remove the kick panel or toe-kick plate to access the valve and screen. Carefully detach the inlet hose, inspect the screen for mineral deposits, and clean it with a soft brush or a toothpick. Reconnect and test by running a small cycle. If the screen is clear but the valve still won’t open when you energize it, the coil or valve mechanism may be faulty and require replacement.
Examine the supply hose, fittings, and water pressure
Next, inspect the supply hose for kinks or twists and check the fittings at both ends for tightness. A loose connection or a crimped hose can mimic a water-starved fill. Gently straighten any bends and reseat clamps securely. If you feel resistance when you attempt to hand-pull water through the hose, the line could be blocked or undersized for your model. While most homes have adequate pressure, low supply pressure is a common cause of slow or incomplete fills. If you suspect pressure is insufficient, test by opening the sink faucet fully nearby and observing sustained flow through the dishwasher hose for a short period.
Test electrical signals and safety steps for filling
Because the fill action is controlled electronically, it’s essential to follow safety steps before touching wires. With the power off, you can inspect the control board connections and the valve coil wiring harness for obvious signs of damage or corrosion. If you’re comfortable, use a multimeter to check coil resistance when the power is turned back on briefly, being mindful of safety. If you detect an open circuit or a burned smell, replace the valve. If you’re unsure about testing electrical components, skip to the next physical checks and plan to call a technician.
Run a controlled fill test and observe the results
Perform a controlled test by starting a short wash cycle and watching the fill stage closely. Listen for the fill valve clicking and observe the water level rising in the tub. If water does not appear, double-check the shut-off valve again, then retry after securing all hose connections. It can help to place a shallow tray under the inlet to catch drips during testing. Document any codes shown on the display to help a technician diagnose quickly.
When to call a professional and what to expect
If you have ruled out obvious supply blockages and the dishwasher still won’t fill, it’s time to contact a professional. A technician will typically verify the valve’s electrical signal, test the valve coil resistance, inspect the float switch, and assess the overall wiring harness. Expect a diagnostic visit to include valve replacement if the coil tests fail or if there is evidence of internal damage. Early-stage leaks or persistent odor can also indicate components that warrant replacement. This approach preserves your appliance’s warranty and safety.
Maintenance habits to prevent future water problems
Preventive care reduces the chance of fill failures. Regularly inspect the water inlet screen and clean it every few months, especially in areas with hard water. Keep the shut-off valve free of mineral buildup and ensure hose connections remain tight. If your home has variable water pressure, consider installing a small water hammer arrestor or upgrading to a valve designed for fluctuating supply. Finally, schedule periodic professional inspections to catch wear before it becomes a breakdown.
Tools & Materials
- Phillips-head screwdriver(For toe-kick access panels)
- Adjustable wrench(To loosen hose fittings)
- Bucket or shallow tray(Catches drips during hose removal)
- Flashlight(Illuminates valve area behind kick plate)
- Soft brush or toothpick(Clean inlet screen without eroding it)
- Lint-free cloth(Wipe seals and fittings clean)
- Gloves(Protect hands from sharp edges)
- Multimeter (optional)(Test valve coil resistance if you’re comfortable)
- Replacement water inlet valve (optional)(Keep on hand if coil or valve fails diagnostic tests)
Steps
Estimated time: 25-40 minutes
- 1
Power down and prepare the area
Unplug the dishwasher or switch off the circuit at the breaker. Relieve pressure by turning on a nearby faucet for a moment, then shut it off. This minimizes the risk of electric shock or spray while you inspect the valve and hose.
Tip: Take a photo of hose connections before removing anything to ensure correct reassembly. - 2
Open the shut-off valve fully
Locate the valve behind or beneath the dishwasher and turn it counterclockwise until it stops. A partially closed valve is a common culprit for poor fill. Recheck after any disassembly but before re-energizing power.
Tip: If the valve feels stiff, don’t force it; stop and evaluate for mineral buildup or a seized stem. - 3
Inspect and clean the inlet screen
With the valve off, detach the inlet hose and use a soft brush to remove mineral deposits from the screen. Rinse gently and verify there’s free passage through the hose.
Tip: Be careful to re-seat the screen correctly to avoid leaks. - 4
Check the supply hose and fittings
Inspect hoses for kinks, cracks, or crush points. Ensure fittings are tight on both ends and use a wrench to snug them without overtightening.
Tip: Keep spare gaskets handy if you notice worn seals during disassembly. - 5
Test fill with the valve energized
Reconnect the hose, restore power, and run a quick cycle to observe if water enters the tub. If it still won’t fill, consider testing the valve coil or planning a component replacement.
Tip: If you smell burning or see discoloration around the valve, power down immediately and seek service. - 6
Run a controlled fill test
Set the dishwasher to a short wash and monitor the fill stage. Note any codes on the display and listen for the valve’s click. Document results for your records or when you call a technician.
Tip: Use a stopwatch to measure fill time; abnormal timing helps pinpoint valve or pressure problems. - 7
Decide on next steps
If tests indicate a defective valve or persistent electrical issues, plan for replacement. If the issue seems upstream (hose, valve, or pressure), you may be able to address it without a full service call.
Tip: Keep a log of symptoms and test results; it speeds up diagnosis with a tech.
People Also Ask
Why isn’t my dishwasher filling even though the sink faucet is fine?
The issue is often with the dishwasher’s water inlet valve, its screen, or the hose connections rather than the household water supply. Begin by inspecting the valve and screen for blockages, and verify the valve is receiving an electrical signal. If the valve coil tests out, the problem may lie in the control board or wiring.
Usually the problem is the inlet valve, screen, or hose. Check the valve signal and screen first, then consider control wiring if the valve seems to be getting power.
Can low water pressure affect how my dishwasher fills?
Yes. If water pressure is too low, the tub may not fill quickly or evenly, and cycles can fail to complete. Check the shut-off valve, inspect hoses for obstructions, and ensure the supply line is clear. If pressure remains low, contact a plumber to assess the service line.
Low pressure can prevent proper filling; inspect valves and hoses, and consider a professional pressure check if needed.
How do I test the water inlet valve at home?
Access the valve safely with power off, then energize the valve and feel or listen for the valve click while water should flow. If you don’t hear a click or water doesn’t flow after energizing, the valve or coil may be faulty. For accurate results, a multimeter can be used to check coil resistance.
Safely energize the valve and listen for a click; lack of flow or click suggests valve trouble. Multimeter testing can help confirm coil issues.
Is it safe to troubleshoot while the dishwasher is plugged in?
No. Always unplug the unit or switch off the circuit breaker before opening access panels or handling the inlet valve. This reduces the risk of electric shock and damage to components.
Always power off before touching any internal parts to stay safe.
What if I see water leaking under the dishwasher?
A leak can come from loose hose fittings, a damaged hose, or a faulty seal. Check all connections, replace cracked hoses, and ensure seals around the doors and kickplates are intact. If the leak persists, call a professional to inspect for cabinet damage.
Leaks usually come from hoses or seals; tighten or replace as needed, and call a pro if it continues.
How often should I clean the inlet screen?
Clean the inlet screen every few months, or more often if you have hard water or notice reduced flow. A simple brush and rinse will usually remove mineral buildup and restore normal flow.
Clean the inlet screen every few months to prevent blockages and ensure steady water entry.
Watch Video
What to Remember
- Identify whether water reaches the valve first
- Clean the inlet screen to restore flow
- Inspect hose connections for leaks or kinks
- Test cycle fill to confirm function before replacing parts
- Call a professional if electrical tests suggest valve failure