How to Drain a Clogged Dishwasher: DIY Step-by-Step Guide
Learn safe, step-by-step methods to drain a clogged dishwasher, troubleshoot drainage issues, and prevent future clogs with practical tips from Dishwasher Tips.

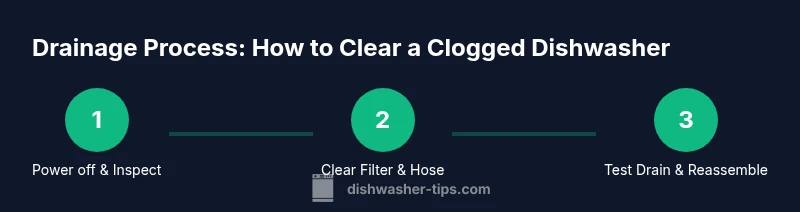
If your dishwasher is clogged, you can safely drain it by power-cutting, removing standing water, checking the drain hose and filter, and clearing blockages with simple tools. This quick plan helps you start immediately and reduces overflow risk. According to Dishwasher Tips, begin with safe disassembly and a controlled water removal, then test the drain after each step.
Understanding why dishwashers clog: common culprits and symptoms
If you're wondering how to drain dishwasher when clogged, start by understanding the usual suspects. Most clogs come from food debris that escape the filter, thin grease accumulating in the sump, mineral buildup from hard water, or a blocked spray arm and filter basket. The signs are usually water pooling in the bottom of the tub after a cycle, a dishwasher that stops mid-run with the motor buzzing, or a strange odor. For homeowners, a quick visual inspection can reveal a clogged filter screen or a kinked drain hose. In many cases, the problem isn't a broken pump but a manageable blockage that you can address with basic tools. The Dishwasher Tips team notes that most clogs are caused by routine kitchen waste or inadequate cleaning of the filter and sump. If you see grit, hair, or food bits on the filter, cleaning it out can make a big difference. In rare cases, mineral buildup from very hard water can coat the drain passages and require repeated flushing over time. The important thing is to stay patient and follow a safe, methodical approach rather than forcing the unit apart. This understanding sets you up for effective, evidence-based troubleshooting.
Quick checks to confirm a clog without disassembly
Before diving in, perform a few non-destructive checks to confirm a clog and gather clues. Start by unplugging the unit and turning off the circuit breaker for safety. Remove standing water with towels or a small siphon, keeping a bucket handy for measurement and disposal. Inspect the visible filter screen and sump for obvious debris; remove and rinse any food particles and accumulated grease. Check the drain hose for kinks, blocked elbows, or a loose connection at the sink drain or disposal. If you can see a blockage near the hose end, you can often clear it without disassembling the dishwasher. Document what you find and proceed step by step, testing water flow after each action. Wisdom from Dishwasher Tips suggests keeping a clean record of what cleared the blockage so you know what to repeat if it reoccurs.
How the drainage system works in a dishwasher
A modern dishwasher uses a pump to push wash water out through a drain system that includes a filter, a sump, a drain hose, and sometimes an air gap. Water travels from the tub to the sump where debris are trapped by the filter. If the filter becomes clogged or the hose kinks, water cannot drain, causing pooling and overflow. The pump must turn freely and the impeller must push water through a winding path toward the disposal or sink drain. Hard water mineral buildup or a partially blocked filter can gradually reduce flow and spur a clog. Understanding this flow helps you target the right component—whether it’s the filter, the hose, or the disposal side—without unnecessary disassembly. This contextual knowledge anchors your next steps in a coherent drainage strategy.
Step-by-step: safe, non-destructive drain strategy
- Power off and prepare: Unplug the dishwasher at the outlet and switch off the circuit to avoid shocks. 2) Remove dishes and wipe surface water: Clear the rack, pull the dishes forward, and use towels to soak up excess water. 3) Access the sump area: Remove the lower spray arm and filter assembly to expose the sump. 4) Inspect for debris: Remove any visible food particles, seeds, or grease from the filter and sump. 5) Test the drain path: If the hose is accessible, detach one end and gently flush with warm water to check for flow. 6) Reassemble partially to test: Reinstall the filter or temporarily reconnect the hose to check drainage. 7) Re-run a test cycle: With a small amount of water in the tub, run a short cycle to observe drainage. 8) If water remains, escalate carefully: Do not force the pump or apply harsh chemicals; reassess the hose and trap. 9) Clean and store tools: Wipe surfaces and return the dishwasher to normal operation. Pro tip: Work slowly and avoid bending the hose sharply to prevent new leaks.
Clearing the drain hose and air gap: practical steps
Clearing the drain hose often resolves a clog without replacing parts. First, locate and disconnect the hose from the sink drain or disposal, noting orientation. Inspect the hose interior for blockages; use a long flexible brush or wire to dislodge any buildup. Rinse the hose thoroughly and reattach, ensuring a tight seal at both ends. If your setup includes an air gap on the sink, disconnect and clean it to remove any debris that may be blocking drainage. Reconnect and run a test cycle with a small amount of water to confirm the path is clear. If blocks persist, remove the hose entirely and flush with a garden hose while another person watches the tub to ensure no backflow occurs. A clean hose often restores proper drainage without more invasive work. Dishwasher Tips emphasizes patience and methodical checks rather than rushing to replace parts.
Checking the sink drain, P-trap, and disposal side
Clogs in the dishwasher drain can transfer to the sink’s drain path, especially when the disposal is connected. Start by inspecting the kitchen sink trap (P-trap) for clogs; wear gloves and use a bucket to catch water. Remove blockages with pliers or a flexible cleaning rod. If you have a garbage disposal, check the knockout plug area and run cold water to flush any residue. Reattach the trap securely and run the disposal briefly to verify it drains freely. Finally, re-run the dishwasher drain test cycle. If the sink drains slowly or backs up during the test, the problem may lie in the main drain or a wider plumbing issue that warrants professional help. This dual-check approach helps isolate whether the clog is dishwasher-specific or part of a broader drainage problem.
When to attempt professional help vs DIY diagnosis
Some clogs are straightforward and resolvable with basic tools, but others require professional attention. Consider DIY when the issue is a clearly visible blockage, the filter or hose is accessible, and you can re-create normal drainage with careful steps. Seek a plumber if you notice persistent backups, unusual noises from the pump, evidence of water leakage around the dishwasher, or if you smell burnt plastic from overheated components. If the dishwasher is still under warranty, contact the manufacturer or an authorized service provider to avoid voiding protections. In many cases, a technician can inspect internal seals and the pump for wear that DIY methods cannot safely address. The key is to know your limits and to avoid risky disassembly that could worsen the problem.
Preventive maintenance to reduce future clogs
Prevention is easier than repair. Clean the filter and sump weekly, especially if you wash a lot of fibrous vegetables or starchy foods. Use a pre-rinse if your dishes tend to send large debris into the tub. Run hot water through the sink before starting a cycle to help loosen any residual grease and prevent solids from setting. Consider a periodic flush with a dishwasher-safe cleaner designed to dissolve mineral buildup, following the product’s directions. Check the spray arms for blockages and ensure the drainage path remains free of kinks or constrictions. Finally, keep an organized dishwasher routine, empty the filter, and run an empty cycle once a month to dislodge any trapped food. Following these steps reduces future clogs and extends the life of your appliance.
Quick-start checklist before you drain
- Power off the unit at the outlet and switch off the circuit
- Remove standing water with towels and a small container
- Inspect and clean the filter and sump for debris
- Check the drain hose for kinks, leaks, or loose connections
- Detach and inspect the air gap (if present)
- Flush the hose end with warm water and test drainage
- Reassemble and run a short test cycle
- If unresolved, contact a professional
Tools & Materials
- Heavy-duty gloves(Protect hands from sharp edges and wastewater)
- Absorbent towels or rags(Mop up standing water)
- Bucket or shallow tray(Container for draining water)
- Flashlight(Insist on good lighting under the cabinet pan)
- Pliers and a screwdriver(Dislodge debris and detach hose clamps)
- Flexible brush or pipe-cleaner(Clear hoses and trap paths)
- Screwdriver (Philips/flat)(Open filter housing if needed)
- Shop vac (optional)(Suck out water if large amount remains)
- Towels or clamps(Contain splash and seal connections)
Steps
Estimated time: 45-60 minutes
- 1
Power off and safety check
Unplug the dishwasher at the outlet and switch off the circuit to prevent electrical shocks. Confirm the unit is not energized before you touch any components. This protects you while you inspect for blockages.
Tip: If the plug is hard to reach, switch off the household circuit breaker instead. - 2
Remove dishes and excess water
Clear the lower rack and large items, then use towels to soak up standing water. This creates a dry work area and reduces spill risks during cleaning.
Tip: Keep a scribbled note of what you remove to avoid dropping pieces back into the tub. - 3
Access the sump and filter
Open the filter cover or lower spray arm to access the sump. Remove the filter screen and any accumulated debris. Rinse under running water and inspect for wear.
Tip: Do not force the filter if it resists; rotate gently to break loose any stuck debris. - 4
Inspect the drain hose
Locate the drain hose and check for kinks, cracks, or loose clamps. If you can detach one end, inspect inside for blockages.
Tip: Place a towel under the hose to catch any residual water when you detach it. - 5
Clear the hose end and components
Use pliers or a flexible brush to clear the hose end and any elbow fittings. Flush with warm water to ensure a clear path.
Tip: Do not use metal objects that can scrape or damage the hose interior. - 6
Check the sink side and disposal
Inspect the sink drain, disposal inlet, and P-trap for clogs. Remove blockages with gloves and pliers, then flush with water.
Tip: If you have a disposal, run it with cold water to clear debris from the line. - 7
Reassemble and test drainage
Reconnect hoses securely, reinstall the filter and sump parts, and run a brief cycle with water only to verify drainage.
Tip: Watch for leaks around hose clamps and seals; tighten if necessary. - 8
Assess the need for further action
If water still remains or backs up, repeat checks or consider a professional inspection. Document what you did and any observations for the technician.
Tip: Keep a log of steps taken and outcomes to speed future service. - 9
Finalize cleanup and routine
Wipe dry all surfaces and sanitize the area. Return the unit to normal operation and schedule a monthly filter check as preventive maintenance.
Tip: Set a calendar reminder for routine cleaning to prevent future clogs.
People Also Ask
What causes a clogged dishwasher drain?
Clogs usually come from trapped food debris, mineral buildup from hard water, grease, or a blocked filter. Regular cleaning of the filter and sump reduces the risk. If you have fibrous foods like celery, rinse them off before loading to minimize debris.
Most clogs come from food debris and mineral buildup; cleaning the filter and sump helps a lot.
Is it safe to use chemical drain cleaners in a dishwasher?
No. Chemical drain cleaners can damage dishwasher hoses and seals and may create dangerous reactions with dishwasher detergents. Always try mechanical cleaning methods first and consult a professional if in doubt.
Chemical cleaners aren’t safe for dishwashers; stick to mechanical cleaning or call a pro.
Will a clogged dishwasher affect the sink drain?
Sometimes yes. If the dishwasher and sink share a trap or drain line, a clog in one can back up into the other. Check the sink drain and disposal side to confirm where the blockage is located.
Yes, it can affect the sink drain if they share a line.
How can I tell if the clog is in the hose or pump?
If you can access the hose easily, inspect and clear it first. If water won’t move despite an unobstructed hose, the pump or sump may be the issue. In that case, professional inspection may be required.
If the hose is clear but water won’t drain, the pump might be the problem.
Should I run hot water down the sink before starting a cycle?
Running hot water before starting may help soften grease and debris in the drain path. It’s not a fix by itself, but it can prevent partial clogs when you test drainage.
A quick hot water flush can help prep the path but isn’t a cure-all.
When should I call a professional?
Call a professional if clogs recur after cleaning, if you smell burning or see leaks, or if the unit remains blocked after all basic checks. A tech can inspect seals, the pump, and internal plumbing not accessible safely at home.
Call a pro if clogs keep returning or you notice leaks.
Watch Video
What to Remember
- Diagnose with safe checks before disassembly
- Target the filter, hose, and sump first
- Avoid harsh chemicals inside the dishwasher
- Prevent clogs with regular maintenance