How to Get a Dishwasher to Drain: Step-by-Step Guide
Learn practical, step-by-step methods to fix a dishwasher that won't drain. From checking filters to hoses and disposals, get safe, DIY guidance to restore proper drainage fast.

To get a dishwasher to drain, start with simple checks: ensure the unit is unplugged, verify the drain hose isn’t kinked, and clean the filter and sump. If drainage remains slow or blocked, inspect the air gap and pump area for clogs, then clear any disposal connections if applicable. If you're not sure, turn off power at the breaker and consult the guide before proceeding.
Quick Diagnostics: Start with the Easiest Fixes
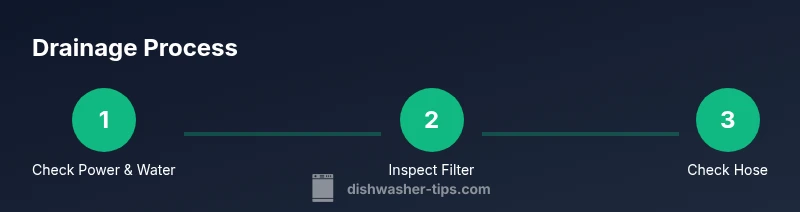
When you wonder how to get dishwasher to drain, begin with a quick sweep of the simplest causes. The most common culprits are a clogged filter, a kinked or blocked drain hose, or a stalled pump. With the unit unplugged and the lower rack removed, you can inspect these areas safely. If drainage is still slow after these checks, move to the more involved steps. This approach saves time and money by ruling out the least invasive fixes first.
Before you dive in, gather a few tools and keep a towel handy because you'll likely encounter water in the sump area. A clear head and a methodical plan help you avoid creating new leaks or dislodging other components.
Clean or Replace the Filter and Sump
A lot of drainage problems start with a clogged filter or sump that traps food debris. Remove the lower rack, then locate the filter assembly at the bottom of the tub. Rinse the filter under warm running water, using a brush to dislodge stuck particles. Check the sump screen and remove any trapped gunk. After cleaning, reassemble and run a short drain test with an empty load. If the water still pools or backs up, the issue may lie downstream.
If the filter is torn or worn, replace it with an OEM-compatible part or an equivalent model. A damaged filter fails to trap debris effectively and can cause clogs elsewhere in the system. Regular cleaning every 1-2 months helps maintain optimum drainage.
Inspect the Drain Hose and Air Gap
The drain hose is often the culprit. Check for kinks and ensure the hose follows a smooth downward path to the sink. Detach from the sink or disposal and inspect for cracks or collapses. If you have an air gap, remove the cap and check for mineral buildup or blockages. Clear with a flexible brush or compressed air if safe to do so. Reconnect and run a test cycle.
Be mindful of the hose's path; it should slope gently downward toward the sink to prevent standing water. If the hose is too long, it can trap water and cause backups. If you use a disposer, ensure the knockout plug was removed correctly during installation.
Check the Garbage Disposal Connection and Knockout Plug
If your dishwasher drains into a garbage disposal, the disposal must be clear of clogs. Run disposal briefly with cold water to flush debris. If you recently installed a disposal, verify that the knockout plug was removed from the dishwasher connection. A failed removal can block drainage entirely. After clearing, re-test the dishwasher drain.
If water still backs up, inspect the dishwasher inlet hose connection to the disposal for looseness. Tighten clamps and check gaskets for leaks. A loose connection can allow air to infiltrate and hamper draining, especially on high-efficiency models.
Test the Pump and Drain System Safely
Access the pump housing, which many models provide via the bottom panel. Look for signs of broken impellers or shredded seals. If you have a multimeter and know how to use it, test the pump's electrical continuity. Do not run the unit until you’ve verified the tests, as a short could pose a safety hazard. If you discover a damaged pump or worn seals, replacement is usually required.
If you’re unsure about electrical testing, focus on mechanical checks first: clear any stubborn debris from the pump inlet, ensure the impeller spins freely, and listen for the motor buzzing when attempting to drain. This can indicate a seized pump or motor issue requiring professional service.
Safety, Maintenance, and When to Call a Pro
Safety is essential. Always unplug and turn off the water supply before disassembly. Use gloves and eye protection when handling sharp edges or rust. Keep children away from the work area and clean up any water spills immediately to avoid slips. If, after all checks, the dishwasher still won’t drain, it could require a pump replacement or wiring repair. A licensed technician can diagnose electrical or internal component failures accurately. Costs vary by model and part, so request a diagnostic quote before proceeding.
Prevention and Regular Maintenance
Regular maintenance reduces not-draining problems. Clean the filter monthly, inspect hoses for cracks or kinks, and run a drain-test cycle with every new load. Use the right amount of detergent; excessive foaming can contribute to clogs. If you have hard water, consider a rinse aid and occasional descaler as recommended by the manufacturer. Keeping the drain path clear and the disposal knockout plug properly handled will help prevent future issues.
Authority Sources
Authoritative guidance on dishwasher maintenance and drainage comes from trusted institutions and major publications. For practical maintenance tips and energy-efficient operation, consult:
- Energy Star: https://www.energystar.gov/products/dishwashers
- University Extension (Penn State): https://extension.psu.edu/dishwashers
- University Extension (Illinois): https://extension.illinois.edu
Tools & Materials
- Power outlet nearby(Ensure the outlet is easily accessible and not controlled by a wall switch during testing.)
- Screwdrivers (Phillips and flat-head)(For removing filter housing and panels.)
- Pliers(Helpful for hose clamps and clamps.)
- Bucket or shallow pan(Catch water that drains when you remove hoses.)
- Towels or absorbent cloths(Mop up spills and wipe the sump area.)
- Gloves(Protect hands from sharp edges and debris.)
- Flexible brush or old toothbrush(Clean filter screens and sump without damage.)
- Flashlight(Improve visibility inside the tub.)
- Multimeter (optional)(Check electrical continuity of the pump if you’re comfortable.)
Steps
Estimated time: 60-90 minutes
- 1
Power down and access the drain area
Unplug the dishwasher and, if needed, turn off the water supply. Remove the lower rack to expose the filter and sump. This gives you a clear view of the primary drainage components before you touch anything.
Tip: Keep the plug in a safe place; you’ll reconnect after testing. - 2
Remove and clean the filter
Take out the filter assembly and rinse under warm water. Use a brush to remove trapped debris. Inspect the sump screen for buildup and clear any blockages.
Tip: A clogged filter is the most common cause of slow drainage. - 3
Inspect the drain hose path
Trace the drain hose from the tub to the sink or disposal. Look for kinks or squeezes that could block flow. If you have an air gap, remove the cap and clean the opening.
Tip: Ensure the hose runs downhill toward the sink; improper slope causes standing water. - 4
Check the disposal connection and knockout plug
If your dishwasher drains into a disposal, verify the knockout plug was removed during installation. Clear any debris in the disposal inlet and reconnect the hose securely.
Tip: A missing knockout plug or loose connection is a frequent cause of drainage failure. - 5
Test the pump area for blockage
With the filter reinstalled, run a short cycle to observe water movement. If possible, listen for the pump and check for a buzzing sound or lack of water movement.
Tip: Do not force the machine to drain if unusual noises occur; stop and recheck for clogged components. - 6
Electrical check (optional and advanced)
If you’re comfortable, test the pump’s continuity with a multimeter. If continuity is absent, the pump may need replacement. If unsure, skip this step and call a pro.
Tip: Working with live electricity is hazardous; prioritize safety or consult a technician. - 7
Final drain test and reassembly
Reassemble all parts, plug back in, and run a full drain test with an empty load. Observe whether drainage completes within a normal cycle and no leaks appear.
Tip: Document any persistent symptoms to share with a technician if needed.
People Also Ask
Why won't my dishwasher drain even after cleaning the filter?
If drainage remains, check the drain hose for kinks, inspect the air gap, and verify the disposal connection. A clogged pump or a damaged hose could also be the cause.
If drainage still fails after cleaning the filter, check the hose and air gap, then inspect the disposal connection for blockages.
Can too much detergent affect drainage?
Yes, excessive soap can foam and trap debris, leading to clogs. Use the recommended amount and consider a rinse cycle to clear suds.
Too much soap can cause foam that traps debris and clogging; follow the manufacturer's guidance on amounts.
Should I run a cleaning cycle to clear a clog?
A cleaning cycle can help with grease buildup but won't remove a hard clog. It’s useful as a maintenance step after fixing the main issue.
A cleaning cycle helps with grease buildup but won't fix a hard clog.
When is it time to call a professional?
If the pump is damaged, hoses show wear, leaks persist, or you’re unsure about electrical tests, a licensed technician is recommended.
If you can't diagnose or fix after basic checks, it's wise to call a pro.
Is a disposal-related drainage issue common?
Yes, a disposal can block drainage if the knockout plug wasn’t removed or if the disposal is clogged. Clear the inlet and verify connections.
Disposal problems can block drainage; ensure the knockout plug is removed and the disposal is clear.
What safety steps should I always take?
Unplug the unit, turn off the water, wear gloves, and wipe up spills. Do not touch live wires.
Safety first: unplug, turn off water, wear gloves, and avoid water near electrical parts.
What to Remember
- Start with the simplest fixes to save time and money
- Regular filter cleaning is crucial for proper drainage
- Inspect hoses and air gaps for kinks or blockages
- Disposal connections can block drainage if not correctly installed
- Call a professional for electrical or pump failures