How to Fix Dishwasher Not Draining: A Step-by-Step Guide
Learn how to diagnose and fix a dishwasher that won't drain. This educational guide covers safety, common causes, and practical fixes with tools, step-by-step instructions, tips, and professional benchmarks.

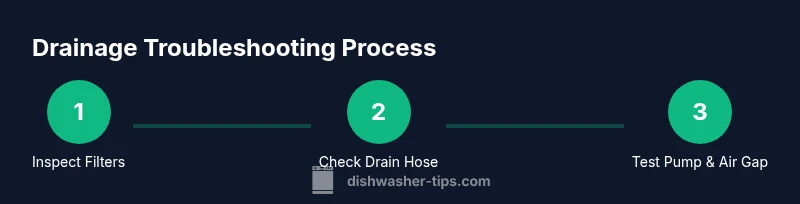
Facing a dishwasher that won’t drain? This guide shows you how to diagnose and fix the problem safely. Start by unplugging the machine, removing the filter, and inspecting the drain hose for kinks or clogs. If needed, clean the sump, check the pump, and test drainage before restoring power. Follow the steps in order for the best chance of a quick fix.
What causes a dishwasher not draining
If you’re wondering how to fix dishwasher not draining, you’re not alone. Most drainage problems come from simple, fixable causes rather than a blown motor. In many homes, the leading culprits are clogs in the filter, sump, or drain hose; a stuck float switch; or a blocked air gap. The Dishwasher Tips team notes that clog-related failures are the most common reason for standing water after a cycle, especially in older models where debris has had time to accumulate. Additionally, an improperly installed drain hose or a disposal connection can create a siphon effect that prevents proper draining. Undiagnosed leaks around the door or tub can also mask drainage problems until a thorough inspection is performed. By understanding these root causes, you’ll be better prepared to tackle the issue without unnecessary repairs.
In practice, start with the simplest checks first. If you see standing water, resist the urge to run a rinse cycle again; instead, focus on removing the water and clearing blockages. This approach reduces the risk of splashing and makes subsequent steps clearer. The goal is to restore gravity-driven drainage and confirm that the pump and hose are functioning as designed. A methodical approach also reduces the chances of accidentally dislodging a seal or damaging a hose. As you work, keep in mind that many drain issues are intermittent—cleaning the filter and hose usually resolves the majority of cases.
According to Dishwasher Tips, addressing blockages at the source (filters, sump, and hoses) yields the most reliable results. By following a structured diagnostic path, you’ll save time and avoid unnecessary parts replacement. If after all steps the water still won’t drain, you may be facing a failing pump, a cracked hose, or a faulty float switch, which would require professional intervention.
note
Tools & Materials
- Protective gloves(Keep hands clean and dry; some components may be sharp)
- Bucket or shallow tray(Catch water when you remove the filter or hose)
- Old towels or rags(Contain spills and keep area dry)
- Screwdrivers (Phillips and flat-head)(Access screws on panels and components)
- Pliers or needle-nose pliers(Grasp clamps and hoses securely)
- Flashlight or headlamp(Inspect tight spaces under the unit)
- Flexible cleaning brush or old toothbrush(Scrub filters and sump corners)
- Tongs or a small snake/pipe cleaner(Dislodge stubborn clogs without damaging parts)
- Wet/dry vacuum (optional)(Suck out standing water if needed)
Steps
Estimated time: 60-90 minutes
- 1
Power down and prep
Unplug the dishwasher or switch off the dedicated circuit at the breaker. Move the unit away from the wall to access the drain hose and kick plate. Place a shallow tray and towels to catch any water that may spill. This initial safety step prevents shocks and keeps your work area clean.
Tip: Take a quick photo of hose routing before disconnecting anything to simplify reassembly. - 2
Access the filter and sump
Remove the bottom rack and take out the filter assembly if your model has one. Use a flashlight to inspect the sump area for food particles and debris. Rinse the filter under warm water and scrub away residue that can block water flow. A clogged filter is a frequent cause of poor drainage.
Tip: Do not use sharp metal tools on the filter surface to avoid scratches. - 3
Clear the filter and sump
Scrub away hardened debris from the filter with a brush. Pay attention to the sump walls and corners where grime often accumulates. After cleaning, reassemble loosely to confirm fit before final tightening.
Tip: If debris is stubborn, soak the filter in warm soapy water for a few minutes. - 4
Inspect and clear the drain hose
Trace the drain hose from the sump to the connection at the sink or disposal. Look for kinks, sags, or crushing that would block flow. Detach the hose if needed and flush with water or use a pipe cleaner to dislodge any blockage.
Tip: Hold the hose steady to avoid kinking during reattachment. - 5
Check the air gap and disposal connection
If your system uses an air gap, inspect and clean it; a clogged air gap can prevent draining even if other parts are clear. If the dishwasher drains into a garbage disposal, ensure the knock-out plug is removed and the disposal is clear of blockages. Reconnect firmly and test.
Tip: Run hot water down the sink before testing to help release any trapped air. - 6
Test the drain pump and impeller
With the front access panel off, listen for the pump motor during a test cycle. If you hear no sound or a hum but no pumping, the impeller may be stuck or the motor worn. This step might require more expert diagnosis or replacement parts.
Tip: Check for a clogged impeller by gently turning it with a tool; avoid forcing it. - 7
Reassemble and run a test cycle
Reconnect all hoses and panels securely. Load a small amount of water in the tub and run a shortest cycle to observe drainage. If water drains properly, you’ve resolved the issue. If not, note any sounds or leak points for further analysis.
Tip: Run the test cycle with no dishes to avoid re-clogging while diagnosing.
People Also Ask
Why is my dishwasher not draining at all?
Not draining at all often points to a clogged filter, sump, or drain hose, a stuck float switch, or a blocked air gap. Inspect these components in order, as they are the most common culprits. If you verify these parts and still have a problem, the pump or electronics may be involved.
Most drainage problems come from clogs in the filter or hose, or a stuck float switch. Check those first, then the pump if needed.
Can a clogged filter cause poor draining but not complete stoppage?
Yes. A clogged filter reduces water flow and can leave standing water after a cycle. Cleaning the filter is typically the fastest fix and should be done before exploring pump issues.
A dirty filter often slows draining. Clean it and test again.
Is it safe to use a plunger on a dishwasher drain?
Using a plunger on a dishwasher drain is generally not recommended because it can force debris into the pump or damage seals. Start with manual cleaning and hose checks instead.
Plungers aren’t ideal for dishwashers; better to clear clogs with hands-on cleaning and hose checks.
What should I do if the drain hose is clear but water still backs up?
If the hose is clear, check for a siphon issue from the sink or disposal. Ensure proper installation height and that the hose isn’t inserted too far into the disposal. Inspect the air gap if present.
Clear hose but water backs up? Check for disposal siphon or air gap issues.
Will a dishwasher drainage issue cause leaks onto the floor?
Drainage problems can coincide with leaks around seals if debris has forced water into unintended areas. Look for damp areas near the pump, seals, and hoses after running a cycle.
Drainage issues can lead to leaks near seals—check for moisture after testing.
How do I know if the pump is faulty?
A faulty pump often shows little to no sound during draining, or a persistent hum without water movement. Visual inspection of the impeller and electrical testing by a qualified technician is usually required.
If the pump makes no noise or hums without moving water, it may be faulty. Consider a professional evaluation.
Watch Video
What to Remember
- Unplug before starting any work.
- Clean filters and sump to address the most common drainage issues.
- Inspect drain hose and air gap for kinks and blockages.
- Test drainage after each fix to confirm success.
- If the pump is faulty, consider professional replacement.