How to Fix a Dishwasher That Won't Drain: Troubleshooting Guide
A practical, step-by-step troubleshooting guide to diagnose and fix a dishwasher that won’t drain. Learn common causes, safety tips, and when to call a pro.

How come my dishwasher won t drain? The most likely culprit is a clog in the filter, pump, or discharge hose. Start with the filter screen and bottom sump, then remove debris from the pump impeller if accessible. Run a short wash with hot water and a dishwasher-safe cleaner or a cup of white vinegar to help dislodge buildup. If it still won t drain, inspect the drain hose and check the garbage disposal connection.
What Not-Draining Means for Your Dishwasher
A dishwasher that won t drain leaves standing water in the tub at the end of a cycle. This is a practical signal that something is obstructing the flow. The root cause is almost always a blockage or a failing part within the drain path. The Dishwasher Tips team has seen this issue across many homes, often tied to routine debris that accumulates in filters or hoses. In most cases, the fix is straightforward and safe when you follow a methodical approach. Quick attention now can prevent longer-term damage to the motor or seals and reduce the risk of smells or mold developing in the tub. By understanding the normal drain process and the common failure points, you can diagnose and resolve the problem without calling for expensive service. The key is to be systematic, wear gloves, and unplug the machine before you begin.
Common Causes at a Glance
Drainage problems fall into a few predictable categories. A clogged filter or sump screen is the most frequent culprit, followed by a blocked or kinked drain hose, and a failed pump or impeller. Other contributors include an air gap or disposal connection that is blocked, a stuck float switch, or buildup from hard water. Each cause has its own symptoms, but they all share one thing: water can’t move past the obstacle. Understanding these categories helps you triage quickly and avoid unnecessary replacements. In many homes, a simple cleaning of the filter and a hose inspection resolves the issue in under an hour. If you’re unsure, start with the easiest fix and work toward the more involved steps.
Quick Checks You Can Do Right Now
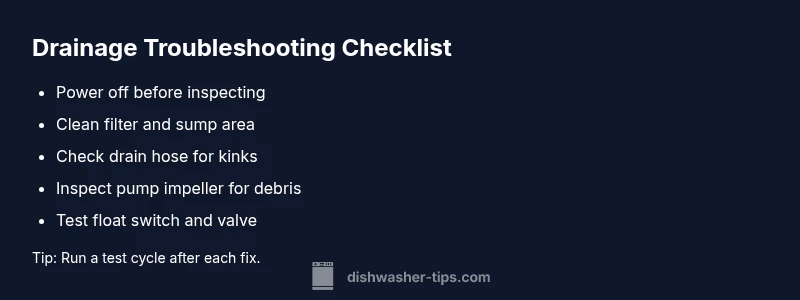
Before you pull the dishwasher apart, perform a few rapid checks that require no tools. Ensure the power is off at the breaker, and verify there is water supply to the machine. Look for visible clogs in the door seal and the tub bottom. Remove the bottom rack and locate the filter and sump area. Gently remove debris with disposable gloves or damp cloth. If you have a disposal, check for a clogged knockout plug. After each check, plug the unit back in and run a short wash to gauge whether drainage improves. If not, proceed to the next step in the diagnostic flow. Always prioritize safety and stop if you detect leaks or electrical concerns.
Diagnostic Flow Overview
This section maps a practical, symptom-to-diagnosis workflow for not draining dishwashers. Start with the simplest checks: filters, debris, and hoses. If water still sits in the tub, test the pump area and verify the impeller spins freely. If the drain hose is clear, inspect the disposal connection or air gap. Use a process of elimination: confirm each component works before moving on. If a single part is failing, replacing it often restores full drainage. The goal is to isolate the responsible component with minimal disassembly. In case you cannot access the pump or its impeller safely, stop and consult a professional. Dishwasher Tips notes that many drainage problems are resolved with a careful cleaning rather than part replacement.
Step-by-Step: Clear a Clogged Filter and Sump
- Turn off power at the breaker and unplug the dishwasher. 2) Remove the lower rack to expose the filter and sump. 3) Remove the filter assembly, rinse under warm water, and remove trapped debris. 4) Wipe the sump basin with a damp cloth, removing any coarse grit. 5) Reassemble the filter, ensuring it sits snugly and rotates freely. 6) Run a short cycle with hot water to test drainage. If water still remains, proceed to Step 2 with pump considerations. Tip: Keep a bucket handy to catch any splashes and wear gloves to protect your hands.
Step-by-Step: Inspect the Drain Pump and Impeller
If cleaning the filter didn’t fix the problem, inspect the drain pump and impeller. Remove the access panel according to your model’s manual. Look for loose wiring, burned smells, or debris jammed in the impeller housing. Gently rotate the impeller by hand to confirm it spins freely. Clean away lint and food particles with a damp cloth. If the impeller is blocked, remove the obstacle; if the motor is noisy or won’t spin, the pump may need replacement. This step can be challenging for beginners; if you encounter resistance or signs of motor damage, stop and contact a professional. Refitting the panel protects the internals and test the unit after reassembly.
Step-by-Step: Check the Drain Hose and Connections
Trace the drain hose from the tub to the sink or disposal. Look for kinks, clogs, or a backward bend that traps water. Detach the hose clamp and carefully remove the hose to flush it with water. If debris is present, clean and reattach. If you have a disposal, ensure the knockout plug is removed and the connection is tight. A blocked hose is a frequent cause of poor drainage and is often easy to fix by flushing out the line. After reassembly, run a test cycle to confirm drainage improves.
Step-by-Step: Inspect the Float Switch and Drain Valves
The float switch signals the dishwasher that the tub is full and stops drainage when appropriate. If the float is stuck or blocked, water will remain in the tub. Access the float assembly and ensure it moves smoothly and freely. Clean around the float and check its wiring for signs of wear. If the float is defective, it will need replacement, often requiring a service call. Some models include a secondary anti-siphon valve or check valve; verify these parts operate during drainage tests. Ensure there are no water leaks around the valve housings.
Step-by-Step: Reset, Clean, and Test
After cleaning and inspecting, a reset can clear control board glitches that may prevent draining. Unplug the unit for 60 seconds, then plug back in. Run a short, hot-water cycle and observe the drainage. If the issue recurs, move to more involved checks or professional service. Keeping a routine cleaner on board helps maintain performance; use dishwasher-safe cleaners or vinegar in moderation and avoid corrosive products. If you still see standing water after a full cycle, proceed to the final checks and potential repairs.
When to Call a Technician or Consider Replacement
If you have followed the steps above and the dishwasher still does not drain, it is time to seek professional help. A service technician can diagnose motor or control-board faults and test the drain pump with specialized tools. Replacement of the pump or compact control modules can be cost-effective compared to ongoing leaks and energy waste. If your dishwasher is older than 10-12 years or repair costs exceed a practical percentage of replacement, consider a new unit. The Dishwasher Tips team notes that proper diagnosis by a professional prevents unnecessary parts replacements and ensures safe operation.
Prevention Tips to Avoid Future Drain Problems
To reduce the chance of drainage issues in the future: clean the filter weekly, avoid rinsing heavy debris down the drain, and use a quality detergent that does not produce excessive suds. Check the drain hose for kinks periodically, and ensure the disposal connection is clear. Run cold-water cycles after disposal use to minimize grease deposition. Regular inspections of seals and gaskets help catch leaks early and keep the pump and hose in good condition. Keeping a maintenance schedule can prevent most drainage problems.
Steps
Estimated time: 60-90 minutes
- 1
Power down and access area
Turn off power at the breaker and unplug the dishwasher. Remove the lower rack to access the filter and sump. This protects you and prevents accidental starts during inspection.
Tip: Label screws if you remove panels for easier reassembly. - 2
Clean the filter and sump
Remove the filter assembly, rinse under warm water, and clear all debris. Wipe the sump basin clean to remove grit that can keep debris from flowing to the pump.
Tip: Use a soft brush to remove stubborn residue without scratching parts. - 3
Inspect the drain pump area
Access the pump housing according to your model’s manual. Look for debris, check that the impeller spins freely, and ensure wiring is intact.
Tip: Do not force the impeller; a gentle turn with a screwdriver handle works well. - 4
Check the drain hose and connections
Trace the hose from tub to disposal or sink. Clear kinks and detach to flush with water; reattach firmly and ensure clamps are tight.
Tip: Flush the hose before reconnecting to confirm it’s clear. - 5
Test the float switch and valves
Ensure the float moves freely and wiring shows no wear. Clean around the float and verify valve operation during a drain test.
Tip: If the float sticks, a replacement is often simple and inexpensive. - 6
Reset and run a test cycle
Unplug for 60 seconds, plug back in, and run a short hot-water cycle to verify drainage improves. If it repeats, proceed to professional help.
Tip: Keep a record of which steps fix the issue for future reference.
Diagnosis: Dishwasher won't drain
Possible Causes
- highClogged filter or debris in sump
- mediumBlocked or kinked drain hose
- mediumFaulty drain pump or impeller
- lowBlocked air gap or disposal connection
- lowStuck float switch
Fixes
- easyClean the filter and wipe the sump area; remove visible debris
- easyStraighten and flush the drain hose; remove any blockages
- mediumInspect and clean the pump impeller; replace pump if damaged
- mediumCheck disposal connection and remove any knockout plug or blockage
- easyTest and replace float switch if it sticks or fails to move
- hardIf unresolved, call a professional for motor/control board diagnosis
People Also Ask
Why won’t my dishwasher drain after a cycle?
Most drainage issues are caused by clogs in the filter, sump, or drain hose. Start by cleaning the filter, then inspect the hose for kinks. If water still sits, check the pump and float switch. Persistent problems may require professional help.
Most drainage issues come from clogs or a faulty pump. Start by cleaning the filter and checking the hose, then test the pump and float switch. If it remains unresolved, a professional can help.
Could a clogged filter cause drainage problems?
Yes. A clogged filter is the most common cause of poor drainage. Clean the filter and sump area thoroughly, then run a test cycle to see if drainage improves.
A clogged filter is a common cause; clean it well and test drainage afterward.
How do I check the drain hose for kinks?
Disconnect the hose, flush it with water, and inspect for kinks or blockages. Reconnect securely and run a cycle to confirm drainage.
Flush the hose and look for bends or blockages. Reconnect firmly and test.
What should I do if the drain pump is faulty?
If the pump is noisy, stalled, or won’t spin, it often needs replacement. Consider professional diagnosis if you’re not comfortable testing electrical components.
If the pump is failing, replacement is usually required; a technician can confirm.
Is it safe to reset the dishwasher to fix drainage issues?
Resetting can clear minor control glitches, but it won’t fix mechanical blockages. Use reset as a supplementary step after inspecting filters and hoses.
Resetting helps only for glitches, not clogs; use it after basic checks.
When should I call a professional for drainage problems?
If you’ve tried the basic cleaning and checks but the tub still holds water, it’s time to call a technician. They can diagnose motor, control-board, or pump issues safely and accurately.
If drainage doesn’t improve after basic checks, get a pro to diagnose the motor or pump.
What to Remember
- Start with the filter and sump; most clogs resolve the issue.
- Follow a step-by-step diagnostic flow to isolate the problem.
- If the drain pump is the culprit, replacement may be needed.
- When in doubt, consult a professional to avoid safety risks.