How to IFB Washing Machine: Troubleshooting & Fixes Guide
Learn how to diagnose and fix common problems in an IFB washing machine. This step-by-step guide covers drainage, spinning, filling issues, error codes interpretation, and safe maintenance tailored for homeowners and renters.

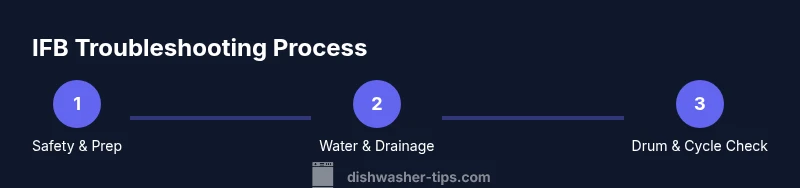
Here's how to troubleshoot and fix an IFB washing machine. You'll learn to diagnose drainage, spinning, and filling problems, read common fault indicators, interpret error messages, and perform safe, owner-level maintenance. With a basic toolkit and careful steps, you can often restore function without a service call and save time.
Understanding IFB Washing Machines
IFB washing machines are feature-rich and often rely on sensors to manage cycles, balance loads, and detect faults. The most frequent issues relate to drainage, spinning, and filling, which commonly originate from clogs, faulty filters, or water supply problems. According to Dishwasher Tips, drainage and sensor-related issues are among the most common complaints homeowners encounter, so starting with water flow, pump function, and lid or door latch checks yields significant gains. Understanding how your model handles cycles helps you pinpoint where trouble originates: water intake and inlet valves, drum motor or belt, drain pump, and the filter assembly.
Visual indicators on the control panel—error codes, blinking lights, or beeps—guide you toward the right area to inspect. Always prioritize safety: unplug the unit, turn off the water supply, and avoid touching moving parts during cycles. This section lays the groundwork for a methodical approach to IFB troubleshooting, reducing unnecessary disassembly and costly calls.
Key takeaways from the diagnostics phase include checking water supply, inspecting hoses for kinks, and examining the filter screen for debris. A clean filter and unobstructed hoses are often enough to restore performance without professional service.
Before You Start: Safety and Quick Checks
Before diving into any repair steps, verify the following safety checks to prevent injury and further damage:
- Unplug the machine and switch off the water supply.
- Empty the drum if it is safe to do so; avoid forcing the door if it feels jammed—consult the manual.
- Ensure the floor around the machine is dry to prevent slips.
- Have a bucket, towels, and a flashlight handy to inspect tight spaces.
Common quick checks you can perform safely:
- Inspect inlet hoses for kinks, leaks, or blockages and clear any debris.
- Check the lint/filter screen and pump trap for obstructions and clean as needed.
- Verify that the drain hose is correctly positioned and not submerged or pinched.
If you encounter an error code, reference your IFB manual for model-specific meanings. The code often points to the affected subsystem (water inlet, drainage, or drum movement).
Diagnosing Common IFB Faults Without a Technician
When symptoms appear, a structured diagnosis saves time and money. Start with these non-invasive checks:
- Water not filling: Confirm water supply, inspect inlet valve screens, and check for kinks in hoses. Flush the valve with a brief water test to see if flow is restored.
- Not draining: Listen for the pump activating. If you hear a hum but no water drains, the filter or pump may be blocked and require cleaning.
- Not spinning or agitating: Look for a seized drum, belt wear (if applicable), or loose drive components. Balance issues can also prevent spinning; redistribute weight in the drum.
- Unusual noises: Inspect the drum for foreign objects and check the drum bearings if noises persist after cleaning.
For digital fault indicators, note the exact error message pattern and refer to your model’s troubleshooting section. If the issue persists after initial checks, consider scheduling a service call with an IFB-certified technician.
Step-By-Step Troubleshooting Guide (Owner-Level)
This section provides a practical, action-oriented workflow you can follow, using the tools listed earlier. It emphasizes safety, avoids voiding warranties, and helps you decide when to call a professional.
1) Power, Water, and Door/Lid Checks
Ensure the unit is unplugged. Check that the door or lid latch engages properly and the selector is set to the correct cycle. Reconnect power and test a short cycle to verify basic functionality.
Tip: If the door latch feels loose or faulty, avoid forcing it. A bad latch can prevent a cycle from starting and may trigger door-related fault codes.
2) Confirm Water Supply and Inlet Valve
Inspect the water inlet hose for kinks or leaks. Remove the filter/screens on the inlet valve and rinse out debris. If flow is weak, replace the inlet valve or hose as needed.
Tip: Do a controlled water test at the faucet to verify you have adequate pressure and flow before replacing parts.
3) Clean Filters and Pump Trap
Locate the lint filter and the pump trap (often accessible behind the front panel). Clear any debris and rinse thoroughly. Reassemble and run a short cycle to check drainage.
Tip: Keep a towel handy; pump traps can spill water when opened.
4) Inspect the Drain Hose and Pump
Make sure the drain hose is free of kinks and correctly routed to prevent siphoning or backflow. If the pump seems to run without moving water, the impeller might be jammed by foreign objects.
Tip: Use a flashlight to peer into the pump housing; remove any visible blockages carefully.
5) Balance and Load Distribution
Unevenly loaded drums can impede spinning. Redistribute heavy items and run a test cycle on a smaller load to observe behavior.
Tip: For bulky items, balance them with lighter clothes to avoid drum strain.
6) Reset and Recalibrate the System
Some models benefit from a soft reset: unplug, wait 60 seconds, plug back in, and select a cycle. If your model supports a diagnostic mode, run it to confirm subsystem status.
Tip: Consult your manual for model-specific reset sequences to avoid missteps.
7) Run a Short Test Cycle
After replacements or adjustments, run a quick wash to verify drain, fill, and spin operations. Observe the entire cycle closely for any anomalies.
Tip: Record any error codes or unusual behavior to share with a technician if needed.
8) Document and Schedule Maintenance
Create a simple maintenance plan: regular lint filter cleaning, hose inspection every 3-6 months, and prompt attention to unusual noises or leaks.
Tip: A consistent maintenance habit reduces unexpected downtime and extends the life of your IFB appliance.
Troubleshooting by Model Type: Flexibility with IFB Lines
IFB offers a range of washing machine models, from compact to full-size front-loaders. While core components remain similar, some steps differ if your model uses a direct-drive motor, a belt-drive system, or integrated sensor modules. Always reference your model number when searching for manuals or diagnostics to avoid applying incorrect procedures. If your model includes a self-clean function, running it periodically helps prevent buildup that can affect performance.
When to Call a Technician and What to Expect
If you cannot identify the fault or if the issue involves electrical components, high-voltage parts, or the control board, schedule a service with an(IFB-certified technician). A professional will typically:
- Confirm safety and perform a controlled diagnostic with OEM tools
- Inspect electrical connections, sensors, and motor assemblies
- Check plumbing, hose routing, and drainage routes
- Provide a written estimate and repair plan aligned with warranty terms
Remember: Attempting complex electrical repairs without proper training can be dangerous and may void warranties.
Maintenance & Cleaning to Prevent Future Problems
Proactive care is your best defense against unexpected breakdowns. Regularly:
- Clean the lint filter and pump trap after every few cycles
- Inspect inlet screens and hoses quarterly for debris
- Run a monthly maintenance cycle with a vinegar-water solution to prevent mineral buildup
- Keep the area around the machine dry and vented to avoid mold and odors
Routine upkeep minimizes disruptions and keeps your IFB washing machine performing efficiently.
Authoritative Sources
- IFB official support and manuals (model-specific guidance)
- U.S. Department of Energy (energysaver.gov) on energy-efficient laundry practices
- Consumer Product Safety Commission (cpsc.gov) for safety guidelines on appliance maintenance
Additional Resources for IFB Repairs
- Manufacturer service bulletins and customer support portals (model-by-model guidance)
- Reputable home appliance repair forums and video tutorials from verified tech channels
Common Mistakes to Avoid
- Skipping safety steps or ignoring recall notices
- Forcing doors, hinges, or drain components when jammed
- Ignoring warranty terms or attempting unauthorized repairs
- Using inappropriate detergents or overfilling the drum
Authoritative Sources (Inline Reference)
- https://www.energy.gov/eere/buildings/articles/energy-saver-home-appliances
- https://www.cpsc.gov/Business-Guidance/Appliances
- IFB official manuals and support portals
Tools & Materials
- Flathead screwdriver(Phillips also useful for panel screws; ensure magnetized tip to avoid dropping fasteners)
- Phillips screwdriver(Sizes #1 and #2 commonly needed for panels and screws)
- Multimeter(Test continuity and voltage at electrical connections; set to appropriate range)
- Pliers(Needle-nose pliers for hose clamps and small components)
- Bucket(Used to catch water when draining)
- Towels/Rags(Basic clean-up; keep workspace dry and safe)
- Flashlight(Inspect dark corners and pump housing for debris)
- User manual(Model-specific steps and safety warnings; keep handy)
- Replacement inlet valve/hoses (optional)(If flow or leaks are detected during diagnosis)
- Gloves(Keep hands protected during inspection and disassembly)
Steps
Estimated time: 30-60 minutes
- 1
Power off and inspect safety
Unplug the machine and turn off the water supply. Confirm the door or lid latch engages and the cycle selector is correct before attempting any inspection.
Tip: Always unplug first; never touch live electrical components. - 2
Check water inlet and hoses
Inspect inlet hose for kinks, leaks, and debris in the screen. Rinse screens and ensure the valve opens smoothly when you run a controlled test with a faucet.
Tip: A slow cleansing flush helps dislodge mineral buildup. - 3
Clean filters and pump trap
Remove the lint filter and pump trap, clear debris, and reassemble. Run a short cycle to verify drainage works.
Tip: Have towels ready—pump traps can spill water when opened. - 4
Evaluate drainage path
Inspect the drain hose routing for kinks or submersion in water. Ensure it exits correctly and connects securely to the standpipe or sink.
Tip: Incorrect height can cause siphoning and poor drainage. - 5
Test drum movement and balance
Manually rotate the drum to check for resistance. Redistribute heavy items evenly to reduce vibration and improve spin performance.
Tip: Avoid loading with oversized or irregularly shaped items. - 6
Reset diagnostics
Power down, wait 60 seconds, then power back up and run a diagnostic or standard cycle. Note any new codes or sounds.
Tip: Use the model’s diagnostic mode if available. - 7
Run a focused test cycle
Run a small load through a complete cycle to confirm all systems (fill, wash, drain, and spin) operate as expected.
Tip: Watch for leaks, unusual noises, or incomplete draining. - 8
Document and plan maintenance
Record notes from testing and set a simple maintenance schedule to prevent future faults.
Tip: Regular upkeep saves time and protects warranty terms.
People Also Ask
How do I reset my IFB washing machine safely?
Most IFB models support a soft reset by unplugging the unit for about a minute and plugging it back in. If your model has a diagnostic mode, use it to verify subsystem status after reset.
To reset, unplug the machine, wait a minute, plug it back in, and start a cycle. If available, run the diagnostic mode to confirm everything is clear.
What should I do if the drum won’t spin?
Check for an unbalanced load, verify the drum turns by hand, inspect drive belts if applicable, and ensure the motor isn’t obstructed. Rebalance the load and run a test cycle.
If the drum won’t spin, first check the load balance, then inspect the belt or motor area for obstructions and try a light test cycle.
Why is there water left in the drum after a wash?
This usually indicates drainage issues, a clogged filter, or a faulty pump. Clean filters, check the drain hose, and test a short cycle to see if water drains properly.
If water stays, inspect the filter and drain hose for blockages, and test whether the pump runs correctly.
Are IFB error codes model-specific?
Yes. Error codes vary by model. Always refer to your user manual or IFB support site for model-specific meanings and recommended steps.
Error codes depend on the model, so check the manual or official support for exact meanings.
How often should I clean filters and hoses?
Inspect and clean filters and hoses every 3-6 months, or more often if you notice slower draining or frequent clogs. Regular cleaning prevents many common issues.
Clean the filters and hoses every few months to keep the machine running smoothly.
When should I call a technician?
If you cannot locate the fault, the issue involves electrical components, or repairs would require opening the control board, contact an IFB-certified technician.
If the problem persists after basic steps or involves the electronics, it’s best to call a professional.
Watch Video
What to Remember
- Identify and fix water flow or drainage first
- Always unplug before inspecting electrical parts
- Regularly clean filters and pump traps to prevent clogs
- Use a balanced load to improve spinning performance
- Consult the manual for model-specific steps