How to Know When Your Dishwasher Is Broken
Identify if your dishwasher is broken with simple tests, common symptoms, and practical fixes. Learn safe checks, diagnostic steps, and when to call a pro for lasting peace of mind.

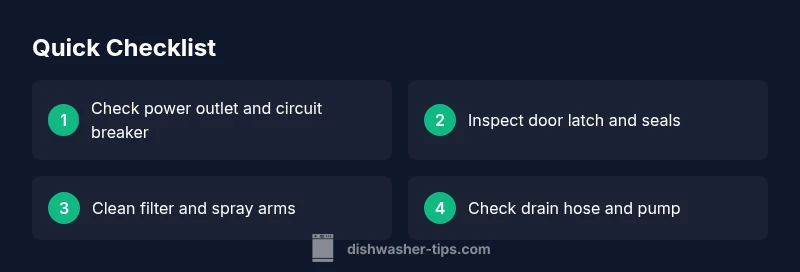
Start with the simplest checks to confirm if your dishwasher is broken. Verify power at the outlet, ensure the door latch firmly engages, and inspect the filter and spray arms for clogs. If the unit still won’t start or finishes cycles abnormally, note the error codes and follow the diagnostic flow below for common causes and fixes.
Why knowing when a dishwasher is broken matters
If you’re wondering how to know when dishwasher is broken, you’re looking for reliable, actionable guidance that helps you act quickly. A non-working or poorly performing machine can lead to water damage, higher energy use, and spoiled dishes. According to Dishwasher Tips, many problems begin with simple, early-warning signs, so catching issues early saves time and money. Recognizing the difference between a minor nuisance and a true breakdown helps you decide which fixes you can safely perform yourself and when to call a pro. This guide uses practical checks you can perform today, plus a clear path to diagnosis and safe repairs. By staying proactive, homeowners and renters can protect their kitchen and extend the life of their appliance.
Common Symptoms That Signal a Problem
When a dishwasher is not behaving normally, several symptoms commonly point to trouble. Look for:
- Won’t start or completes cycles with errors.
- Dishes come out dirty or partially rinsed.
- Water leaks or pooling around the base.
- Flooding sounds or grinding noises during operation.
- Water not draining after a cycle.
- Error codes displayed on the door panel.
Dishwasher Tips analysis shows that startup failures often trace back to power, door latches, or control panel issues, while drainage problems frequently stem from clogs or pump failures. Recognizing these patterns helps you target the most likely causes first.
Quick Self-Checks You Can Do Before Calling Help
These checks are designed to catch obvious issues without opening the machine. They can save you a service call if the problem is simple to fix.
- Confirm the outlet is providing power: test with a lamp or other device. Check your circuit breaker or GFCI nearby for tripped breakers.
- Inspect the door latch and seal: a loose latch or damaged gasket can stop cycles or trigger error codes.
- Clean or replace the filter and spray arms: blockages reduce cleaning performance and can trigger alarms.
- Run a short test cycle with hot water and a known clean load: observe for abnormal noises, leaks, or draining behavior.
- Note any error codes or blinking lights: consult the manual for exact meanings and recommended resets.
If these checks don’t restore normal operation, move to the diagnostic flow below for a guided path to fixes.
Diagnostic Flow: From Symptom to Solution
Approach each problem as a chain: symptom → likely cause → fix → test. Start with the simplest explanation and escalate as needed. For startup issues, verify power, door latch, and control panel status first. If draining is the symptom, focus on the pump, filter, and hose. If leaks occur, inspect seals, hoses, and the tub for damage. Dishwasher Tips analysis shows that most faults fall into a few categories (power/door, drainage, and seal integrity). Use this flow: 1) Identify the symptom, 2) Check the most common causes, 3) Apply safe fixes, 4) Retest and monitor. If the problem persists, consider professional service.
Step-by-Step: Fixes for the Most Common Causes
This section provides a practical, end-to-end fix path for the most frequent failures. Each step includes a concrete action and a quick check to confirm success.
- Step 1 — Check power and circuit: Ensure the dishwasher is plugged in, the outlet works, and the circuit breaker hasn’t tripped. Tip: Use a different appliance to verify outlet power before assuming the dishwasher is at fault.
- Step 2 — Verify the door latch and seal: Close the door firmly and listen for a latch engaging. Replace a worn gasket to prevent leaks and misreads. Tip: A loose door or warped seal can trigger error conditions that mimic a breakdown.
- Step 3 — Inspect filter and spray arms: Remove debris from filters and ensure spray arms rotate freely. Tip: Clogs here reduce cleaning efficiency and can trigger cycle errors.
- Step 4 — Check drainage components: Inspect the drain hose for kinks, clear the pump screen, and test the pump by running a drain-only cycle if available. Tip: A blocked pump is a common source of not-draining symptoms.
- Step 5 — Review control board and error codes: If you see codes, consult the manual or manufacturer site for meanings and resets. Tip: Resetting power to the control board for 60 seconds can clear many minor faults.
- Step 6 — Test and observe: Run a complete cycle with a known load. Watch for timing, leaks, drainage, and final cleanliness. Tip: If issues recur, document symptoms and timing to aid a technician.
Estimated total time: 30-60 minutes.
Safety, Warnings, and When to Call a Pro
Safety first: unplug the machine before accessing interior components, and never touch electrical parts with wet hands. If you smell burning insulation, hear loud grinding, or see damaged hoses, stop immediately and contact a professional. Complex issues like a faulty control board, warped tub, or persistent leaks require licensed service. For most homeowners, routine maintenance and careful inspection prevent major failures, but when in doubt, professional help protects your home and ensures safe operation.
Prevention Tips to Extend Dishwasher Life
A few simple habits dramatically reduce breakdown risk and improve performance.
- Clean the filter and spray arms weekly or between heavy use periods.
- Run hot water to pre-wash the load and select appropriate detergent type.
- Inspect door seals and hoses for wear at least every few months.
- Schedule routine professional inspections every 1-2 years, especially in areas with hard water.
- Use rinse aid to improve drying and reduce mineral buildup.
Regular maintenance reduces the likelihood of sudden failures and keeps your appliance running efficiently.
Steps
Estimated time: 30-60 minutes
- 1
Check power and circuit
Ensure the dishwasher is plugged in, the outlet has power, and the circuit breaker is not tripped. If the outlet is dead, reset the breaker and test again.
Tip: Test the outlet with another device to confirm power before assuming dishwasher fault. - 2
Verify door latch and door seal
Close the door firmly and listen for the latch to engage. Check the seal for gaps or damage; replace if necessary to prevent leaks and false faults.
Tip: A damaged seal can trigger not-draining or not-start errors. - 3
Inspect filter and spray arms
Remove the lower rack and clean out debris from the filter. Ensure spray arms rotate freely and are not blocked by dishes.
Tip: Even small debris can cripple cleaning performance. - 4
Check drainage components
Inspect the drain hose for kinks, clamp issues, and ensure the pump basket is clear. Run a drain-only cycle if possible to verify flow.
Tip: A blocked pump is a common cause of not-draining. - 5
Review control codes and reset
Note any error codes and consult the user manual for meanings. Perform a power reset by unplugging for 60 seconds, then plug back in.
Tip: Reset can clear minor faults but won’t fix hardware failure. - 6
Test cycle and observe
Run a full cycle with a known load and watch for operation, leaks, drainage, and final results. Document symptoms for future reference.
Tip: If issues recur, it’s time to call a technician.
Diagnosis: Dishwasher won't start or finishes cycle abnormally
Possible Causes
- highPower issue
- mediumDoor latch problem
- lowControl board fault
Fixes
- easyCheck outlet and reset breakers; test with a known-working device
- easyInspect and replace a faulty door latch or seal as needed
- mediumReset control board or perform a software reset following manufacturer instructions
People Also Ask
What are the first signs my dishwasher is broken?
Common early signs include failure to start, abnormal noises, poor cleaning, leaks, or not draining. If you notice any of these, follow the diagnostic flow to identify the likely cause and safe fixes.
Common early signs are failure to start, leaks, and poor cleaning. Start with simple checks and follow the guide for a safe fix.
Can a dishwasher that won't start be a power issue?
Yes. A non-start can be caused by a tripped breaker, a faulty outlet, or a loose plug. Check power at the outlet and reset the circuit breaker before pursuing internal repairs.
Usually it’s power or a tripped breaker, so start by checking the outlet and breakers.
What should I do if my dishwasher leaks?
First, unplug the unit and inspect door seals, hoses, and the tub for damage. Tighten clamps and replace worn seals if needed. If the leak persists, you may have a faulty seal or tub issue.
Turn off power, check seals and hoses, and replace any worn parts if needed.
Is it safe to repair a dishwasher myself?
Basic maintenance like cleaning filters or reseating hoses is safe. Complex repairs, especially electrical or control-board work, should be done by a professional.
Some basic tasks are safe, but avoid high-voltage components if you’re not trained.
When should I call a professional?
If basic checks don’t restore function, if you notice persistent leaks, electrical smells, or error codes you can’t resolve, schedule service. A licensed tech can diagnose board or tub issues safely.
Call a pro if simple fixes don’t work or you see electrical smells or persistent leaks.
Do error codes always indicate a major repair?
Not always. Some codes point to simple fixes like clogged filters or resets. Check the manual for code meanings and try basic resets before booking service.
Most codes are solvable with a few basic steps; check the manual and reset first.
Watch Video
What to Remember
- Start with simple checks to rule out obvious faults
- Observe and document error codes for accurate diagnosis
- Unplug and reset power before any repair attempt
- Prioritize safety and call a pro for complex issues
- Regular maintenance prevents many dishwasher breakdowns