Broken Dishwasher Troubleshooting: Quick Fix Guide
Urgent guide to diagnose and fix a broken dishwasher. Learn common causes, safe checks, and when to call a pro to restore clean dishes quickly.

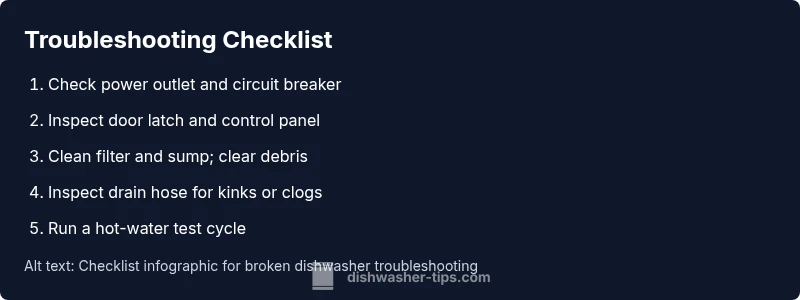
Most likely, a broken dishwasher starts from a simple power or drainage issue. The quick fix is to verify power, check the door latch, and inspect the filter and drain hose for clogs. Unplug, reset the circuit if needed, and run a short hot-water cycle after cleaning. If problems persist, proceed with the home diagnostic steps outlined below.
Why a broken dishwasher disrupts daily life
A functioning dishwasher saves time, reduces countertop mess, and keeps kitchens sanitary. When it breaks, you might find yourself washing dishes by hand, dealing with standing water, or worrying about water damage from leaks. According to Dishwasher Tips, a broken dishwasher is most stressful when it upends weekday routines. The Dishwasher Tips team found that many calls for help start with basic power or drainage issues, not a total unit failure. In practice, you can triage most common problems with a calm, methodical approach. Start by confirming the basics: is the unit plugged in? Is the door latch secure? Are there obvious leaks around the base? These quick checks set you up for a faster, safer fix and help you decide whether to DIY or call a pro. We'll walk you through practical, safety-conscious steps to diagnose and fix the issue efficiently, so you can return to clean dishes without unnecessary risk. This guide treats a broken dishwasher as a solvable puzzle, with clear steps and no blame. Read on to build confidence and take control of the problem today.
Common causes of a broken dishwasher
Several factors can cause a broken dishwasher to behave badly, and most of them are approachable for a homeowner with basic tools. A plugged or clogged filter and sump is a frequent culprit, especially in households that skip regular cleaning. A failing door latch or safety switch can prevent the machine from starting or entering a cycle. Drain issues—kinks, blockages, or a clogged pump—are another leading source of performance problems. Leaks around the door or base may indicate worn seals or loose fittings. Based on Dishwasher Tips research, clogged filters and buildup inside the sump are frequent culprits, while DIY electrical mistakes are less common but risky. Understanding these possibilities helps you triage without guessing. If your unit won’t drain, stops mid-cycle, or leaves dishes dirty, you’ll have a practical checklist to test one by one. Remember, never skip safety steps, and always unplug the appliance before touching any internal components. The goal is to identify the lowest-effort cause first, then escalate only if necessary to avoid expensive repairs.
Safety first: power, water, and leaks
Before you touch a single screw, make safety your top priority. Start by unplugging the unit or switching off the circuit breaker to prevent shock, and turn off the water supply to the dishwasher if you can access the valve. Inspect the area around the unit for signs of water pooling or dampness, which can indicate a leak. If you detect a strong electrical smell, sizzling sounds, or scorch marks, stop immediately and call a professional. When you’re ready to proceed, keep children and pets away from the area. Safety gear like gloves and eye protection are sensible, especially if you need to handle sharp components. These precautions protect you while you perform basic checks, such as verifying the outlet works, ensuring the door latch closes firmly, and examining visible hoses for cracks or loose connections. Safety isn’t optional here; it’s the foundation of every troubleshooting step.
What to check first: quick tests you can do
Start with the simplest, lowest-risk checks. Verify the power supply: is the dishwasher outlet live? If you have a dedicated circuit, confirm the breaker hasn’t tripped. Check the door latch and switch by gently closing the door and pressing the latch; if the light or indicator behaves oddly, the switch may be faulty. Inspect the spray arms and filter basket for debris that could block water flow. Look at the drain hose for kinks or obvious clogs, and ensure it’s properly connected to the sink drain or disposal. If water is pooling in the base, you may have a leak or a blocked drain. Document any error codes or flashing lights on the control panel, as these can guide you toward the specific component that’s failing. If a basic test passes, you can move to more detailed checks described in the diagnostic flow. Always recheck safety after every step and stop if anything feels risky or uncertain.
Diagnostic flow preview: symptom to solution
Symptoms guide the diagnosis. If the unit won’t start, suspect power, door latch, or control board issues. If it runs but won’t fill with water, check the water inlet valve and float switch. If it drains slowly or leaks, examine the pump and drain hose for blockages. Use a process of elimination: test power first, then door hardware, then drainage components. For each potential cause, try the simplest fix first—cleaning filters, reseating hoses, or resetting the control—before moving on to replacements. If you identify a faulty part, record the model and serial number, and consult replacement parts from reputable suppliers. If you feel uncertain at any point, it’s wise to consult a professional to avoid unnecessary damage and ensure safety.
Step-by-step preview: preparing for a fix
Part 1: Gather tools and safety gear. Part 2: Power down and disconnect from the water supply. Part 3: Remove the bottom rack and access the filter and sump. Part 4: Clean the filter and sump, then inspect the drain hose. Part 5: Reassemble and run a test cycle with hot water. Part 6: Evaluate the results and decide whether to proceed or call a pro. Note: these steps are designed for common, non-electrical fixes; if you encounter damaged wiring or persistent leaks, stop and contact a licensed technician. The goal is to complete a safe, repeatable process that minimizes surprises.
Prevention and next steps
Maintaining a routine can prevent much of the frustration around a broken dishwasher. Clean the filter and spray arms monthly, and run an empty hot-water cycle to flush the sump and hoses. Use the right detergent and avoid overloading the racks, which reduces strain on the spray arms and drainage system. Inspect seals and hoses periodically for cracks or loosening clamps, and replace worn parts promptly. If your dishwasher continues to misbehave after completing the basic checks and safe fixes, the remedy may require professional diagnostics—especially when water is leaking, you notice electrical smells, or you observe visible damage. With consistent maintenance, you’ll extend the life of your appliance and keep the kitchen running smoothly. The Dishwasher Tips team recommends staying proactive with maintenance and seeking professional help when needed to ensure safety and reliability.
Steps
Estimated time: 30-60 minutes
- 1
Power check
Inspect outlet, reset breaker, and test the outlet with a known working device to confirm power. Ensure the dishwasher is completely disconnected before handling any components.
Tip: Always start with a confirmed power source; safety first. - 2
Inspect door latch
Gently close the door and press the latch to see if it engages fully. If the door light behaves unusually or the latch feels loose, plan for replacement.
Tip: A stubborn latch is a common non-destructive fault. - 3
Clean filter and sump
Remove bottom rack, extract the filter, and rinse under warm water. Wipe the sump area and check for debris that could hinder water flow.
Tip: Use a soft brush to remove stubborn buildup. - 4
Check drain hose and pump
Inspect the drain hose for kinks, clogs, or loose connections. If you see a blockage, carefully clear it without forcing materials through.
Tip: Do not crush the hose; maintain a gentle bend. - 5
Test run
Run an empty cycle with hot water after cleaning to observe pump operation and drainage. Listen for unusual noises or water pooling.
Tip: If the cycle stalls, recheck the hose and filter again. - 6
Decide on next steps
If leaks persist or you smell burning, stop and call a professional. Record the model number for accurate part replacement.
Tip: Some fixes require specialized tools and safety precautions.
Diagnosis: Dishwasher won't start, stops mid-cycle, or leaks
Possible Causes
- highPower issue (outlet, cord, or circuit)
- mediumDoor latch or switch failure
- highClogged filter or pump debris
- mediumDrain hose kink or blockage
- lowFloat switch stuck or misreading
Fixes
- easyCheck outlet and reset breaker; unplug and replug the unit
- easyTest door latch for secure closure and replace if needed
- easyRemove and clean filter; clear debris from sump and pump area
- easyInspect drain hose for kinks and blockages; straighten and clear
- mediumVerify float switch movement; clean debris; replace if malfunctioning
People Also Ask
What should I do first when my dishwasher stops mid-cycle?
First, unplug the unit and check the circuit breaker. Confirm the door latch closes properly, then inspect the filter for debris. If it won’t start after these checks, continue with the diagnostic steps in this guide.
First, unplug it and check the breaker, then verify the door latch and filter for debris. If it still won’t start, follow the steps in this guide.
Why isn’t my dishwasher draining?
Drain issues are commonly caused by a clogged filter, pump debris, or a kinked drain hose. Clear blockages carefully and ensure the hose is properly connected. If drainage persists, a professional diagnosis may be needed.
Drain problems usually come from clogs in the filter or pump, or a kinked hose. Clear the blockages and recheck the hose.
Can I fix a broken dishwasher myself?
Many routine fixes, like cleaning filters or reseating hoses, can be done by homeowners. Electrical or leak issues, however, can be dangerous; if unsure, consult a pro.
Some fixes you can do yourself, but for electrical or leak problems, it’s safer to call a professional.
How can I prevent future dishwasher breakdowns?
Regular maintenance helps: clean the filter, inspect seals, use the right detergent, and avoid overloading. Run hot cycles periodically to flush the system.
Do regular maintenance like cleaning filters and seals, and run hot cycles to keep it healthy.
When should I call a professional?
If leaks continue, you smell burning or hear unfamiliar noises, or you’re uncomfortable with electrical components, stop and contact a licensed technician.
Call a professional if leaks persist or you notice electrical issues or odd noises.
Is it safe to run a damaged dishwasher?
No. If you notice leaks, damaged seals, or electrical concerns, discontinue use immediately and arrange service. Continuing to run it can cause further damage or safety risks.
No—don’t run it if you see leaks or damage. Get service to avoid hazards.
Watch Video
What to Remember
- Start checks with power and door latch.
- Keep filters clean to prevent clogs.
- Follow a stepwise diagnostic flow.
- Know when to call a pro for safety.
- Maintain routine upkeep to extend life.