How to Remove a Dishwasher Without Tools
Learn how to remove a dishwasher without tools with this comprehensive, home-friendly guide. Safe, clear steps, minimal risks, and practical tips for homeowners and renters.

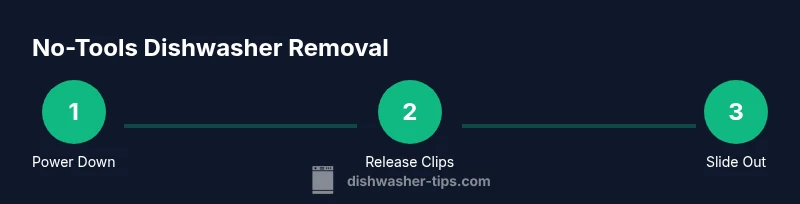
You can remove many standard dishwashers without tools by safely powering down, disconnecting power and water by hand, releasing built-in clips or rails, and sliding the unit out with careful footwork. This no-tools methodworks best on older, simpler installations and when there are accessible release points. Always prioritize safety and use a helper for heavier units.
Preparation and safety checks
In this guide on how to remove dishwasher without tools, you will learn a practical, no-tools approach that works for most standard under-counter installations. The goal is to minimize risk, protect your floors, and avoid unnecessary damage to cabinetry. According to Dishwasher Tips, a careful plan and calm execution dramatically increase the odds of a successful tool-free removal. Start with safety: unplug the unit from the wall outlet or switch off the breaker feeding the circuit. If your home uses GFCI outlets in the kitchen, test the outlet to confirm there is no power. Next, shut off the water supply; locate the shut-off valve under the sink or behind the toe-kick and rotate it clockwise until it stops. Have your towels ready; place a shallow bucket near the bottom front of the cabinet to catch drips. A flashlight or your phone flashlight helps you inspect dark corners inside the cabinet and behind the unit. Clear the area around the dishwasher, move any obstacles, and plan a clear path to pull the appliance straight out. Finally, be realistic about how much you can lift yourself—enlist a helper if the dishwasher is heavy.
Know Your Installation Type
Dishwashers come in several common configurations: built-in under the counter, freestanding with finish panels, or compact drawer-style units. The no-tools removal technique works best when there are visible mounting clips or rails that invite hand-release rather than screws. If your model uses a toe-kick access panel or a front panel that snaps off, gain access to screws or latches early, but only if you can do so safely by hand. If you’re unsure about your model, consult the user manual or the manufacturer’s website. The Dishwasher Tips Team notes that recognizing your installation type before you start reduces wasted effort and helps you plan your path to extraction. If you feel unsure at any point, pause and reassess rather than forcing the unit out.
Tools and Materials: What You Actually Need (No Tools Required)
Even though the goal is to remove without tools, you’ll still want a small set of household supplies to manage water and debris. Essentials include a flashlight, towels or rags, and a shallow bucket or tray to catch drips. Keep a non-slip mat or a sturdy piece of cardboard under the unit to prevent slipping. A helper makes the process safer, especially when maneuvering a heavy dishwasher. If you have to move the appliance across a carpeted area, use a thin plywood sheet or a section of thick cardboard to reduce friction. This is a practical no-tools setup that minimizes risk and keeps your workspace clean. As you prepare, remember that many homeowners succeed with these items because they enable a controlled, tool-free approach to removal.
Step 1: Power Down and Safety First
Begin by ensuring there is no electrical power feeding the machine. Unplug the appliance from the outlet if you can access it easily. If the plug is hard to reach or the cord is short, switch off the kitchen circuit breaker and verify there is no current with a tester if available. Then shut off the water supply using the under-sink shut-off valve and prepare absorbent towels to catch any residual water. This step is critical for a tool-free removal, and Dishwasher Tips emphasizes keeping power off until you are ready to move the unit to avoid shocks or leaks.
Step 2: Access and Prepare the Unit
With power off, open the door and inspect the area around the toe-kick and bottom panel for signs of clips or latches. If your model has a front panel that can be gently pried away without tools, you may access internal mounting points. Place a towel along the ground and a bucket ready in case of drips. Light the inside of the cabinet with a flashlight so you can see where to safely apply pressure or releases. The key is to identify any anchored points that you can disengage by hand rather than with a screwdriver or wrench. The Dishwasher Tips Team recommends planning your approach and keeping your path clear to avoid door swings that could pinch fingers or knock over the unit.
Step 3: Release Clips or Rails by Hand
Look for top or bottom mounting clips that hold the dishwasher in place. If your model uses spring-loaded or snap-in clips, you may be able to depress a release tab with soft pressure from your hand or forearm, then gently pull the unit outward along the rails. Do not yank; use slow, steady motions and keep the appliance close to the cabinet to prevent tipping. If you encounter a stiff clip, pause and re-check that you’ve disengaged all accessible releases. In some models, the clips can be disengaged from above, so you can press the release while pulling the unit forward a few inches at a time. The objective is a controlled disengagement rather than brute force.
Step 4: Detach Water Supply and Drain Lines by Hand
If the water supply line is connected with a simple compression fitting or a clip, you may be able to detach it by hand by turning the valve off first and then gently pulling free. Wipe down any drips as you go. For the drain hose, avoid twisting or pulling too hard; instead, detach it by loosening the clamp with your fingers if it is a flexible quick-release type or by sliding the hose off the nipple. Keep a towel ready to catch water that escapes. If you encounter a stubborn connection that won’t budge by hand, stop and reassess. For many installations, the hose clamps are designed to release without tools, but some configurations require a small amount of gentle leverage that should be done cautiously to avoid damage.
Step 5: Slide the Dishwasher Out Along the Rails
With all connections free and the unit supported, gently rock the machine slightly toward you while sliding it out along the bottom rails. Have a helper support the front edge to prevent the door from hitting you or the cabinet. Maintain a low center of gravity and keep the unit close to the floor to minimize tipping. If the appliance binds at the toe-kick, reposition your stance and try to ease it forward again. Moving slowly is safer than forcing the unit, which can bend rails or damage cabinetry. Keep the path clear of furniture and pets.
Step 6: Clear the Path and Inspect for Leaks
Once the dishwasher is free, inspect the floor for water and remove any towels. Check the supply line and drain hose for any signs of wear, cracks, or leaks that could have developed during removal. Wipe down the area, then store or set the unit aside on a protective surface. Compare the exposed underside with the installation diagram in your manual to ensure you understand how it was anchored. If you notice a dripping valve or a loose connection, address it before moving the unit further or reinstalling.
Step 7: Post-Removal Cleaning and Safety Checks
With the dishwasher removed, take the opportunity to clean the cabinet interior and the floor area. Check for any hidden screws or mounting points that you may have missed during the process. Ensure the surrounding cabinets are not damaged and that no sharp edges are exposed. Use a soft cloth to wipe down the rails and the area behind the appliance. The no-tools approach is a practical solution when done patiently and carefully; however, if you encounter resistance or damage, pause and consult a professional. The Dishwasher Tips analysis shows that careful, methodical work reduces the risk of harm to you or the machine.
Step 8: Planning Next Steps: Reinstallation or Disposal
If you plan to reinstall, review the installation steps in your manual and inventory any mounting brackets or hardware that may have to be reattached with tools. If you are disposing of the unit, ensure it’s safely disconnected from power and water and prepared for disposal according to local guidelines. Either path benefits from documenting what was done and keeping notes about what could be improved next time. The no-tools method is a useful skill, and ongoing practice with this approach will increase your confidence for future appliance tasks.
Step 9: When to Call a Professional
If you can’t locate hidden screws, your model uses unusual mounting hardware, or you encounter persistent resistance that risks damage, it’s wise to pause. Not every dishwasher is designed for tool-free removal, and pushing further may cause more harm than good. In these cases, contacting a professional is the safe choice. The Dishwasher Tips Team recommends prioritizing safety and avoiding dramatic force when removing appliances. A pro can assess and complete the job without risk to your cabinetry or electrical system.
Step 10: Final Safety Recap and Documentation
Before concluding, recap the safety steps: power off, water off, dry surfaces, and careful movements. Take photos of the setup for reference if you plan a future reinstallation. Maintain a neat workspace, and store tools or materials out of reach of children and pets. This final review helps ensure you can reassemble confidently or pursue a professional option if needed. Remember, working calmly and deliberately is the core of a successful no-tools removal.
Tools & Materials
- Flashlight(Inspect dark corners under/behind the unit)
- Towels or absorbent rags(Place around the base and catch drips)
- Bucket or shallow tray(Catch residual water during disconnections)
- Non-slip mat or thick cardboard(Prevent slips and protect floor surface)
- Gloves(Protect hands from sharp edges)
- Helper(Assist with lifting and guiding the unit)
Steps
Estimated time: 60-90 minutes
- 1
Power down and prepare area
Ensure no electrical power is feeding the dishwasher. Unplug if accessible; otherwise switch off the kitchen circuit breaker and verify there is no current. Standby with towels and a bucket to manage any drips. Light up the work area so you can see clearly before touching any components.
Tip: Always double-check power at the outlet before touching any electrical components. - 2
Identify installation type
Look under the cabinet toe-kick and behind the panel to spot clips, rails, or screws. Confirm whether there is a removable front panel or a toe-kick release. Knowing your setup helps you plan the no-tools removal path and reduces the risk of damaging cabinetry.
Tip: If you’re uncertain, pause and review your model’s manual before proceeding. - 3
Clear workspace and prep helpers
Move furniture and pets away from the area. Have a helper ready to support the appliance so you can safely guide it out without tilting aggressively.
Tip: Clear a straight path to avoid sudden jams during extraction. - 4
Release top/bottom clips by hand
Find any visible release latches or clips. Press or squeeze them with your fingers to disengage the dishwasher from the cabinet. Work slowly, pulling the unit forward as you release each clip.
Tip: If a clip resists, pause and recheck for any additional hidden releases. - 5
Detach water supply by hand
Turn the supply valve clockwise to close. Grip the hose connector gently and pull it away from the valve or the dishwasher with a steady, even motion. Wipe remaining water spills immediately.
Tip: Avoid twisting hoses; a straight pull reduces damage risk. - 6
Detach drain hose without tools
Locate the drain hose clamp and release with your fingers if possible. Slide the hose off the nipple and keep drips contained with towels.
Tip: If the hose won’t release, stop and verify there isn’t a hidden clamp you missed. - 7
Slide the unit out evenly
Support the front edge with a helper and slide the dishwasher along the rails. Keep it close to the floor and avoid tilting. Move slowly to prevent cabinet contact and door damage.
Tip: Offer the unit your body as a brace to prevent sudden shifts. - 8
Inspect for leaks and clean
Check the work area for drips and inspect lines for wear. Wipe the cabinet and floor, and prepare for reinstallation or disposal planning.
Tip: This is a good moment to verify floor integrity before placing the unit elsewhere. - 9
Decide on reinstall or disposal
If reinstalling, review mounting points and hardware needed. If disposing, follow local e-waste guidelines. Take photos for future reference.
Tip: Document the process to simplify future maintenance. - 10
When to call a professional
If you encounter hidden fasteners, unusual wiring, or stubborn resistance, stop and seek professional help. For many homes, no-tools removal is feasible, but safety comes first.
Tip: A licensed technician can finish the job safely if you’re unsure.
People Also Ask
Is it safe to remove a dishwasher without tools?
Yes in many cases, but it depends on your installation. Always power down and water off first, then proceed carefully. If you encounter resistance, stop and reassess.
Yes, many installations allow tool-free removal when you proceed safely. If you get stuck, pause and reassess.
What should I do if the dishwasher won’t unplug or turn off?
If the plug is inaccessible, switch off the circuit breaker and verify there is no current before continuing. Do not rely on unplugging alone.
If you can't unplug, switch off the breaker and confirm there’s no power before continuing.
Will removing without tools void the warranty?
Removal methods can affect warranty if the unit is damaged or if the installation requires screws or specialized fasteners. Check your warranty terms and consult the manufacturer if uncertain.
Your warranty may be affected if nonrecommended methods cause damage; check terms and consult the maker if unsure.
What if there are leaks after removal?
Contain the spill with towels, then inspect hoses and connections. Reestablish a dry area before moving the unit further or reinstalling.
If leaks appear, wipe up, check connections, and only proceed if everything is dry and secure.
Can I reinstall the dishwasher without tools?
Some installations allow tool-free reattachment, but many require screws or fasteners. Refer to the installation guide and be prepared to use basic tools if needed.
Reinstallation can require tools; consult the manual and have basic tools ready.
Are there model-specific steps I should know?
Yes. Check your model’s manual or the manufacturer’s website for installation specifics. If in doubt, consult a professional.
Model specifics vary; when in doubt, refer to the manual or call a pro.
Watch Video
What to Remember
- Plan first, then move slowly
- Power off and water off are non-negotiable
- Release clips by hand before any pulling
- Keep a towel and bucket ready for leaks
- If uncertain, call a professional