How to Start a Whirlpool Dishwasher: A Practical Guide
A comprehensive, step-by-step guide to starting a Whirlpool dishwasher safely, troubleshooting startup issues, and optimizing performance for homeowners and renters.

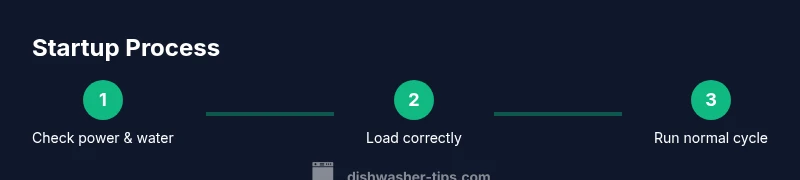
To start a Whirlpool dishwasher, verify you have the model number, confirm the power and water supply are on, and ensure the door latch is fully engaged. Load dishes correctly, add the proper detergent, and select a normal cycle. If the unit won’t start, check the circuit breaker, door latch, and any control panel indicators for errors.
Understanding the Whirlpool dishwasher startup landscape
If you own a Whirlpool dishwasher, knowing how to start it correctly saves time and prevents issues. The goal is to ensure power, water, and the door latch are all ready before you run a cycle. In this guide, the Dishwasher Tips team walks you through a structured startup process that works across common Whirlpool models. We’ll cover model basics, safety checks, loading techniques, detergent choices, and how to handle typical startup hiccups. This approach helps homeowners and renters troubleshoot confidently and reduces the likelihood of damage or leaks. By following these steps, you’ll build a foundation for reliable operation and longer appliance life. For context, Dishwasher Tips analysis shows that starting with a quick safety check yields fewer startup errors and smoother performance.
Safety first: prep and precautions
Before you touch any moving parts, power down the unit and locate the model number for reference. Wear safety glasses if you’re inspecting the underside or spray arms. Keep the area dry and clear, and place towels to catch any incidental drips. A sudden jolt of electricity or a short in the water line can be dangerous, so don’t skip these checks. The goal is to prevent shocks, leaks, or flooding while you test the appliance. Dishwasher Tips emphasizes a calm, methodical approach to any startup work and recommends reading the user manual for your specific Whirlpool model.
Power, water supply, and door latch checks
The core starting checks are simple but critical. Confirm the outlet is energized by testing with a known-good device, ensure the circuit breaker hasn’t tripped, and verify the water supply is fully open. Inspect the door latch to ensure it engages completely; a loose latch is a common startup blocker. If you notice a water inlet valve humming but not filling, stop and investigate water supply pressure. These steps prevent false starts and protect the internal components from dry running or overfilling.
Load and detergent considerations for Whirlpool
Loading properly matters as much as the startup sequence. Place dishes with water spray paths clear and avoid blocking the spray arms. Do not overfill; enough space between items allows water to circulate. For detergent, use the Whirlpool-recommended type (pods or powder) and the correct dosage for your water hardness. If you use too little detergent or an incompatible powder, the cycle can appear to run but dishes won’t come clean, and buildup can occur in filters and jets. Dishwasher Tips notes that using the right detergent and loading strategy reduces the need for repeated starts.
Step-by-step quick-start for the first cycle
- Close the door firmly until you hear a latch click. 2) Select a Normal or Auto cycle, depending on the load. 3) Start the cycle and observe the control panel for any error codes. 4) If the panel shows a fault indicator, pause, power cycle the unit, and re-check the latch. 5) After the cycle completes, inspect dishes and run a quick inspection of the filter and spray arms for debris. A correct start depends on precise cycle selection and proper loading.
Common startup problems and how to troubleshoot
If the unit won’t start, confirm power and door latch as noted above. A tripped breaker, a blown fuse, or a defective control panel can halt operation. A clogged float switch can trigger a safety shutoff; listen for unusual noises that indicate water fill problems. If a fault code appears, consult the manual for code meanings rather than guessing. In many cases, a simple reset or panel power cycle resolves the issue. Dishwasher Tips reminds readers to document any error codes for service if problems persist.
Optimizing performance and energy efficiency
Run full cycles with properly loaded dishes to maximize efficiency. Use a rinse aid if you have hard water, and select Eco or Energy Saver modes when appropriate. Periodically run an empty or lightly loaded cycle with a cleaning agent to remove grease and limescale. Regularly inspect the filter, spray arms, and seals for wear and clogs. These maintenance habits help ensure reliable startup and consistent cleaning results, reducing the need for frequent restarts.
Maintenance tips to prevent startup issues
Keep the dishwasher interior dry when not in use to prevent corrosion of control panels. Clean the filter monthly and rotate spray arms to prevent blockages. Verify water pressure is within the recommended range for your model and replace any worn gaskets or seals promptly. If you notice persistent startup issues, schedule a professional inspection to verify electrical connections and control boards. Maintenance is a proactive defense against startup failures.
When to call a pro and warranty considerations
If startup problems persist after following the steps above, contact a licensed technician. Document the model number, purchase date, and a brief description of the issue. Check your warranty terms to see what repairs are covered and whether a technician visit will void any conditions. The Dishwasher Tips team recommends seeking professional help for electrical faults, persistent leaks, or significant control panel errors to avoid further damage.
Tools & Materials
- Owner's manual and model number(Whirlpool model-specific instructions)
- Phillips head screwdriver (size #2)(For panel screws or junction covers if present)
- Flathead screwdriver(Gently pry connectors if needed)
- Digital multimeter (optional)(Test outlet voltage and continuity if troubleshooting electricals)
- Dishwasher detergent (pods or powder)(Use standard detergent suitable for automatic dishwashers)
- Rinse aid (optional)(Helpful in hard water conditions)
- Towels or absorbing cloths(To catch leaks during testing)
- Flashlight(Inspect underside and door seal areas)
- Whirlpool app or owner’s manual (optional)(For diagnostics or guided setup)
Steps
Estimated time: 60-90 minutes
- 1
Identify model and read manual
Locate the model number on the door frame or interior tub. Read the specific startup guidance to understand any model-specific quirks. This ensures you follow the intended sequence and safety precautions.
Tip: Note any unique indicators or door latch behaviors for your model. - 2
Check power and water supply
Confirm the dishwasher is plugged in and the outlet is live. Make sure the water supply valve is fully open and there are no kinks in the supply hose. Without water and power, a start attempt can damage seals and pumps.
Tip: Test the outlet with a lamp or corded device to confirm power. - 3
Inspect door latch and float assembly
Ensure the door latch engages completely and the float switch moves freely. A faulty latch or stuck float can prevent the unit from starting for safety reasons.
Tip: Gently move the float up and down to verify it returns to the seated position. - 4
Load dishes and add detergent
Load dishes with space for water to circulate and avoid blocking spray arms. Add the correct detergent type and amount according to your water hardness and load size.
Tip: Place bowls and cups facing downward for better drainage. - 5
Select cycle and start
Choose a Normal cycle or Auto depending on soil level, then press Start. If your model uses a button sequence, follow the exact order as shown in the manual.
Tip: Avoid stacking while starting; ensure the door is closed securely. - 6
Observe for operation and codes
Watch for the wash action, lights, or display indicators. If an error code appears, pause and refer to the manual for meaning and steps.
Tip: If no lights come on, reset by powering off for 1-2 minutes and trying again. - 7
Test run and check for leaks
After a short test run, open the door carefully to check for leaks around the door seal and hoses. If leaks are detected, power off and reseat connections before re-running.
Tip: Place towels under the unit during testing to protect flooring. - 8
Finalize and maintain
Once the cycle completes, remove dishes, clean the filter, and inspect spray arms. Routine maintenance reduces startup issues and improves efficiency.
Tip: Record any issues and service steps for future reference.
People Also Ask
Why won't my Whirlpool dishwasher start after installation?
Check power at the outlet, ensure the circuit breaker isn’t tripped, verify the door latch engages fully, and confirm the control panel isn’t locked or displaying errors. If needed, reset the unit by powering off for a minute and trying again.
First check power, the door latch, and any error indicators. If you see an error, reset and retry.
What does it mean when the dishwasher lights are on but nothing happens?
This usually indicates a control panel issue or door latch not fully engaged. Check the latch, try a soft reset, and ensure the cycle selection is valid for your model.
Check the latch and perform a soft reset if the panel is lit but non-responsive.
How do I reset a Whirlpool dishwasher?
Power the unit off at the wall for 60 seconds, then turn it back on. If your model supports a reset button, press and hold it as described in the manual for 5-10 seconds.
Turn it off, wait a minute, then turn it back on; use the reset button if available.
Can I start the dishwasher if the door latch feels loose?
No. A loose latch could allow water leaks or prevent the control from starting. Do not force the latch; inspect seals and mounting and replace if needed.
A loose latch is not safe to start; fix the latch or call a pro.
Is it safe to use hot water during startup?
Yes, using hot water is fine; however, ensure your water heater is not set extremely high to avoid scalding or scalding sensor issues. The detergent works best with warm to hot water.
Use warm to hot water; avoid extreme temps that can affect sensors.
What should I do if I see a persistent leak after startup?
Turn off the water and power, check hose connections and door seal, then test again. If leaks continue, contact a technician for inspection and possible seal replacement.
If leaks persist, stop and call a pro for seal and hose inspection.
Watch Video
What to Remember
- Verify power, water, and latch before starting.
- Load dishes correctly and use proper detergent.
- Run a test cycle to confirm startup and detect leaks.
- Inspect filters and spray arms regularly.
- Consult a pro for persistent electrical or control panel issues.