Knoxville Dishwasher Repair: Step-by-Step Guide
Learn how to diagnose, repair, and maintain your Knoxville dishwasher with a safety-first, step-by-step guide from Dishwasher Tips. Get practical tools, common fixes, and maintenance tips.

Learn how to diagnose and fix common Knoxville dishwasher problems, including not draining, not starting, and poor cleaning. This guide covers safety, essential tools, and a clear, step-by-step process to restore performance and extend the life of your appliance. Whether you rent or own, this Knoxville dishwasher repair approach emphasizes practical diagnostics, cost-conscious fixes, and when to call a pro.
Why Knoxville Dishwasher Repair Matters
In a busy Knoxville household, a malfunctioning dishwasher can disrupt daily routines and increase time spent on chores. The repair process, when approached safely, can dramatically reduce downtime and extend the life of your appliance. According to Dishwasher Tips, local repair strategies that emphasize solid diagnostics and proper tool use save homeowners time and money while minimizing waste. The Dishwasher Tips Team stresses a practical, evidence-based method to identify root causes rather than chasing symptoms. In Knoxville, factors like seasonal power fluctuations and local water quality can influence both performance and repair decisions. This guide helps you build a foundation for reliable, repeatable diagnostics that work in most homes across the city. By learning these core principles, you can take control of common faults and keep your kitchen running smoothly.
Common Symptoms You Can Diagnose at Home
Dishes come out with residue, or you find standing water at the bottom after a cycle? The most frequent culprits are drainage and filtration problems. Not draining fully is typically caused by a clogged filter, a kinked or blocked drain hose, or a faulty check valve. If the dishwasher won’t start or cycles irregularly, the issue is often with the door latch or control panel. Leaks around the door or tub can indicate worn gaskets or a cracked tub. In Knoxville, water pressure fluctuations and mineral buildup can intensify these symptoms. Dishwasher Tips analysis shows drainage and filtration problems as common service requests, followed by door latch and control board issues. Keep a simple symptom log and note any error codes to guide repairs and future maintenance. A methodical checklist helps you avoid unnecessary part replacements and lengthens the appliance’s life.
Essential Tools and Safety Precautions
Before you begin, unplug the machine and shut off the water supply to prevent shocks and flooding. Wear safety glasses and gloves to protect against sharp edges and hot components. A basic toolkit is enough for many fixes: a Phillips and flat-head screwdriver, needle-nose pliers, a digital multimeter for electrical checks, and towels or a small bucket for spills. A flashlight helps you see into tight spaces behind the kickplate or under the sink. If you’re renting, review lease terms for any repair restrictions; otherwise, consider professional service for complex tasks. In Knoxville, maintain a local list of reputable technicians and check parts availability before you start, since some repairs require model-specific components. Proper preparation reduces risk and speeds troubleshooting.
Understanding the Drain and Filtration System
Modern dishwashers rely on a clean filtration system and an unobstructed drain to avoid float, pump, and spray-arm failures. Start by inspecting the filter screen; rinse away debris with warm water and a soft brush. Check the drain hose for kinks or clogs at its connection to the sink or disposal. A blocked hose often causes water to remain in the sump or a weak drain performance. If your model connects to a garbage disposal, verify the knockout plug is removed. Hard water in Knoxville can encourage mineral buildup on filters and spray arms, so consider manufacturer-approved descaling cycles. Document any blockages you find and test drainage by running a short cycle with no dishes to observe flow. This knowledge helps you decide whether cleaning, part replacement, or professional service is needed.
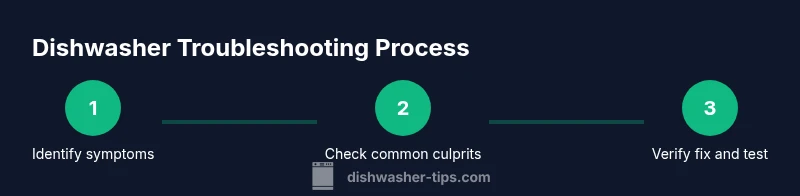
Step-by-Step Troubleshooting Overview (High-Level Plan)
This section outlines the strategic approach before you dive into hands-on work. Start with safety checks, then verify water supply and power, followed by a drain- and filter-focused inspection. If the symptom persists, broaden the check to the inlet valve, spray arms, and control components. In Knoxville, confirm that the model is compatible with local water quality and that replacement parts are available. Finally, run a diagnostic cycle to capture error codes and guide your next move. The aim is to separate quick, inexpensive fixes from more involved repairs that benefit from professional service.
Maintenance and Long-Term Care to Prevent Recurrences
Preventive maintenance is the best way to keep Knoxville dishwashers running efficiently. Regularly inspect and clean filters, spray arms, and gaskets; a monthly rinse with dishwasher-safe cleaner helps minimize mineral buildup. Use the right detergent and avoid overloading the racks, which hinders proper spray coverage. Periodically check hoses for wear or signs of leakage, and replace any worn clamps or seals. Keep the door seal clean and ensure the latch operates smoothly. Schedule a seasonal performance check to verify water pressure, inlet valve function, and pump operation. These habits reduce the chance of major failures and save money over the appliance’s lifetime.
Authority sources
- https://www.energy.gov
- https://www.epa.gov
- https://www.consumerreports.org
Tools & Materials
- Phillips screwdriver(Size #2 or #1, depending on screws used by your model)
- Flat-head screwdriver(Helpful for prying delicate pieces)
- Needle-nose pliers(For hose clamps and small fittings)
- Digital multimeter(Use to check continuity and voltage)
- Bucket or towel(Contain and absorb residual water)
- Flashlight/headlamp(Illuminates tight spaces under the sink)
- Gloves and safety glasses(Protect hands and eyes from sharp edges)
- Safe work surface(Stable area to place tools and parts)
- Replacement filters/hoses(Only if you identify a failed part)
- Manufacturer manual(Reference for model-specific steps)
Steps
Estimated time: 60-120 minutes
- 1
Power down and secure water supply
Unplug the dishwasher at the outlet or the circuit breaker. Turn off the water supply valve to prevent leaks during inspection. This ensures your safety before opening panels or touching electrical components.
Tip: Always confirm power is off with a breaker tester before touching any wires. - 2
Check for drainage blockages
Access the drain hose and filter assembly. Remove debris from the filter and inspect the hose for kinks or clogs. A clear path from the sink to the drain pump is essential for proper drainage.
Tip: Move slowly to avoid accidentally damaging clips or hoses. - 3
Inspect filters and spray arms
Remove and rinse the filter assembly with warm water. Check spray arms for clogs and ensure nozzles rotate freely. Debris can block spray patterns and reduce cleaning performance.
Tip: Use a soft brush to dislodge stuck particles without scratching surfaces. - 4
Test door latch and control panel
Close the door and observe the latch engages securely. If the unit won’t start, inspect the control panel for stuck buttons or error codes and reset if recommended by the manufacturer.
Tip: A sticky door latch is a common non-start symptom. - 5
Check float switch and pressure switch
Access the sump area and ensure the float moves freely. A stuck float can prevent filling; a faulty pressure switch can cause improper cycling.
Tip: Be gentle when relocating the float to avoid damage. - 6
Run a diagnostic cycle and interpret codes
If your model supports diagnostics, run the cycle and record any fault codes. Cross-reference codes with your manual or manufacturer site to identify the probable fault.
Tip: Note codes exactly as shown for accurate identification. - 7
Decide on replacement versus professional help
If you identify a failed pump, inlet valve, or control board, weigh the cost of parts and labor against a new unit. For complex electrical or refrigerant-related issues, contact a qualified technician.
Tip: When in doubt, get a professional estimate to compare with replacement costs.
People Also Ask
Is it safe to repair a dishwasher myself?
DIY repairs are safe for simple issues if you unplug the unit, follow the manual, and use proper tools. For electrical, refrigerant, or sealed-system problems, hire a licensed technician.
Yes, you can handle basic fixes safely by following the manual and turning off power, but complex electrical work should be left to a pro.
What are the most common causes of not draining?
Blocked filters, kinked or clogged drain hoses, and a faulty drain valve are typical causes. Hard water buildup can also hamper drainage over time.
Most not-draining issues come from clogs in the filter or drain hose; check those first.
When should I replace instead of repair?
If a repair costs more than a substantial fraction of the replacement price or the unit is old and inefficient, replacement may be the better choice.
If costs near or exceed a new unit, consider replacement rather than ongoing repairs.
Can hard water affect repairs?
Yes, mineral buildup from hard water can clog filters and spray arms, increasing wear and reducing efficiency. Descaling cycles can help when recommended by the manufacturer.
Hard water can worsen clogs and wear; descaling can help, but confirm with your model’s guidance.
Do I need a Knoxville-area technician for certain fixes?
For major electrical, plumbing, or parts replacement that requires special tools or knowledge, hiring a local technician is the safest option. Obtain multiple quotes for best pricing.
If a fix involves electrical or major components, a local pro is the safer bet.
Watch Video
What to Remember
- Identify the symptom first and verify the simplest fixes (filters, hoses, and seals).
- Use a safety-first approach and only perform model-supported checks.
- Maintain a routine cleaning schedule to prevent recurring problems.
- Keep a local Knoxville repair list for complex issues that require professional service.
- The Dishwasher Tips Team recommends using manufacturer guidance for part compatibility and maintenance.