Replacing Drain Hose on Dishwasher: A Complete How-To
Learn how to replace the dishwasher drain hose safely with a step-by-step guide, tools, tips, and common troubleshooting to prevent leaks and drainage problems.

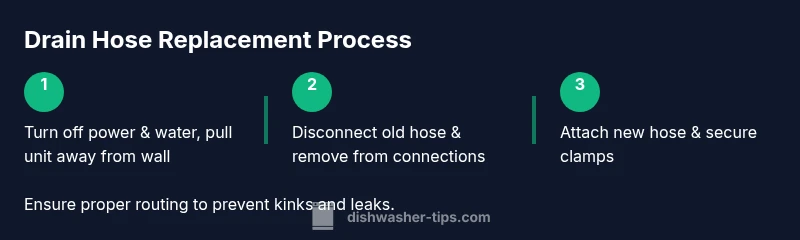
Learn how to replace the dishwasher’s drain hose with this step-by-step guide. You’ll need basic tools, a new hose, and careful sealing to prevent leaks. This quick answer covers safety checks, hose removal, hose replacement, and testing, so you can fix drainage problems without calling a technician. Follow along for proper routing and clamps.
The Drain Hose and Why It Fails
According to Dishwasher Tips, the drain hose is a frequent point of failure in modern dishwashers. A kinked, cracked, or poorly routed hose can cause slow draining, backflow into the tub, and leaks behind the unit. Most failures stem from aging plastic, improper installation, or clamps that loosen over time. Recognizing the signs—water around the base, damp cabinets, or dishes not drying properly—helps you decide when replacement is necessary. Replacing the hose is usually safer and more economical than trying to repair a crack or kink. A well-installed hose maintains proper gravity drain, reduces siphoning, and minimizes air ingestion that can disrupt pump operation.
Dishwasher Tips emphasizes that routing matters as much as material; a flexible hose with smooth interior reduces mineral buildup and flow resistance that can trigger backflow. If you notice repeated backwash into the tub or water pooling at the base after cycles, plan a hose replacement as part of regular maintenance. This section sets the stage for choosing the right hose and executing a safe replacement.
Tools and Materials You’ll Need (Overview)
Before you begin, take a quick inventory of the essentials. The hose should match the tailpiece diameter and be long enough to reach the sink drain or disposal without sharp bends. Use high-quality hose clamps and check local codes for disposal connections. A catch basin or towels helps manage residual water, and a bucket is handy for draining the line. Choose a hose with a smooth interior to minimize deposits and a clamp with a wide grip to resist loosening. This overview aligns with best practices discussed by industry guides and the Dishwasher Tips team.
Step-by-Step: Prepare the Workspace
Clear the area around the dishwasher, pull it away from the wall, and unplug it from the power supply. Shut off the water valve that feeds the appliance and place towels to catch any drips. Remove the kickplate or access panel if necessary to expose the drain hose and clamps. This prep work reduces the risk of shock and water damage and ensures you can access both ends of the hose safely. A tidy workspace also helps you identify routing constraints and avoid bending the hose beyond its recommended radius.
Step-by-Step: Remove the Old Hose
Loosen the hose clamps on the dishwasher side with pliers or a screwdriver, then carefully detach the hose from the sink or disposal connection. If the hose is stuck, gently twist while pulling to avoid tearing the hose barb. Inspect the connection points for crust, mineral buildup, or damaged gaskets. Discard the old hose if it shows cracks or visible wear. Keep the sink side clean so you don’t introduce debris into the drain. This step reduces the risk of leaks after installation and makes the replacement straightforward.
Step-by-Step: Install the New Hose
Attach the new hose to the dishwasher tailpiece or diverter using the supplied clamp, ensuring the clamp sits in the hose groove and is snug but not overtightened. Connect the other end to the sink drain or disposer inlet, again securing with a clamp. Choose a hose length that allows a gentle sweep to avoid kinks, and keep the hose above floor level where possible to prevent backflow. If your model uses a check valve or air gap, reinstall it according to manufacturer instructions. Double-check that no crimps or twists are present, which can impede drainage and trigger leaks later. A careful start prevents recurring issues and helps the hose seat properly.
Step-by-Step: Route, Clamp, and Seal
Carefully route the hose to avoid sharp bends or contact with the cabinet floor. Use worm-drive clamps or the clamps provided with the hose, positioning them to compress the hose without cutting into the material. Ensure a smooth arc and maintain a downward slope toward the drain to promote gravity drainage. If the hose is routed through a tight space, consider trimming or repositioning to reduce stress. After securing, confirm there are no gaps around the connections that could allow air or water to escape. Proper routing and secure connections prevent leaks and ensure reliable drainage.
Step-by-Step: Test, Observe, and Clean Up
Restore power and water supply, and run a short cycle without dishes, watching all connection points for leaks. Use towels to catch any drips and check under the cabinet for damp spots. If you notice leaks, tighten clamps a touch and re-test. Once satisfied, run a full cycle with a light load to confirm stable operation. Finally, return the dishwasher to its place and clean the surrounding area. This final check confirms success and helps you avoid hidden leaks that only show after longer use.
Authority Sources
- Energy.gov: Appliances and dishwashers efficiency and maintenance basics
- EPA.gov: Green Home considerations for appliance maintenance and drainage
- Extension.illinois.edu: Home maintenance guidelines for kitchen plumbing and appliances
toolsMaterialsNoteOnlyForContentIfNeededFrontEnd
Tools & Materials
- new dishwasher drain hose(Match tailpiece diameter and length; consider stainless or reinforced hose for durability)
- catch basin or towels(Place to catch residual water during replacement)
- adjustable pliers(For hose clamps and fittings)
- screwdriver set(Flathead or Phillips as needed by clamp screws)
- bucket(Optional for extra drainage capacity during work)
- utility knife or scissors(For trimming hose if needed to fit path)
Steps
Estimated time: 45-60 minutes
- 1
Power down and prep
Begin by unplugging the dishwasher and turning off the water supply. Move the unit gently away from the wall to gain enough space for access. Place towels on the floor and position a catch basin to collect any water that might spill. This step minimizes the risk of shock and water damage and sets a safe foundation for work.
Tip: Have a helper nearby if the dishwasher is heavy to avoid strain. - 2
Detach the old hose
Loosen the hose clamps at the dishwasher end and at the drain end. Gently pull the hose free from the tailpiece and the drain connection. If the hose is hard to remove, apply a small amount of penetrating oil to the clamps and wait a minute before retrying. Inspect the fittings for corrosion or damage as you remove them.
Tip: Do not yank; twisting helps release stubborn clamps without tearing fittings. - 3
Prepare and install the new hose
Compare the new hose length with the old one to ensure it reaches without stretching. Attach one end to the dishwasher tailpiece with a fresh clamp, then route the hose toward the drain. Secure the other end to the sink drain or disposal inlet with a clamp, ensuring a clean seal.
Tip: Position clamps over the grooves on the hose for a snug fit. - 4
Route for optimal drainage
Avoid sharp bends or horizontal sections that can trap air or debris. Keep the hose above cabinet ground level and maintain a smooth curve that minimizes kinks. If you have an air gap, reinstall it according to the manufacturer’s instructions.
Tip: A gentle arc reduces the chance of siphoning and backflow. - 5
Re-secure and check connections
Tighten all clamps firmly but avoid over-tightening that can crush the hose. Once secured, pull gently on the hose to confirm there is no slippage. Wipe any residue from the connections to help spot future leaks more easily.
Tip: Looseness is a common cause of leaks—check twice, tighten once. - 6
Test run and finalize
Plug the unit back in, restore water supply, and run a brief cycle with a small amount of water. Look under the cabinet for leaks around both ends of the hose. If nothing drips after the cycle, run a full load to confirm long-term integrity.
Tip: If you see a leak, re-check clamps and routing before concluding.
People Also Ask
Can I replace the drain hose myself?
Yes. A drain hose replacement is a common DIY task for homeowners with basic plumbing tools. Follow the manufacturer’s instructions, ensure the power is off, and take care to secure clamps and connections to prevent leaks.
Yes—most people can do this themselves if they follow safety steps and manufacturer guidance.
What tools do I need?
You’ll typically need needle-nose pliers, a screwdriver, a new drain hose, hose clamps, towels or a basin, and optional trimming shears for length adjustments.
Commonly you’ll use pliers, a screwdriver, clamps, a new hose, and towels.
How do I know which hose size to buy?
Check the existing hose for diameter and length, or consult your dishwasher’s manual for the tailpiece size. Choose a hose that matches the inlet diameter and provides a comfortable length for routing.
Measure the old hose or check your model’s manual to match size.
What are common causes of leaks after replacement?
Leaks usually come from loose clamps, cracked hoses, or improper routing that creates a gap at the connection points. Re-tightening clamps and re-checking the path typically resolves these.
Leaks are usually from clamps, hose wear, or bad routing.
Do I need a plumber for this?
Most homeowners can complete this task without a plumber. If you encounter nonstandard connections, gas lines, or code concerns, seek a professional.
Usually not—DIY is fine unless there are code or safety issues.
How long does it take to do this normally?
A typical drain hose replacement takes about 30-60 minutes, depending on access and familiarity with the unit.
Usually half an hour to an hour.
Watch Video
What to Remember
- Shut off power and water before starting
- Use the correct hose length and secure clamps properly
- Route the hose to avoid kinks and backflow
- Test for leaks after installation
- Maintain a clean workspace to spot leaks early