Replace Dishwasher Drain Hose: A Step-by-Step Guide
Learn a safe, practical way to replace your dishwasher drain hose with this clear, step-by-step guide, plus tips and common-sense maintenance.

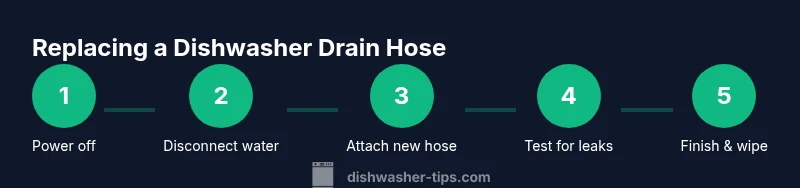
This guide helps you safely replace a dishwasher drain hose. You’ll need basic tools, a replacement hose matching size, and clamps. The process includes disconnecting power and water, removing the old hose, installing the new one, reconnecting to the drain, and testing for leaks. Verifying model compatibility and following safety steps prevents water damage and costly repairs.
Why replacing a dishwasher drain hose matters
A worn or damaged drain hose is a common source of leaks, odor problems, and drainage failures. Over time, hoses can become stiff, cracked, or kinked, which creates weak points that leak when the dishwasher runs. A failing hose not only risks water damage under cabinets, it can also allow dirty rinse water to back up into the tub, potentially causing mold growth. Replacing a compromised hose is a proactive maintenance step that protects your kitchen and reduces emergency repairs. By choosing a high-quality replacement and installing it correctly, you preserve efficient draining and prevent future headaches. The Dishwasher Tips team has found that routine inspection of hoses during seasonal maintenance can catch wear before it becomes a leak, saving homeowners time and money.
Key concepts to keep in mind include ensuring the new hose matches the connection size, avoiding sharp bends, and using reliable clamps to secure the ends. When you replace the hose, you’re not just stopping a leak—you’re restoring the dishwasher’s drainage performance and extending the appliance’s life. Always follow the manufacturer’s guidance for hose type and length, and take a moment to inspect the sink drain and disposal connections for compatibility. If you see signs of mold or strong residues, address those issues while you’re under the sink to prevent recontamination of the new hose.
Signs it’s time to replace vs. repair
Not every leak means a full hose replacement is necessary, but several indicators point toward replacement rather than patching. Visible cracks, bulges, or stiff sections on the hose body are red flags that the material is failing. If the hose shows signs of fraying near clamps or has developed pinhole leaks, replacement is the prudent choice. Odd kinks or crushed sections that you cannot straighten enough to allow proper drainage indicate a hose nearing failure. A persistent, slow drip at the hose-to-disposer or hose-to-tailpiece connection also warrants replacement to prevent ongoing moisture exposure. If you frequently find yourself tightening clamps or resealing fittings, the hose may be past its service life. In these cases, replacing the hose eliminates recurring issues and reduces the risk of water damage. The Dishwasher Tips analysis shows many homeowners overlook worn hoses until a leak occurs, making proactive replacement a smart habit.
Choosing the right hose and fittings
Selecting the correct drain hose requires matching the hose to your dishwasher’s drain connection diameter and the discharge path. Consider whether you’ll mount the hose to a garbage disposal or directly to the sink tailpiece, and ensure you have compatible clamps and fittings. Smooth-bore hoses are easier to clean and resist buildup, while corrugated hoses are flexible and resist kinking. Pay attention to length: a hose that's too short won’t reach the drain, while an overly long hose can loop and siphon water back. Anti-siphon features and reinforced materials add durability in busy kitchens. Always verify that the new hose is certified for appliance use and that it includes durable clamps. The connection to the disposal may require removing the knockout plug—check your disposal manual and proceed accordingly. Keeping the routing clean and away from sharp edges reduces wear and prevents leaks over time.
Safety and preparation
Before touching any plumbing, power should be off and the water supply shut down. Unplug the dishwasher, then locate the water inlet valve under the sink and close it to stop supply. Have a bucket and towels ready to catch residual water; working on a dry surface reduces slip hazards. Gather tools like screwdrivers, pliers, and a utility knife, and prepare the replacement hose and clamps. If you’re working in a crowded cabinet, clear space so you can maneuver the hose without bending or twisting it more than necessary. Safety first means preventing electrical shocks and minimizing water exposure to electrical outlets. The installation should be performed with the dishwasher cold and the area well-ventilated to avoid humidity buildup that can wick into cabinet joints.
Common mistakes to avoid during replacement
A frequent error is selecting a hose that’s too long or too short, which can cause improper drainage or kinking. Another mistake is reusing old clamps or ignoring corrosion on metal fittings, which weakens the seal. Failing to fully dry connections before tightening clamps invites leaks. Not removing a disposal knockout plug when connecting to a disposal will create a blocked path for drainage. Finally, routing the hose so it runs downhill into a non-vented area or above the water level increases the risk of backflow and odors. Taking a moment to verify the hose orientation and clamp position helps ensure a leak-free operation. The quick visual check after installation is worth the extra minutes.
Maintenance after replacement and troubleshooting
After installation, run a test cycle with a small amount of water to observe the hose connections. Inspect clamps for tightness and feel along the hose for any damp spots. If you detect even a tiny leak, shut off power and water, tighten connections again, and re-run the test cycle. Keep the area underneath dry by placing absorbent towels during the first few cycles. Periodic checks every few months will catch wear or loosening before it becomes a problem. If you notice frequent wear on a particular section, consider adding a protective grommet or routing the hose with slightly more slack to avoid rubbing against cabinet edges. The goal is a long-lasting connection that remains leak-free through normal use.
Tools & Materials
- Replacement dishwasher drain hose(Match the connection diameter and ensure compatibility with disposal or sink drain.)
- Stainless steel hose clamps (2)(Choose clamps that fit the hose diameter snugly; avoid plastic clamps for durability.)
- Screwdriver or pliers(Use the appropriate head for your clamps and fittings.)
- Bucket or towels(To catch residual water and keep the work area dry.)
- Adjustable wrench(Helpful for stubborn fittings or metal connectors.)
- Measuring tape or ruler(For confirming hose length and routing clearance.)
Steps
Estimated time: 30-60 minutes
- 1
Disconnect power and water supply
Power down the dishwasher by unplugging it at the outlet or turning off the circuit. Close the hot water valve under the sink to stop water flow. This prevents electrical shock and accidental flooding during removal.
Tip: Test the outlet with a non-contact tester to confirm there is no live voltage before working. - 2
Access the drain hose area
Move the dishwasher slightly away from the cabinet to access the drain hose. Clear any obstructing items and inspect the hose path for sharp bends or contact with cabinet edges that could cause wear.
Tip: Have a helper hold the dishwasher steady if space is tight to avoid damaging the sink or cabinet surfaces. - 3
Loosen and remove old hose clamps
Using the screwdriver or pliers, loosen the clamps at both ends and slide them away from the hose. Carefully pull the hose off the dishwasher fitting and from the drain connection, letting any residual water drain into the bucket.
Tip: Keep track of which clamp goes on which end if they are different sizes. - 4
Measure and cut the new hose to fit
Measure the required length by dry-fitting the new hose from the dishwasher outlet to the drain connection without tension. Cut the hose cleanly using a utility knife or hose cutter, ensuring straight end surfaces for a good seal.
Tip: Test-fit the hose before final installation to confirm clearance and routing. - 5
Attach the new hose to the dishwasher
Slide one end of the new hose over the dishwasher outlet and secure with a clamp. Ensure the hose sits evenly and won’t kink when the dishwasher is pushed back into place.
Tip: Position the clamp just behind the groove to maximize grip without damaging the hose. - 6
Connect the hose to the disposal or sink drain
Attach the other end to the drain connection (disposal inlet or tailpiece). If using a disposal, remove the knockout plug according to the disposal’s instructions before attaching the hose.
Tip: Double-check the connection is accessible for future inspections. - 7
Test for leaks and clean up
Restore power and water, then run a short cleaning cycle. Look for leaks at clamps and connections and check under the sink for dampness after the cycle.
Tip: If you see damp spots, power down again and re-tighten clamps before re-testing.
People Also Ask
Do I need a new drain hose if the old one looks fine?
Not always, but worn, cracked, or stiff hoses should be replaced to prevent leaks and drainage problems.
If you see wear or stiffness, replace the hose to prevent leaks.
What size drain hose should I buy?
Buy a hose that matches your dishwasher’s drain connection diameter. If unsure, bring the old hose or check the manual.
Match the diameter of the existing hose.
Should I remove the disposal knockout plug?
Yes, remove the knockout plug if you’re connecting to a disposal, following the disposal manual.
Yes, remove the knockout plug if you’re connecting to a disposal.
How long does replacement take for a DIY homeowner?
Most homeowners complete this in about 30 to 60 minutes, depending on access and fittings.
Usually 30 to 60 minutes.
What if water leaks after replacement?
Shut off power and water, then re-tighten connections and re-test until no leaks appear.
Re-tighten connections and re-test.
Can I hire a pro instead of DIY?
If you’re uncomfortable with plumbing or electrical work, hire a licensed technician.
If you’re unsure, hire a professional.
Watch Video
What to Remember
- Plan and prepare before starting.
- Match hose size and secure connections.
- Test for leaks after installation.
- Inspect hose path to prevent wear.
- Keep the work area dry during and after replacement.