How to Install a Dishwasher Drain Hose: Step-by-Step Guide
Learn how to install a dishwasher drain hose safely and correctly with this comprehensive, step-by-step guide from Dishwasher Tips. Covers routing, high loops, air gaps, clamps, and testing for leaks in real-world kitchens.

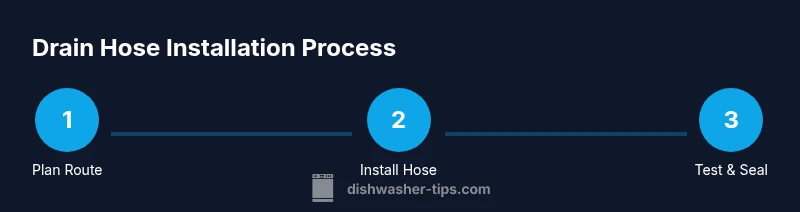
Install a dishwasher drain hose by routing it to the sink or disposal, ensuring a secure high loop or approved air gap, connecting with the proper clamps, and testing for leaks. Gather tools, measure hose length, and follow local code. This guide from Dishwasher Tips covers every step in detail for safety.
How the dishwasher drain hose system works
A dishwasher drains wastewater through a flexible hose that connects to either the sink drain or a garbage disposal. The key purpose is to prevent backflow and contamination of clean water. Most codes require a high loop or an air gap to avoid siphoning dirty water back into the dishwasher. The Hose carries used water from the dishwasher pump to the drain, and a properly routed hose keeps the kitchen sanitary and prevents clogs downstream. According to Dishwasher Tips, the goal is a reliable, gravity-assisted flow with minimal bends and no kinks that could trap food particles. Understanding these basics helps you plan a safe, code-respecting installation that will last years. In everyday kitchens, routine maintenance like ensuring clamps stay tight and the hose remains free of cracks helps prevent leaks and costly water damage.
Planning the installation: code, routing, and safety
Before you touch the hose, check your local codes and the dishwasher manual for any specific requirements about drain routing. Some municipalities require an air gap on every installation, while others permit a high loop when space or plumbing prohibits an air gap. If you replace an old hose, inspect the disposal knock-out plug area and the sink port for debris that could impede flow. Plan a route that avoids sharp bends, runs uphill to a reasonable height, and keeps the hose clear of cabinet doors and heat sources. Safety first: disconnect power to the dishwasher at the breaker and shut off the water supply if you’ll be handling connections near water or electrical components. A clean workspace helps you see connections clearly and reduces the risk of cross-threading clamps or stripping screws.
Choosing between air gap and high loop
An air gap is a small device mounted on the sink or countertop that creates a physical barrier between the dishwasher and drain. A high loop is simply the hose looping up high under the countertop to prevent backflow. Air gaps can reduce backflow risk in some homes and may be required by code, especially in multi-story installations or shared sinks. A high loop is easier to install in tight spaces and avoids additional hardware, but it must be high enough above the flood level to be effective. Weigh your local rules, cabinet clearance, and the dishwasher’s drain outlet position when deciding. The goal is a consistent slope toward the drain with no sags that can accumulate waste or cause clogs.
Location, length, and slope considerations
Measure precisely where the hose will attach to the dishwasher and where it meets the drain. Avoid stretching the hose to the point of tension; a slight slack helps prevent kinks and leaks. Keep the hose out of contact with sharp edges and heat sources, and ensure there is a gentle upward curve to the connection point. The hose should not loop tightly in a way that binds or twists. If you must cut the hose, use clean scissors or a utility knife to make a straight cut and remove burrs that could damage clamps. Longer runs may require a larger-diameter hose to maintain flow and reduce pressure loss. Finally, ensure the connection point allows for easy inspection and future maintenance.
Replacing an old hose: what to know
If you’re replacing an old hose, remove the existing clamps and hose carefully to avoid damaging fittings. Check the drain connector on the dishwasher and the port on the sink or disposal for cracks, rust, or corrosion. When installing a new hose, align the hose so that the clamps sit on the smooth, ridged portion of the fitting rather than the bare end. Test fit before final tightening, then tighten clamps firmly but not so tight that you damage plastic fittings. If your kitchen uses an air gap, install it per the manufacturer’s instructions and ensure the hose routes cleanly from the dishwasher to the gap.
Common mistakes to avoid and troubleshooting basics
Avoid sagging sections of hose; sags act as traps for food particles and can lead to clogs. Do not route the hose through the undersink water lines or around hot surfaces, which can soften the hose and cause leaks. Always secure the hose with clamps at both ends and, if required, with zip ties to maintain a neat route. After installation, run a short dishwasher cycle with a shallow tray of water in the sink to observe any leaks. If you notice leaks, double-check clamps, port connections, and the hose’s end that connects to the drain. Remember, a small leak today can become a big problem tomorrow, so fix it now.
What to do if you’re replacing an old hose (closing guide)
Replacements should use the same diameter hose as the original or the manufacturer’s specification. When in doubt, measure the inside diameter of the existing hose and match to the new one. Install any required adapters with care and avoid overtightening fittings. Keep spare clamps and a small length of hose on hand for quick fixes. Document the installation with photos for future inspections or troubleshooting.
What to do if you encounter leaks after installation
If you see a leak after testing, start by tightening all clamps and rechecking connections for misalignment or loose fittings. Look for hairline cracks in the hose and consider replacing a damaged section immediately. Verify that the air gap, if installed, operates smoothly without obstruction. If leaks persist, consult a licensed plumber or the dishwasher manufacturer’s support line. Persistent leaks can indicate a bigger issue in the drain system or a misfit component that needs replacement.
This is the final check: finishing touches and periodic maintenance
Wipe down the area to remove any moisture and inspect for signs of corrosion on clamps or fittings. Ensure the hose maintains a clear path to the drain without kinks or trapped debris. Schedule periodic checks to confirm that the hose remains securely mounted and free of cracks. A quick yearly inspection saves you from unexpected water damage and extended downtime.
Tools & Materials
- Dishwasher drain hose(New hose if replacing; match the hose diameter to the dishwasher port)
- Drain hose clamps(Stainless steel; one at each connection (dishwasher and drain))
- Air gap device (optional)(Check local code; install if required)
- Adjustable pliers(Grip fittings without slipping)
- Screwdriver (Phillips or flat-head)(Screw the hose clamps securely)
- Utility knife or scissors(For cleanly trimming the hose)
- Measuring tape(Accurate length planning)
- Bucket or towels(Catch water during hose removal)
- Cable ties(Secure routing and avoid movement)
- Silicone sealant (optional)(Seal slight gaps around fittings if recommended by manufacturer)
Steps
Estimated time: 60-90 minutes
- 1
Inspect the existing setup
Begin by unplugging the dishwasher and turning off the water supply. Inspect the current drain hose, fittings, and disposal port for wear, cracks, and signs of leakage. Take clear photos so you can reference the original arrangement if needed.
Tip: Pro tip: Label hoses and clamps before removing them to simplify reassembly. - 2
Power down and water shut-off
Ensure the dishwasher is disconnected from power at the breaker. Shut off the sink’s water supply if you’ll be working near plumbing. This reduces the risk of electric shock and water damage during the process.
Tip: Do not skip this step; it prevents accidents when handling connections. - 3
Clear the under-sink area
Remove any obstructing items from under the sink. You’ll need space to maneuver the hoses, clamps, and fittings. Lay down towels to catch any residual water.
Tip: Having a clear workspace speeds up the process and reduces mistakes. - 4
Remove the old drain hose
Detach the old hose from the dishwasher and the drain port. If the hose is stuck, use pliers gently to loosen the clamps. Inspect the fittings for damage and plan where the new hose will route.
Tip: If a disposal knock-out plug is present, ensure it is properly removed or left in place per the disposal’s instructions. - 5
Choose routing: air gap or high loop
Decide whether to install an air gap or use a high loop beneath the countertop. Mark the points where the hose will connect to the dishwasher and to the sink/disposal. Ensure the route avoids sharp bends and tight spaces.
Tip: A high loop should be securely mounted to stop the hose from sagging. - 6
Prepare and cut the new hose
Measure the required hose length between the dishwasher outlet and the drain port. Cut the new hose squarely, ensuring a clean edge. Remove burrs and check for straight alignment.
Tip: Trim less than you think you need and test fit before final cutting. - 7
Attach to the dishwasher
Slide the clamp onto the dishwasher outlet and slide the hose end over the outlet. Position the hose so it will rise to the high loop or air gap without kinking. Tighten the clamp securely.
Tip: Make sure the connection sits squarely on the outlet for a leak-free seal. - 8
Connect to the drain or air gap
Attach the hose to the sink drain or the air gap inlet, depending on your chosen routing. If using a disposal, knock out the connection as required by the unit’s design. Secure with a clamp and inspect for any gaps.
Tip: Avoid twisting the hose around the disposal; keep the path clean and straight. - 9
Create a high loop or install air gap
For a high loop, secure the hose beneath the countertop using brackets. For an air gap, follow the device’s mounting and connect the hose from the dishwasher to the gap’s inlet and the gap’s outlet to the drain.
Tip: The loop or gap should be above the sink drain height to prevent backflow. - 10
Secure all connections
Double-check each clamp and connection. Ensure hoses are not kinked and that there’s no contact with sharp metal edges. Use a zip tie if needed to secure routing.
Tip: Over-tightening clamps can crack fittings; tighten to a firm bite but avoid breaking them. - 11
Test for leaks
Restore power and water supply. Run a short wash cycle and observe all joints for leaks. Check under the sink and around the disposal for moisture after the cycle completes.
Tip: If a leak appears, power down, re-tighten the clamps, and reseat the hose ends. - 12
Final inspection and cleanup
Wipe dry, store tools, and take note of any wear or damage to hoses for future replacement. Keep a small spare hose and clamps handy for future maintenance.
Tip: Document the installed path so future service calls are quicker.
People Also Ask
Do I need an air gap for my dishwasher drain hose?
Air gaps are often required by local code in some regions; otherwise a high loop may suffice. Always check your local plumbing codes and the dishwasher's installation guide.
Air gaps may be required by code in your area; otherwise a high loop can be acceptable. Check local codes and the manual.
Can I connect the drain hose directly to a garbage disposal?
Yes, most installations connect to the disposal. If there is a knock-out plug, remove it per the disposal manufacturer’s instructions before attaching the hose.
You can connect to a disposal, but remove the knock-out plug as required by the unit’s instructions.
What length should the drain hose be?
The hose should be long enough to reach the drain with a proper high loop or air gap but not so long that it sags or kinks. Measure carefully before cutting.
Make sure the hose is long enough for a high loop or air gap, but not so long that it sags or kinks.
How can I tell if the installation is correct?
Run a test cycle and look for leaks at all joints. Confirm the hose follows a smooth route with no sharp bends or contact with hot surfaces.
Test the setup with a cycle and inspect all joints for leaks while ensuring a smooth route.
What tools do I need to replace the hose?
You’ll typically need a screwdriver, pliers, a utility knife, clamps, and the correct length hose. Have a measuring tape and spare parts on hand.
Most installations require a screwdriver, pliers, a knife, clamps, and the correct hose length.
What if my sink has a double-basin drain?
You can route the hose from the dishwasher to a main drain or to one basin’s disposal, depending on plumbing. Ensure the chosen path avoids backflow and maintains adequate slope.
You can connect to the main drain or a basin disposal; avoid backflow and keep slope proper.
Watch Video
What to Remember
- Plan routing based on local codes and space constraints.
- Use a high loop or air gap to prevent backflow.
- Secure all connections and test for leaks after installation.
- The Dishwasher Tips team recommends documenting the setup for future maintenance.