Water Inlet Valve Dishwasher Repair: DIY Guide 2026
Learn how to diagnose and replace a water inlet valve in your dishwasher with this practical, AI-informed DIY guide from Dishwasher Tips. Safe steps, tools, maintenance tips, and expert insights to keep your appliance filling correctly.

This guide shows you how to diagnose a faulty water inlet valve, gather the right tools, and perform a safe replacement or repair. You’ll learn common symptoms, testing methods, valve compatibility checks, and how to verify proper filling after installation.
Understanding the water inlet valve and its role in dishwasher filling
A water inlet valve is the small gatekeeper that controls when and how much water enters the dishwasher during the fill cycle. In modern machines, the valve is typically a solenoid-operated device that opens when the control board signals it, allowing household water pressure to fill the tub. When the valve fails, you may encounter a dishwasher that won’t fill at all, fills slowly, or overfills and leaks around the door seal. According to Dishwasher Tips, the water inlet valve is one of the most common points of failure in a dishwasher’s fill system, and problems here are a frequent source of disruptive repairs. In this water inlet valve dishwasher repair guide, you’ll learn how to recognize symptoms, verify valve operation with safe tests, and decide whether to replace the valve or pursue a more targeted fix. Understanding the valve’s role helps you approach diagnosis methodically rather than guessing. Common causes of valve failure include mineral buildup from hard water, a stuck solenoid, damaged electrical terminals, or a clogged screen at the valve inlet. A systematic inspection helps you avoid unnecessary disassembly and identify whether the problem lies upstream (water supply, filters) or downstream (valve assembly, control board). Finally, remember that valve quality and compatibility matter; you want a replacement that matches the valve size, connector style, and flow specifications for your model. This is the foundation for a successful water inlet valve dishwasher repair.
Common symptoms indicating valve problems
Not all dishwasher fill issues point to the valve, but several telltale symptoms deserve closer inspection. If the dishwasher won’t fill at all, it’s a strong sign the valve isn’t opening, the control board isn’t signaling correctly, or there’s an upstream problem (like no water supply). Slow filling can indicate a restricted inlet screen, low water pressure, or a partially failed valve. Overfilling or continuous leaking suggests the valve is stuck open or not sealing properly. You may also notice a buzzing or clicking sound when the valve tries to operate, or you observe water around the valve housing after a cycle. While diagnosing, check the water supply hose for kinks, ensure the shutoff valve is fully open, and inspect the inlet screen for debris. In the context of water inlet valve dishwasher repair, distinguishing valve-related symptoms from hose or filter issues saves time and reduces potential damage to the appliance. Dishwasher Tips’ analysis shows that valve-related faults are a notable cause of abnormal fills, especially in areas with hard water or older valve assemblies. If symptoms persist after basic checks, plan for a valve replacement or professional evaluation.
How supply conditions affect valve performance
Water supply quality and pressure directly influence valve performance. High water pressure can slam a valve open, leading to leaks around seals if fittings aren’t tight, while low pressure can prevent adequate fill. Mineral buildup from hard water can clog the valve inlet screen and reduce flow, making the valve work harder and speed up wear. Temperature and supply hose length also play a role; longer hoses with flexible fittings may dim the valve’s responsiveness or create micro-leaks at connection points. Ensure the household water supply is steady and free from contaminants by inspecting the main shutoff, the hose for kinks or restrictions, and the screen at the valve inlet. If you live in a hard-water area, consider a water-softener or a prefilter to prolong valve life. In the broader context of water inlet valve dishwasher repair, diagnosing supply conditions helps you determine whether the valve itself is failing or if the upstream plumbing is contributing to the problem. Regular maintenance of filters and screens reduces mineral buildup and improves valve reliability.
Safe diagnostic approaches and testing
Before touching any electrical components, power down the dishwasher and unplug it or switch the circuit off to avoid shock. Start with non-invasive checks: verify the water supply valve is fully open, inspect hoses for kinks, and wipe away any mineral deposits around the inlet screen. If you can access the valve safely, you may test the valve coil’s resistance with a multimeter — compare readings to the manufacturer’s specification in your model’s manual. If the valve clicks but doesn’t open, the coil or plunger may be weak or burnt, indicating a replacement is warranted. For safety, do not run the dishwasher with the valve disconnected or damaged connections exposed. If you’re unsure about electrical testing or gas-free appliances, contact a qualified technician. This diagnostic approach keeps you aligned with best practices for water inlet valve dishwasher repair and minimizes the risk of damage to your appliance or yourself.
Replacement vs repair: choosing the right path
Depending on valve condition, replacement is often the simplest long-term solution. If the coil is burnt, terminals are corroded, or the valve leaks around seals, replacing the valve is typically more reliable than a partial repair. Some older valves can be refurbished by replacing the O-rings and seals, but this option is limited by valve design and availability. Check your dishwasher model for compatibility notes and confirm the valve type (inlet size, electrical connector, and flow rating) before purchasing. Replaced valves should come with a secure seal and proper torque on mounting screws to prevent future leaks. If you’re not comfortable with disassembly or you notice water pooling near electrical components, a professional service call is a prudent choice. A smart approach to water inlet valve dishwasher repair balances safety, cost, and long-term reliability.
How to select a compatible water inlet valve
To select a compatible valve, locate your dishwasher’s model number and serial number, usually found on the door frame or inside the tub. Use those numbers to verify valve size, connector type, and flow rating in the manufacturer’s guide or a trusted parts distributor. The valve should match the hose fittings and electrical plug; mismatches can cause leaks, improper filling, or electrical hazards. When shopping, look for valves with strong seals and corrosion-resistant terminals, and verify the installation instructions clearly specify the orientation and mounting hardware. If possible, choose a valve with a reputable warranty, which often indicates better build quality and easier returns. Ultimately, matching the valve to your model and ensuring a secure, leak-free installation are the keys to a successful water inlet valve dishwasher repair.
Maintenance and preventive care to extend valve life
Preventive maintenance can dramatically extend the life of your water inlet valve. Regularly inspect and clean the inlet screen to remove sediment, mineral buildup, and debris. If your water is hard, consider a pre-filter or water-softener to reduce mineral scale. Replace damaged hoses and worn gaskets promptly, and verify that the dishwasher’s mounting screws are tight but not overtightened. Keep the area around the valve dry to prevent corrosion of electrical terminals and connectors. A simple annual check — especially before heavy-use seasons — can avert common failures. By following maintenance best practices, you reduce the likelihood of valve-related issues and keep your dishwasher performing optimally.
Authority sources
For additional reliability, consult authoritative resources on appliance safety and maintenance. The following sources provide general guidelines on electrical safety, water supply best practices, and consumer protection when handling home appliances:
- https://www.osha.gov
- https://www.ftc.gov
- https://www.energy.gov
Tools & Materials
- Phillips head screwdriver(For removing screws securing the valve and panels)
- Flathead screwdriver(Helpful for prying covers or adjusting clamps)
- Multimeter(To check coil resistance (per manual))
- New water inlet valve(Choose a model compatible with your dishwasher; match connectors and flow)
- Bucket or tray(To catch residual water during disassembly)
- Towels or rags(Keep workspace dry and clean to prevent slips)
- Clips, clamps, or hose fittings(Have spare clamps on hand in case of wear)
- Owner’s manual(Refer to model-specific instructions for valve type and torque)
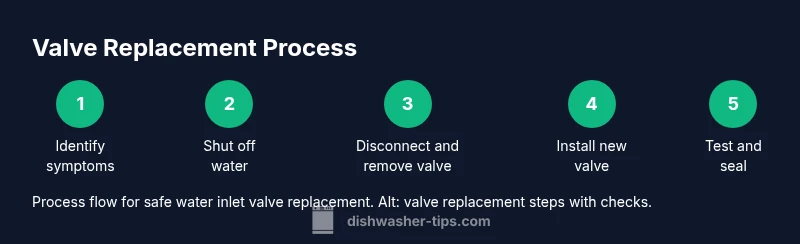
Steps
Estimated time: 60-90 minutes
- 1
Power down and unplug
Unplug the dishwasher from the wall outlet or switch off the dedicated circuit. This eliminates the risk of electric shock during disassembly. If you cannot unplug, switch off the circuit at the home panel and confirm the circuit is de-energized using a tester.
Tip: Taking a photo of wire colors and connector orientation before detaching helps during reassembly. - 2
Shut off water supply
Close the cold water supply valve feeding the dishwasher and place a towel or bucket under the lower panel to catch any drips. Vacuum or wipe up spilled water after removing any components.
Tip: Turn the valve slowly to avoid a sudden surge of water. - 3
Access the valve and disconnect hoses
Remove the access panel and locate the inlet valve at the bottom of the tub area. Disconnect the water supply hose and the drain or overflow line if present, keeping track of each connection for proper reassembly.
Tip: Label hoses if needed and avoid twisting or bending the lines during removal. - 4
Disconnect electrical connections
Carefully unplug the valve’s electrical connector and detach any ground wire if applicable. Do not pull on the wires; use the connector housing to release it.
Tip: If the terminals look corroded, clean or replace the terminal ends with appropriate parts. - 5
Install the new valve
Mount the new water inlet valve in the same orientation as the old one. Reconnect hoses with clamps or fittings, ensuring a snug fit without overtightening. Reattach electrical connections exactly as labeled.
Tip: Hand-tighten first, then snug with a screwdriver—avoid over-tightening which can crack plastic components. - 6
Reconnect, test for leaks, and run a cycle
Restore power, turn the water supply back on, and carefully watch for leaks around the valve. Run a short cycle or a test fill to confirm the valve opens and closes properly and the tub fills to the expected level.
Tip: If you observe a slow leak, re-seat the valve or replace the gasket as needed.
People Also Ask
What are common signs of a faulty water inlet valve?
Common signs include the dishwasher not filling, slow filling, overfilling, or leaks around the valve area. If you hear clicking or see inconsistent fill levels, inspect the valve and related components.
Common signs are not filling, slow filling, or leaks around the valve area. Check the valve and related parts if you notice these symptoms.
Can I test the valve without removing it from the dishwasher?
Some compatibility checks can be performed with the valve in place, such as listening for valve operation and performing a controlled power test if the manual allows. For accurate results, you may need to remove the valve for a visual inspection or resistance test.
You can sometimes test safely without removal, but for accurate results you might need to remove the valve and inspect it.
Is it better to replace the whole valve or repair the coil?
If the coil shows signs of damage, corrosion, or the valve doesn’t seal, replacement is typically the best option. Repairs are often limited to gaskets and screens, which may not resolve deeper coil or seal issues.
If the coil is damaged or the valve leaks, replacing is usually the best choice. Repairs are limited and may not fix the core issue.
Will replacing the valve affect my dishwasher warranty?
Replacement performed by a qualified technician or using manufacturer-approved parts generally maintains warranty eligibility. Always check your model’s warranty terms and the parts’ compatibility.
Warranties vary; using approved parts and professional service typically keeps the warranty intact. Check your model's terms.
How do I reset the dishwasher after a valve replacement?
After installation, run a quick rinse cycle without dishes to purge air from the line. Check for leaks and ensure the fill level is correct before using normally.
Run a quick cycle to bleed air, check for leaks, and verify the fill level before regular use.
What maintenance helps prevent valve failures?
Regularly clean the inlet screen, monitor water hardness, and replace worn hoses and seals. Consider a water softener if you have very hard water to reduce mineral buildup.
Keep the inlet screen clean, watch water hardness, and replace worn parts. A water softener helps in hard-water areas.
Watch Video
What to Remember
- Identify valve symptoms early to prevent major leaks.
- Use model-specific parts for reliable replacement.
- Test after installation to confirm proper fill and no leaks.
- The Dishwasher Tips team recommends preventive maintenance to extend valve life.