What Causes Dishwasher Air Gap Overflow and How to Fix It
Urgent troubleshooting guide: identify blocked air gaps, kinked hoses, and clogged drains causing dishwasher air gap overflow, with step-by-step fixes and prevention tips.

Most often, an overflow is caused by a blocked air gap or clogged drain hose that can't release wastewater properly. Start with the air gap and its cap, remove debris, and rinse. If the hose is pinched or clogged, straighten or replace it. If you still see overflow, inspect the sink drain and disposal for clogs.
Understanding the Overflow: what causes dishwasher air gap to overflow
When a dishwasher finishes a cycle, wastewater should flow up and through the air gap to the drain. If the air gap is blocked or the drain path is obstructed, the water can back up and spill onto the countertop. The exact phrasing of the keyword matters: what causes dishwasher air gap to overflow? It’s usually a combination of debris in the air gap screen, a clogged drain hose, or a blocked sink drain that prevents backflow from escaping. In many homes, mineral buildup from hard water can accumulate deposits in the air gap and reduce flow. Unexpected overflow can also occur if corrugated hoses or fittings are loose, or if the air gap itself is cracked. Understanding these factors helps you triage issues quickly during a busy kitchen cleanup.
Quick checks you can do safely
Visible air gap inspection
- Remove the cap from the air gap at the sink and look for hair, food debris, or mineral buildup. Rinse thoroughly with warm water and a tiny brush. Reassemble carefully to ensure a tight seal.
- If you see corrosion or cracks in the housing, replace the air gap rather than trying to tape a temporary fix.
Drain hose examination
- Trace the drain hose from the dishwasher to the drain or disposal. Look for kinks, squeezes, or crushed sections that can trap wastewater.
- If the hose is damaged, replace it with a new flexible hose designed for dishwashers. Make sure the hose has a smooth interior for optimal flow.
Sink drain and disposal check
- Run hot water down the sink and observe drainage. A slow sink drain often signals a clog that backs up into the air gap.
- If you have a garbage disposal, briefly run it with water to clear jams, then recheck the air gap after the cycle. A clogged disposal can indirectly cause overflow at the air gap.
Common culprits: air gap blockage, hose problems, and plumbing backlogs
- Debris or mineral buildup in the air gap screen can block flow, causing backflow into the dishwasher.
- A kinked, pinched, or crushed drain hose reduces the escape path for wastewater and forces it back toward the air gap.
- A clogged sink drain or disposal creates a backup that pushes wastewater up the hose and out through the air gap.
- Loose fittings, leaks, or a cracked air gap housing can create alternate paths for water and trigger overflow.
By understanding these culprits, you can prioritize the fixes that restore proper drainage first.
Inspecting the air gap, hose, and drain in sequence
Start with the air gap, then move to the hose, and finally inspect the sink drain. This order keeps pressure from feeding back into the dishwasher while you test. If you uncover a blockage in any part, resolve it before retesting.
Safety considerations and warnings
Always unplug the dishwasher or switch off the circuit breaker before disassembling any components. Water and electricity are a dangerous combination; use dry hands and work on a dry surface. If you smell burning or notice melted wiring, stop immediately and call a licensed technician. Do not use harsh solvents to clean the air gap; stick to warm water and a soft brush. Regular maintenance is safer than reactive repairs.
Preventive maintenance to avoid future overflow
Create a simple maintenance routine to keep the air gap and drainage pathway clear. Clean the air gap every 3–6 months, check the drain hose for kinks, and run hot water through the sink regularly to prevent mineral buildup. If your water is hard, consider a light mineral scale cleanser for the plumbing at least twice a year. Inspect fittings for tightness during routine kitchen maintenance and replace worn parts promptly.
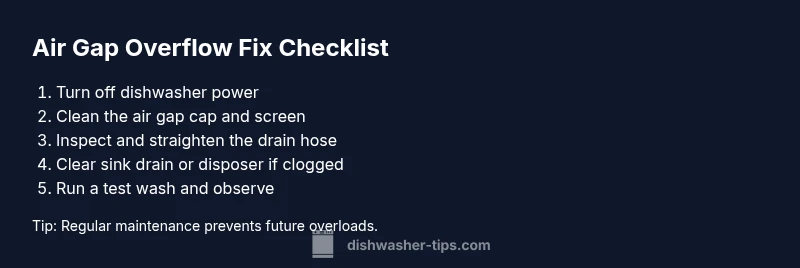
Steps
Estimated time: 25-40 minutes
- 1
Power down and locate the air gap
Unplug the dishwasher or switch off the circuit at the breaker. Locate the air gap at the sink or countertop and remove the cover to inspect for debris. Wipe and rinse, then set the cap aside for later reassembly.
Tip: Have towels ready to catch any residual water when you remove the air gap cap. - 2
Clean the air gap cap and screen
Take the air gap apart and rinse the cap, screen, and interior passages with warm water. Use a small brush to remove mineral buildup or food particles. Reassemble securely and wipe dry before testing.
Tip: Avoid using harsh cleaners that could corrode the air gap housing. - 3
Inspect and straighten the drain hose
Follow the hose from the dishwasher to the drain or disposal. Look for kinks, sharp bends, or crushed sections and straighten or replace as needed. Ensure the hose is not compressed by cabinet hardware.
Tip: Use zip ties only where the hose is supported to avoid new kinks. - 4
Check sink drain and disposal
Run hot water in the sink and observe drainage. If the sink drains slowly, use a plunger or snake to clear clogs. If you have a disposal, run it briefly with water to clear jams, then recheck the air gap.
Tip: Never put hard objects into the disposal to avoid damage. - 5
Reassemble and test
Reconnect all parts, ensure the air gap cap is snug, and run a test wash with nothing in the dishwasher. Watch for overflow during the cycle to confirm the path is clear.
Tip: Always run an empty cycle first to validate the fix. - 6
Prevent future overflow
Establish a regular maintenance routine: clean the air gap every few months, inspect the drain hose, and keep the sink drain free of obstructions. If issues recur, consider professional service.
Tip: Set a calendar reminder to check air-gap hardware quarterly.
Diagnosis: Dishwasher air gap overflow after a wash cycle
Possible Causes
- highBlocked or dirty air gap screen
- highClogged drain hose or kinked hose
- mediumClogged sink drain or disposal backflow
- lowLoose connections or cracked air gap housing
- lowImproper installation or backpressure from plumbing vent
Fixes
- easyClean the air gap cap and screen; rinse with warm water and brush away debris
- easyStraighten or replace a kinked/drain hose; ensure a smooth, unobstructed path to the drain
- mediumInspect the sink drain and disposer for clogs; clear with plunger or plumber’s snake if needed
- easyReconnect fittings securely and test with a short cycle to confirm no overflow
- mediumIf overflow persists, replace the air gap or consult a licensed plumber for deeper plumbing issues
People Also Ask
What causes dishwasher air gap to overflow?
Overflow typically results from a blocked air gap, a clogged or kinked drain hose, or a backed-up sink drain. Debris buildup and mineral deposits can compound the issue. Addressing these components in the right order often resolves the overflow.
Overflow usually happens due to a blocked air gap, clogged hose, or a backed-up sink drain. Start with cleaning the air gap and hose, then check the drain.
Can I clean the air gap myself safely?
Yes. Remove the cap, rinse the screen, and brush away debris with warm water. Reassemble securely and run a test cycle. If the air gap is cracked or the cap won’t seal, replace it.
You can clean it safely by rinsing and brushing away debris, then retesting. Replace damaged parts if necessary.
Could a clogged disposal cause the air gap to overflow?
A clogged disposal can back up into the sink, increasing flow through the drain line and causing overflow at the air gap. Clear the disposal as part of your overall diagnosis.
A clogged disposal can push water back up; clearing it often resolves the overflow at the air gap.
How do I know if the air gap is defective?
Signs of a defective air gap include persistent overflow after cleaning, visible cracks or corrosion, and poor seal. If cleaning doesn’t help, replacement is usually the fix.
If it still overflows after cleaning and you see cracks, replace the air gap.
Should I call a plumber or replace parts myself?
For straightforward clogs and air-gap cleaning, DIY is often sufficient. If you face repeated overflow, a cracked air gap, or plumbing backpressure, a professional plumber is advised.
DIY is fine for simple fixes; call a plumber if problems persist or the plumbing seems damaged.
How often should I check the air gap to prevent overflow?
Regular checks every few months help catch buildup early. Align your maintenance with your hard-water level and household usage.
Check the air gap every few months to prevent surprises.
Watch Video
What to Remember
- Inspect air gap first for debris buildup.
- Check drain hose for kinks and replace if damaged.
- Clear sink drain/disposal to remove backpressure.
- Test with an empty cycle before using with dishes.
- Implement routine maintenance to prevent recurrence.