What Is Wrong with Dishwasher That Won t Drain? A Troubleshooting Guide
Urgent, practical troubleshooting for a dishwasher that won’t drain. Learn quick checks, step-by-step fixes, safety notes, and when to call a pro.

If your dishwasher won t drain, the most likely culprits are clogs in the filter or sump, a kinked or blocked drain hose, or a faulty drain pump. Start with a quick check of the filter, then inspect the hose for kinks, and finally test the pump. If these basics don t solve it, follow the diagnostic flow for deeper fixes.
Why the Dishwasher Won't Drain: Common Scenarios
What is going on when a dishwasher won t drain is usually practical and fixable, not mysterious. In many homes, the first questions are about debris, clog points, and incorrect hose routing. What is wrong with dishwasher that won t drain is often a matter of simple maintenance that was missed or postponed. According to Dishwasher Tips, drain problems most often originate in the sink-side systems (filters, sump, and hoses) or in the pump assembly. A few recurring scenarios include a clogged drain filter, a blocked sump with food remnants, a kinked or blocked drain hose, or a pump that's not turning properly. These issues typically manifest as water left at the bottom, standing water after the cycle, or water siphoning back into the tub from the drain. The good news: with a systematic approach, you can identify the culprit and perform a safe fix without expensive service calls. Keep a small tray, towels, and basic tools handy, and proceed step by step to reduce mess and risk of electrical shock.
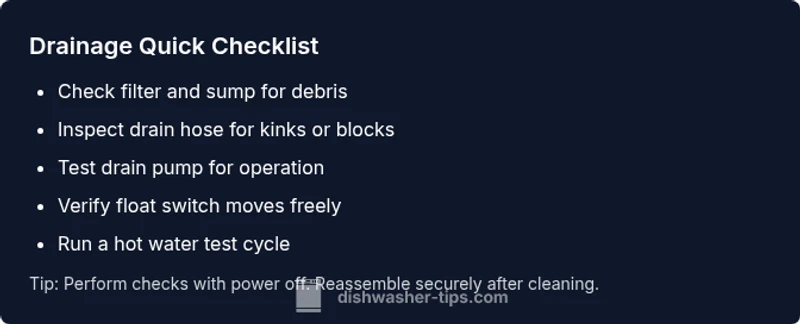
- Common causes: clogged filter/sump, hose kinks or blockages, faulty drain pump, or a stuck float switch.
- Quick wins: clean the filter and sump, straighten the drain hose, and run a test cycle with hot water.
- When to escalate: if you hear grinding noises, smell burnt plastic, or the problem persists after the basics.
Quick Diagnostics You Can Do Before Calling a Pro
Before you dive into hands-on fixes, run through a quick diagnostic checklist to narrow down the problem. This section provides fast, safe checks you can perform with the unit unplugged or powered off. Start with the simplest possibilities and move toward more involved checks. Remember, if you encounter exposed wiring, a cracked hose, or water on the floor, stop and call a plumber or appliance technician.
- Check for standing water in the bottom: If water is present, you may have a block in the drain filter or pump.
- Inspect the drain filter: A clogged filter is the leading cause of drainage problems. Remove and rinse under running water to remove debris.
- Look at the drain hose: Ensure there are no kinks or sharp bends. Verify the hose is not crushed or clogged by objects under the sink.
- Listen for the drain pump: A humming sound without drainage can indicate a failing pump or impeller jam.
- Inspect the float switch: If the float gets stuck, it may falsely signal a full tub, preventing drainage.
- Run a test cycle with hot water: Hot water helps dissolve fatty residues and test whether the drain path clears.
- Check for error codes: Some models display codes on the control panel that point to an outlet or sensor issue.
If you complete these checks and the dishwasher still won t drain, proceed to targeted inspection of filters and hoses as described in the next sections.
How to Inspect the Drain Filter and Drain Hose
The drain filter and drain hose are the most common choke points for drainage problems. A thorough inspection can reveal clogs, misalignment, or damage that prevents water from exiting the tub. Start by removing the lower rack and locating the filter assembly at the bottom of the tub. Rinse the filter under warm water, removing any sediment, food particles, or mineral buildup. If your model has a removable sump screen, take it out and scrub with a soft brush.
Next, check the drain hose that exits the dishwasher and connects to the sink drain or garbage disposal. Detach the hose from the drain connection and inspect for kinks, cracks, or mineral buildup inside the hose. If you find buildup, flush the hose with water or use a flexible brush to clear it. Reattach securely, ensuring a tight, non-leaking connection and that the hose has a gentle downward slope to prevent backflow.
- Tip: Keep a small bucket handy to collect residual water during hose disassembly.
- Caution: Do not exceed the hose length or compress it with cabinet hardware; this can create a trap and impede drainage.
Step-By-Step Fix: Cleaning the Filter and Removing Clogs
A clean filter and sump are usually enough to restore drainage in many appliances. This step-by-step fix walks you through the most common maintenance tasks to restore flow. Always unplug the machine before disassembly and follow the manufacturer’s instructions for your model.
- Unplug the dishwasher and pull out the lower rack to access the filter. Remove the filter assembly and rinse under warm running water. Use a soft brush to remove stubborn debris, and wipe the sump with a damp cloth. 2) Reassemble the filter and run a quick drain test to see if water exits. 3) If water remains, remove the drain hose from the sink or disposer and inspect for obstructions. Use a flexible brush or a long pipe cleaner to clear any blockage. 4) Reconnect the hose, ensuring it sits lower than the dishwasher outlet to prevent backflow. 5) Run a short cycle with no dishes and hot water to flush the system.
- Pro tip: Keep a flashlight handy to spot debris in hard-to-see corners of the sump.
- Caution: Do not use metal tools; they can damage plastic components inside the tub.
Electrical and Sensor Checks: When Water Not Draining Is Electrical
If the mechanical parts seem clear, the issue might be electrical or sensor-driven. Modern dishwashers rely on sensors and a float switch to regulate drainage. A faulty float switch can prevent draining by signaling that the tub is full. Inspect the float assembly for freedom of movement; if it sticks or is misaligned, reposition it or replace the switch as needed. If your model shows an error code related to drainage, consult the manual for the exact meaning and recommended action.
In some cases, the control board may fail to activate the drain pump. Look for visible wiring damage or burn marks near the pump and relay connections. If you suspect a control issue, do not attempt a board replacement unless you have proper training or a service warranty that covers repairs.
- Warning: Electrical testing should only be performed if you are comfortable with appliance electronics.
- Note: If you smell burnt plastic, stop and call a professional.
Prevention Tips to Stop Drain Problems from Returning
Prevention is the best cure for repeated drain problems. Implement a simple maintenance routine to keep drainage clear and reduce the likelihood of clogs forming in the future. Clean the filter and sump after every few uses, and run an occasional deep clean cycle using a dishwasher-safe cleaner to break down mineral buildup. Use a proper amount of detergent and avoid overfilling the tub, which can produce excess suds and trap debris in the filter.
- Schedule a monthly filter check and clean.
- Ensure the drain hose is free of kinks and sits correctly under the sink.
- Use only recommended detergents and avoid garbage-disposal connection issues that can backflow into the dishwasher.
When to Call a Professional: Safety and Warranty Considerations
If the basic cleaning steps do not restore drainage, or if you notice water leaks, unusual noises, or electrical smells, contact a licensed appliance technician. A pro can inspect the pump impeller, seals, and wiring harnesses safely and confirm whether a component needs replacement. If your unit is still under warranty, check whether the issue is covered and avoid DIY fixes that could void coverage. Do not attempt to replace critical parts unless you have proper training and the proper replacement parts from the manufacturer.
Steps
Estimated time: 45-60 minutes
- 1
Power off and access the tub
Unplug the dishwasher or switch off at the breaker. Remove the lower rack to access the filter and sump area. This protects you from shocks and prepares you for a safe inspection.
Tip: Use a flashlight to spot debris near the filter. - 2
Remove and clean the drain filter
Take out the filter assembly and rinse thoroughly under warm water. Remove any caked-on food and wipe the sump area clean.
Tip: Do not use metal tools to avoid scratching plastic parts. - 3
Inspect and flush the drain hose
Detach the drain hose from the sink or disposal and check for clogs or kinks. Flush the hose with water and reattach with a secure, sloped fit.
Tip: Place towels to catch water during removal. - 4
Check the drain pump/impeller
Access the pump assembly if accessible and inspect the impeller for obstructions. Remove any debris carefully and ensure the impeller spins freely.
Tip: Only handle the pump components if you are comfortable with disassembly. - 5
Test the float switch and sensors
Move the float up and down to confirm it moves freely. If it sticks, adjust its position or replace the switch according to the manual.
Tip: A stuck float often mimics a 'full' condition. - 6
Run a test cycle
With no dishes inside, run a short hot-water cycle to verify drainage. Listen for the pump and confirm the tub empties properly.
Tip: If the tub still holds water, proceed to professional service.
Diagnosis: Dishwasher won t drain after a cycle
Possible Causes
- highClogged drain filter or sump debris
- mediumKinked or blocked drain hose
- mediumFaulty drain pump or impeller obstruction
- lowFloat switch stuck or misadjusted
Fixes
- easyClean the drain filter and sump debris; reassemble and retest drainage
- easyInspect drain hose for kinks or blockages; straighten and flush
- mediumCheck the drain pump and impeller for obstructions; clear or replace as needed
- mediumTest float switch operation and adjust or replace if defective
- hardConsult model-specific troubleshooting or service manual for control-board errors
People Also Ask
Why won t my dishwasher drain after a wash cycle?
Most drain problems come from clogs in the filter or sump, a kinked drain hose, or a failed drain pump. Start with cleaning the filter, check the hose routing, and test the pump. If none of these fix it, use the diagnostic flow to identify the deeper issue.
Most drain problems come from clogs, a kinked hose, or a bad pump. Start with the filter, check the hose, then test the pump, and proceed with the diagnostic flow if needed.
Can a clogged filter really stop drainage?
Yes. A clogged filter is the leading cause of drainage problems. Cleaning the filter and sump usually restores drainage. If water remains, inspect the hose and pump next.
Yes, a clogged filter often stops drainage. Clean it, then check the hose and pump if needed.
Is a faulty drain pump common on older models?
Drain pump failures occur with older units or after heavy use. If the pump doesn’t run or sounds strained, replacement may be necessary. It's best to verify with a tech if you’re unsure.
A failing drain pump is common in older machines. If it doesn’t run or sounds strained, you may need a replacement.
What safety steps should I take before inspecting the dishwasher?
Always unplug the unit and wear protective gloves. Avoid working with water near electrical outlets. If you see damaged wiring or smells of burning, stop and call a professional.
Unplug first, wear gloves, and avoid touching wiring. If you smell burning, call for service.
How do I test the drain hose for clogs?
Detach the hose and flush it with water. Use a flexible brush to clear any interior buildup. Reattach securely, ensuring a straight path without sharp bends.
Unfold, detach, flush, and clear the hose with a brush. Reattach firmly.
Should I call a professional if no drainage solutions work?
If basic checks fail or you’re uncomfortable with electrical components, contact a licensed appliance technician. They can diagnose pump, control board, and sensor issues safely and efficiently.
If the basics don’t work, it’s time to call a professional for a safe, thorough diagnosis.
What maintenance can prevent future drainage problems?
Regularly clean the filter and sump, use proper detergent, and avoid overloading. Periodically run a hot-water cleaning cycle to dissolve grease and mineral buildup.
Keep the filter clean, use the right detergent, and run a hot-water clean cycle occasionally.
Can drainage issues void my warranty?
DIY fixes can affect warranty coverage. Review your warranty terms and contact the manufacturer or a certified tech if you’re unsure.
Check the warranty terms; DIY fixes can affect coverage, so confirm before proceeding.
Watch Video
What to Remember
- Start with the basics: clean filters and inspect the hose.
- Test the pump and float switch if basic checks fail.
- Always unplug before any disassembly for safety.
- Call a pro if electrical or control-board issues are suspected.