When Dishwasher Says Check Water: Urgent Troubleshooting Guide
Urgent, step-by-step troubleshooting for the 'check water' message on dishwashers. Learn fast checks, how to test water flow, and when to call a pro to prevent flooding and save time.

The most likely cause is a blocked or mis-seated water inlet valve. Start by checking the water supply shut-off, ensuring the inlet hose isn’t kinked, and clearing the screen/filter at the valve. If the message persists, power cycle the unit and run a short cycle to verify flow; if unresolved, proceed with the diagnostic flow.
Why the check water message happens
If you’re wondering what to do when dishwasher says check water, you’re not alone. According to Dishwasher Tips, this alert points to a water-flow issue that can originate from the supply, filters, or valve hardware. The warning is designed to protect your home from leaks and flood damage, but in most homes it has a practical, safe fix you can perform without fancy tools. The message serves as a trigger to systematically verify water delivery, sensor status, and valve operation. By following a structured approach, homeowners and renters can restore normal operation quickly while avoiding unnecessary parts replacement. This article outlines the diagnostic flow, actionable checks, and safe steps to reclaim reliable water delivery. It also covers when to call a pro and how to prevent future issues.
Quick checks you can do now
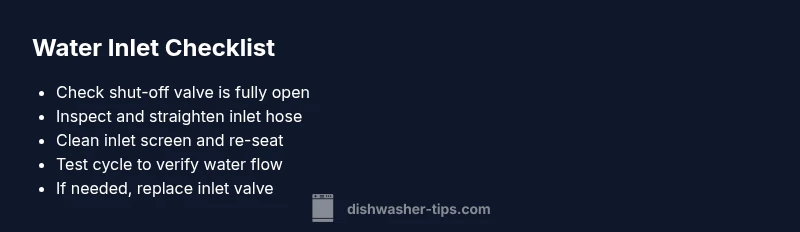
- Confirm the main water shut-off under the sink is fully open.
- Inspect the dishwasher supply hose for kinks or twists and ensure connections are snug.
- Inspect the inlet screen or filter at the valve for debris and clean if needed.
- Look for any damp spots along hoses or the base of the dishwasher indicating a leak.
- If you recently moved the unit or reran plumbing, reseat the hose and valve to ensure a proper seal.
Note: Do not operate the dishwasher if you see active leaks. If these quick checks clear the message, you’re done; if not, continue with the diagnostic flow.
Inspect the water supply and hoses
The first line of defense is the water supply. Ensure the supply valve is fully open and the house water pressure is normal. Detach and inspect the inlet hose for any pinches or kinks that could impede water flow. Reconnect with a firm, straight path to the valve. Check for a loose clamp that might allow air or airlock to develop. If the hose looks worn or swollen, replace it. A damaged hose can mimic valve problems and cause the appliance to report a flow error. After verifying basic plumbing, run a quick test cycle to observe whether water enters the tub smoothly and without interruptions.
Examine the inlet valve and screens
Next, inspect the inlet valve on the dishwasher side. A mis-seated valve or a clogged inlet screen is a frequent cause of the check water alert. Remove the screen and rinse out any sediment or mineral buildup. If your model has a replaceable inlet valve, consider installing a new one if cleaning doesn’t restore flow. When reinstalling, ensure the valve is aligned correctly and seated securely. If you notice signs of wear, corrosion, or frequent blockages, replace the valve to restore reliable water delivery and prevent repeated alerts.
Check the float assembly and pressure switch
Some dishwashers rely on a float assembly and pressure switch to detect water level. If the float sticks or the switch misreads, the unit may trigger the check water message even when water is present. Inspect the float for free movement; clean any debris hindering its motion. Test the switch with a multimeter if you have one, or perform a controlled test by powering the unit and slowly filling the tub to see if the level changes as expected. A malfunctioning float or switch can require replacement to restore accurate readings and prevent false alerts.
Look for kinks, leaks, and water pressure issues
Beyond the inlet components, examine the entire water path for leaks or blocked lines. A small leak can cause air to disrupt pressure sensing, triggering the alert. Check door seals, spray arms, and the sump for mineral buildup. If you have hard water, mineral deposits may accumulate at joints and restrict flow; consider a descaling cycle or a professional professional cleaning if needed. Ensure the drain system is not drawing air backward, which can also affect pressure readings. Addressing these leaks or restrictions helps stabilize the water supply and reduce repeated check water messages.
Run a controlled test cycle to verify water flow
With basic checks complete, run a controlled test cycle using cold or warm water and no heavy pre-wash options. Observe whether water fills correctly, the tub level rises smoothly, and there are no unusual noises. If you notice slower fill, air sounds, or a delayed inlet, stop the cycle and recheck hoses and valve seating. Document any anomalies to share with a technician if you need professional help. A successful test cycle confirms the path is clear and the water flow is steady, reducing uncertainty about future cycles.
When to reset or power cycle the dishwasher
If the system appears to be functioning but the message lingers, try a safe reset. Power off the dishwasher for 5–10 minutes, then turn it back on and start a short cycle without dishes. Resetting clears transient faults that can confuse sensors. If the message reappears after the reset, proceed to a deeper diagnostic flow or contact a professional. Do not ignore repeated alerts, as they can indicate underlying hardware issues that require repair.
When professional help is needed
If you have completed the above steps and the dishwasher still shows check water, it’s time to contact a licensed appliance technician. Recurrent alerts may indicate a failing inlet valve, a faulty sensor, or wiring problems that require specialized equipment and expertise. A pro can perform pressure tests, check for micro-leaks, and safely replace components without risking water damage. Always verify your warranty coverage first, and schedule service promptly to minimize water exposure and avoid bigger repairs.
Prevention: keeping the water inlet healthy
Preventive care reduces future occurrences of the check water message. Regularly inspect water supply lines and hoses for wear, kink resistance, and secure connections. Periodically clean the inlet screen to remove mineral sediment and debris. Use a water softener if you have hard water, and consider a routine descaling cycle recommended by your dishwasher brand. By maintaining clean filters, secure fittings, and steady pressure, you’ll minimize the chances of water-flow faults disrupting cycles.
Steps
Estimated time: 60-90 minutes
- 1
Power and safety prep
Begin by unplugging the dishwasher and turning off the water supply to prevent accidental leaks. Gather towels, a flashlight, and a cup to catch any drips. This step reduces risk while you inspect components.
Tip: Working from a dry, clean area helps you spot leaks quickly. - 2
Check water shut-off and hose
Verify the shut-off valve is fully open and the hose is straight, not bent or crushed. Disconnect and re-seat both ends to ensure a snug fit. If the hose shows wear, replace it.
Tip: Use two hands when reconnecting hoses to avoid kinking. - 3
Inspect inlet screen
Locate the inlet screen at the valve; remove and rinse under running water. Use a soft brush if debris persists. Reinstall carefully ensuring the screen sits correctly.
Tip: Do not use sharp tools that could damage the screen. - 4
Examine valve seating
Check that the inlet valve sits flush and is not loose. If movement is detected, secure mounting or replace the valve as needed. A loose valve can cause air leakage and false alerts.
Tip: Take photos before disassembly to aid reassembly. - 5
Test float switch
Access the float assembly and ensure it moves freely. If you hear a stuck or irregular motion, gently free it. Use a multimeter if available to verify switch continuity.
Tip: Even slight resistance can trigger erroneous readings. - 6
Run a controlled test cycle
With the unit reassembled, run a short cycle with no dishes. Observe filling, sealing, and any leaks. Note how quickly water enters and whether the tub fills evenly.
Tip: Watch for spurts or pauses in water flow during fill. - 7
Reset if needed
If the message persists after repairs, perform a safe reset by unplugging for several minutes, then plug back in and run a diagnostic cycle.
Tip: Avoid jolting the unit during reset. - 8
Assess for deeper issues
If tests fail, document symptoms and timelines. A professional diagnosis may be required for valve, sensor, or wiring faults.
Tip: Prepare model number, serial, and recent service history for the tech.
Diagnosis: Machine displays 'check water' message
Possible Causes
- highWater supply shut-off is closed or restricted
- highInlet hose kinked, loose, or not connected securely
- highInlet screen/filter clogged with sediment
- mediumFaulty or worn inlet valve
- mediumFloat switch stuck or misreading
- lowLow water pressure from the house supply
Fixes
- easyOpen the household shut-off valve fully and re-check the hose connection
- easyStraighten/reseat the inlet hose and tighten clamps
- easyRemove and clean the inlet screen; reinstall securely
- hardReplace the inlet valve if cleaning doesn't restore flow
- mediumTest and, if needed, replace the float switch or check sensor wiring
- mediumVerify house water pressure or call a plumber if pressure is insufficient
- easyRun a controlled test cycle to confirm flow after repairs
- easyIf unresolved, schedule professional service
People Also Ask
What does the 'check water' message mean on my dishwasher?
The message signals a potential water flow issue — problems with supply, valves, filters, or sensors. It’s a safety alert designed to prevent overflow and damage. Start with the simplest checks and work toward more involved diagnostics.
It means there might be a water flow problem. Start with the supply, hoses, and filters and only go further if needed.
I checked the water supply; what’s next if the message remains?
Proceed through the diagnostic flow: inspect the inlet hose and screen, test the float and sensor, and perform a controlled test cycle. If the alert persists after these steps, consider professional service.
If the message stays after checks, continue with the diagnostic flow and consider a technician if needed.
Can a clogged inlet screen cause this alert?
Yes. Debris or mineral buildup can restrict water flow, triggering the check water message. Cleaning the screen often resolves the issue, but replacements may be needed if wear is evident.
A clogged screen can trigger the alert; cleaning or replacing it usually fixes the problem.
Is it safe to run the dishwasher with this warning?
If you suspect a flood or visible leak, do not run the dishwasher. If there are no leaks and you have completed safe checks, a short cycle can help confirm the fix.
If there’s a leak or you’re unsure, don’t run it. Otherwise, test with a short cycle.
How often should I inspect the inlet screen?
Inspect the inlet screen during regular maintenance, especially in areas with hard water or mineral buildup. Cleaning every 6–12 months is a practical guideline for many models.
Check the inlet screen during routine maintenance, typically every 6 to 12 months.
When should I call a professional?
Call a professional if you’ve completed the basic checks, performed a reset, and the message still appears. A technician can diagnose valve, sensor, or wiring faults safely.
If basic checks don’t fix it, it’s time to get a professional to diagnose deeper issues.
Watch Video
What to Remember
- Check water supply first to resolve most issues.
- Inspect hoses and inlet screen for blockages.
- Run a controlled test cycle to verify water flow.
- If unresolved, contact a licensed technician.
- Prevent recurrence with regular cleaning and filter checks.