Why a Dishwasher Holds Water in the Bottom: Quick Diagnosis and Fixes
Learn how to diagnose and fix standing water in the bottom of a dishwasher. Step-by-step checks, common causes, safety tips, and when to call a pro to prevent leaks and keep dishes clean.

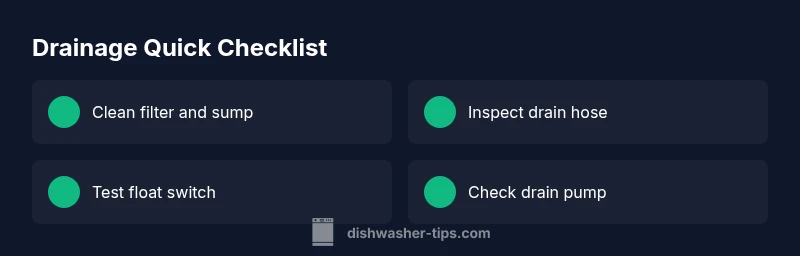
A dishwasher that holds water in the bottom is usually caused by drainage or pump issues. Start with the simplest checks: unplug, inspect and clean the filters, and examine the drain hose for kinks. If the water persists, test the float switch and pump for proper operation. This approach resolves many common drainage problems without tools.
Why would a dishwasher hold water in the bottom
If you notice standing water in the tub after a cycle, the likely culprit is drainage—either a clogged filter, a blocked drain hose, a faulty pump, or a faulty float switch. According to Dishwasher Tips, standing water is a common symptom of drainage problems rather than a failed wash. Understanding the basics can help homeowners triage safely while avoiding costly repairs. In many cases, you can diagnose and fix simple drainage issues with common household tools. Start with the simplest checks and move toward more involved tasks only if the problem persists. The bottom line is to isolate whether water remains because it cannot leave the tub or because a component is failing to initiate drainage properly. By approaching the issue methodically, you’ll save time, reduce risk, and prevent water damage in your kitchen.
Common causes and quick checks
- Clogged or dirty filter and sump screen: Debris can block water flow to the drain. Clean the filter and remove trapped grit.
- Faulty float switch or sensor: If the float doesn't rise, the dishwasher won't trigger the drain or finish the cycle properly.
- Damaged or blocked drain pump: A jammed impeller or motor failure prevents pumping water out.
- Kinked or blocked drain hose: A crimped hose restricts flow to the sink or disposal.
- Connection to disposal: A loose or clogged disposal inlet can keep water in the tub.
Perform quick checks: unplug the unit, remove the lower wash rack, and visually inspect these parts before attempting tools. If you find obvious clogs, clear them with a soft brush and running water. If the water still remains after clearing obvious debris, move to the next diagnostic steps.
How to inspect the drainage path safely
Safety first: unplug the dishwasher and turn off the circuit, then access the sump area from the bottom panel. Remove the filter assembly and check for hair, food particles, and mineral buildup. Rinse under running water and scrub with a soft brush. Inspect the drain hose for kinks or obstructions. If the hose is connected to a garbage disposal, ensure the knockout plug is removed and the connection is clear. A clogged hose or disposal connection can back up water into the tub, especially on newer models that rely on gravity to drain. Document any damaged components for later replacement and avoid forcing parts—use steady, gentle movements to prevent damage to fittings.
Test the float and pump, the two most common failure points
The float is a small buoy that tells the dishwasher when to empty. Manually move the float up and down; it should move freely and return to the bottom when released. If it sticks, clean or replace the float assembly. For the pump, listen for the motor running during drain. If you hear nothing or a grinding noise, the pump impeller may be damaged. A faulty float or a failed pump typically requires part replacement. In many cases, you can access and replace the float assembly with basic hand tools. If the pump is accessory-driven or integrated into a sealed unit, you may need professional service to avoid improper resealing.
Step-by-step practical fixes (drain-focused) & when to escalate
- Power down and access the interior: unplug the unit, remove the lower rack, and locate the filter assembly. 2) Clean filters and sump: remove debris, rinse, and reassemble. 3) Inspect the float mechanism: verify it moves freely; if sticky, replace the float assembly. 4) Check the drain hose: straighten any kinks, detach and flush the hose to clear blockages. 5) Inspect the drain pump: listen for operation during a drain cycle; remove the pump cover if safe to inspect the impeller. 6) Re-test: run a complete cycle with a small amount of dishes to confirm drainage. If standing water persists after these steps, it’s time to call a professional technician. Tip: always label and photograph connections before disassembly to simplify reassembly and avoid mistakes. Progressively escalating steps help minimize repair costs while ensuring safety.
Safety tips & warning signs to avoid common mistakes
- Always unplug the appliance and switch off the circuit before starting any work. Water and electricity are a dangerous combination. - Use a flashlight to inspect tight spaces; wear gloves to protect hands from sharp metal edges. - Do not force hoses or fittings—over-tightening can crack plastic components or create leaks. - If you see burnt smells, exposed wires, or smoke, stop immediately and contact a licensed technician. - Keep the countertop dry during the process to prevent slips and accidental water damage.
Prevention tips to keep end-user drainage reliable
- Clean filters and sump every 1–2 weeks when the dishwasher is in heavy use; schedule a monthly check for hard-water buildup. - Use the right detergent amount and avoid gel pods that leave residue in the filter. - Run hot water at the sink before starting a cycle to improve drainage efficiency. - Avoid putting large food scraps or bones down the unit; use a disposal or trash to reduce clogs. - If you have a disposal, run it briefly before starting the dishwasher to ensure the drain is clear. Taking these proactive steps reduces the likelihood of standing water in future cycles.
Steps
Estimated time: 45-60 minutes
- 1
Power down and access the interior
Unplug the dishwasher and remove the lower rack to access the filter area. Use a flashlight to locate the sump and drain components. Do not force panels; a gentle lift or slide is enough to reveal the filter and hose attachments.
Tip: Take a quick photo of connections before disconnecting any hose or clip to aid reassembly. - 2
Clean the filter and sump
Remove the filter and any visible debris from the sump. Rinse under warm water and scrub with a soft brush. Reinstall once clean and confirm there are no loose debris lingering in the sump.
Tip: A clogged sump is one of the easiest and most common causes of bottom-water issues. - 3
Inspect the float mechanism
Find the float assembly and move it up and down to ensure it moves freely. If it sticks, operate the mechanism gently with a soft cloth or replace the float assembly if needed.
Tip: A stuck float can falsely signal the dishwasher to stop draining. - 4
Check the drain hose and disposal connection
Trace the drain hose from the tub to the connection at the sink or disposal. Look for kinks or bends and detach the hose to flush it with water. Reattach securely with no leaks.
Tip: When connected to a disposal, ensure the knockout is removed and the connection is clear. - 5
Test the drain pump
With the unit reassembled, run a drain cycle without dishes to listen for the pump operation. If you hear grinding, buzzing, or no sound, the pump may be failing and require replacement.
Tip: Never attempt pump replacement unless you have the right model-specific guidance. - 6
Run a full cycle and observe
Load a few dishes, select a normal cycle, and observe drainage. If the tub dries out and no water remains, the issue is resolved. If water remains, escalate with a professional.
Tip: Document symptoms and steps taken to speed up service calls.
Diagnosis: Water remains in the bottom after a normal cycle
Possible Causes
- highClogged or blocked drain filter
- highFaulty float switch not rising
- mediumDamaged or clogged drain pump
- lowBlocked drain hose or garbage disposal connection
Fixes
- easyClean filters, remove debris, and run a test cycle
- easyInspect float and float switch mechanism for free movement; replace if stuck
- mediumInspect drain pump impeller for obstructions; replace if damaged
- easyCheck drain hose for kinks and ensure proper routing; clear clogs with snake or replace hose
People Also Ask
Why is there water still in the bottom after a cycle?
Standing water usually means the drain path is blocked or the float/pump isn’t signaling drainage properly. Start with cleaning filters, inspecting the drain hose, and testing the float switch. If water remains after these checks, a professional inspection may be needed.
There’s water after a cycle most often due to a clogged drain path or a bad float or pump. Start by cleaning the filter, checking the hose, and testing the float switch. If it still holds water, call a pro.
Is a clogged filter the most common cause?
Yes, a clogged filter is a frequent cause of drainage problems. Debris in the sump can block water flow to the drain. Regular cleaning of the filter and sump prevents most standing-water issues.
A clogged filter is a common culprit. Regular cleaning of the filter and sump helps prevent standing water.
Can hard water contribute to this problem?
Hard water can lead to mineral buildup that silently narrows passages in the filter, hose, and pump. This reduces drainage efficiency over time and can cause water to pool in the tub.
Hard water buildup can slow drainage and lead to standing water. Regular cleaning helps, and consider a water-softening solution if you have very hard water.
Should I replace the drain pump myself?
Pump replacement is doable for some models with the right parts and instructions, but it can be tricky and may require disassembly and seal checks. If you’re unsure, consult a professional to avoid further damage.
DIY pump replacement is possible for some models, but it’s safer to hire a pro if you don’t have the exact guidance.
How can I prevent this from happening again?
Regularly clean filters, use the right detergent, avoid large food pieces in the drain, and run hot water through the sink before starting a cycle. Periodic checks of hoses and the disposal connection reduce future drainage problems.
Keep filters clean, avoid big food scraps, and run hot water before cycles to prevent future drainage issues.
Watch Video
What to Remember
- Start with drainage basics: filter, hose, and float.
- Clean and inspect before replacing parts.
- Test components sequentially to avoid unnecessary costs.
- Call a professional if water remains after fixes.