Water on Bottom of Dishwasher: Troubleshooting Guide
Discover fast, practical steps to fix water on bottom of dishwasher. Learn common causes, safe checks, and prevention tips to keep your appliance draining properly.

Water on bottom of dishwasher is most often caused by a clog or drainage issue. Start by removing and cleaning the filter and sump screen, then inspect the drain hose for kinks or clogs and clear the air gap if your model has one. If water remains, test the drain pump and check valve.
Water on the bottom of the dishwasher: what's happening and why it matters
When your dishwasher finishes a cycle and you find a pool of water on the bottom, you're seeing a drainage problem in action. Water on the bottom of the dishwasher can be caused by a clogged filter, a blocked drain hose, or a failing pump. If ignored, standing water can lead to foul odors, mold growth, and rusting of metal components. According to Dishwasher Tips, the majority of bottom-water issues stem from simple maintenance items rather than major failures. This means you can often fix the problem with routine steps rather than costly repairs.
Before you start tearing panels apart, confirm the water-on-the-bottom symptom is accurate and not stray water from loading a wet dish. Notice whether the water is clear or soapy; suds suggest a rinse aid or soap not rinsed out fully, while clear water indicates drainage obstruction. Gather a few basic tools: a flashlight, a towel, a small container to catch water, and a screwdriver if you need to inspect panels. The goal in this initial stage is to identify the simplest cause you can address.
In this article, you will learn a practical, staged approach to diagnosing drainage problems, including checks you can perform safely, a diagnostic flow, recommended steps, safety notes, and prevention tips to reduce future occurrences.
Quick checks you can perform before disassembly
Before you touch internal components, perform a few safe, simple checks that address the most common causes of water pooling. Start with the filter and sump area: remove the bottom rack, take out the filter assembly, and rinse away any trapped food debris. A blocked filter is a frequent culprit and often responsible for poor drainage. Next, inspect the drain hose for kinks, sharp bends, or clogs near the connection point. A blocked or misrouted hose can trap water in the sump. If your model uses an air gap, ensure the cap is clear of mineral buildup and can move freely. Finally, wipe the door seal and the tub lip; a compromised seal can allow water to seep into the base after the cycle.
Document what you find as you go: note whether the water level changes after you clean the filter, and observe whether drainage improves after straightening the hose. If the water is still standing after a test run, you’re likely dealing with a pump or valve issue that requires deeper inspection.
How installation and setup contribute to drainage problems
Improper installation can transform a routine drainage task into a recurring problem. Leveling matters: a dishwasher that isn’t perfectly level can cause water to pool at one end and fail to drain completely. Confirm the unit sits on a flat, stable surface and adjust leveling feet as needed. Drain connections also matter: verify that the drain hose length and height meet your local code and the manufacturer's guidelines. An air gap or high loop configuration helps prevent backflow; if your hose is too low or not looped properly, dirty water can back up into the dishwasher.
Another installation factor is the stance of the disposal or sink connection. A clogged kitchen drain downstream can force water back into the appliance. In some homes, improper pipe slope or a venting issue can manifest as water puddling after cycles. If you recently installed or moved the dishwasher, re-check all connections and ensure hoses are firmly clamped and routed away from heat sources.
How to test the drain pump and valves
Testing the drain pump and associated valves is the next logical step if simple checks don’t resolve water pooling. Start by listening for the pump during the drain portion of a cycle; it should run smoothly without grinding or stalling. If you don’t hear it, check the motor leads for loose connections and ensure the impeller isn’t jammed by debris. Remove the access panel (power off first) and inspect the pump housing for blockages that prevent impeller rotation. If debris is present, remove it with needle-nose pliers. Check the drain valve or check valve for sticking or failure; a faulty valve can allow water to backflow into the sump after draining. If you suspect a pump or valve failure, replacing the faulty part is typically required and may necessitate professional service for your model.
When to call a professional
If the steps above do not restore proper drainage, it’s time to seek professional help. A certified technician can diagnose electrical faults, replace a failing pump, or repair a cracked tub or drainage components that may not be safe to handle for a homeowner. Always unplug the unit and avoid disassembly beyond your comfort zone when dealing with electrical parts and water. If you do reach out for service, provide details on when the water pooling occurs, whether it happens after every cycle, and what you have already checked. Timely professional intervention can prevent further damage and protect your home.
As a general rule, if you see burning smells, sparks, or tripped breakers when testing, stop immediately and call a technician.
Preventing future water pooling
Prevention is the best strategy for keeping water off the bottom of the dishwasher. Schedule regular filter cleanings and sump checks, ideally every one to three months depending on usage. Keep the drain hose free of kinks and ensure the hose is properly installed with an appropriate air gap or high loop. Verify the dishwasher is level and that drain connections are secure. Run a cold-water test cycle after maintenance to confirm the unit drains fully. Finally, avoid overloading the lower rack and ensure large food particles don’t obstruct the filter or spray arms. Consistent maintenance reduces clog buildup and extends the life of the drainage system.
Steps
Estimated time: 60-90 minutes
- 1
Power off and access the drain area
Unplug the unit and pull it out from the cabinet to access the bottom panel or service door. Remove the lower kick plate if your model uses one. Have a towel ready to catch any residual water.
Tip: Always start with safety first; avoid touching live electrical components. - 2
Remove and clean the filter/sump
Take out the filter assembly and rinse under warm water to clear debris. Inspect the sump for trapped food particles and scrub gently with a soft brush.
Tip: Don’t use abrasive tools that could damage the filter housing. - 3
Inspect and clear the drain hose
Follow the hose from the tub to the drain connection, looking for kinks or blockages. If accessible, detach and flush the hose with water or a flexible brush.
Tip: Check both ends for secure connections and a continuous path for water. - 4
Check the air gap or high loop
If your model has an air gap, remove the cap and clean out mineral buildup. For a high loop, ensure the hose runs above the sink or any trap before entering the drain.
Tip: A properly cleared air gap prevents backflow into the dishwasher. - 5
Test the drain pump and valve
With power restored, run a short drain cycle and listen for the pump. If the pump is silent or noisy, test leads and inspect for debris blocking the impeller.
Tip: If you hear grinding or the unit struggles to drain, stop and consider a professional check. - 6
Run a final test cycle and observe
Load a small amount of dishes and a rinse aid, run a full cycle, and observe drainage. Confirm there is no standing water at the end and check for leaks around connections.
Tip: Document any abnormal behavior for the service technician if needed.
Diagnosis: Water pools at bottom after cycle
Possible Causes
- highClogged filter or sump screen
- mediumKinked, blocked, or improperly connected drain hose
- lowFaulty drain pump or check valve
Fixes
- easyClean the filter and sump debris; rinse thoroughly and reassemble
- mediumStraighten or replace the drain hose, clear clogs, and confirm air gap function
- hardTest the drain pump and check valve; replace if defective and re-test draining
People Also Ask
Why is there water pooling at the bottom after a cycle?
Most often this signals a drainage issue or clogged filter. Start with the filter and hose checks before moving to the pump or valve. If problems persist, a professional diagnosis may be required.
Water pooling after a cycle usually means there’s a drainage issue or a clogged filter. Start with simple checks, and if needed, call a professional.
How do I clean the dishwasher filter?
Remove the filter assembly, rinse under warm water, and scrub away debris. Reinstall securely and run a quick test cycle to see if drainage improves.
Take out the filter, rinse it well, scrub off debris, and reinstall. Run a short test cycle to check drainage.
What should I do if the drain hose is kinked?
Gently straighten the hose, detach if needed, and flush to clear any blockages. Ensure it’s securely connected and positioned with a proper loop or air gap.
Straighten the drain hose, remove any blockages, and secure the connections with the proper loop or air gap.
Is a faulty drain pump common?
Drain pump failures are less common than clogs but do occur. If testing shows no pump action or irregular sounds, replacement is often required.
Drain pump failures aren’t the most common cause, but they happen. If the pump won’t run or sounds off, replacement may be needed.
When should I call a professional?
If basic cleaning and hose checks don’t fix pooling, or you encounter electrical concerns, leaks from the tub, or cracked components, contact a licensed appliance technician.
Call a professional if simple fixes don’t solve the problem or you notice electrical concerns or leaks.
How can I prevent water pooling in the future?
Regularly clean the filter and sump, keep hoses clear of kinks, and ensure the unit is level. Run a test cycle after maintenance to verify proper drainage.
Keep the filter clean, avoid kinks in hoses, and level the dishwasher. Do a test run after maintenance.
Watch Video
What to Remember
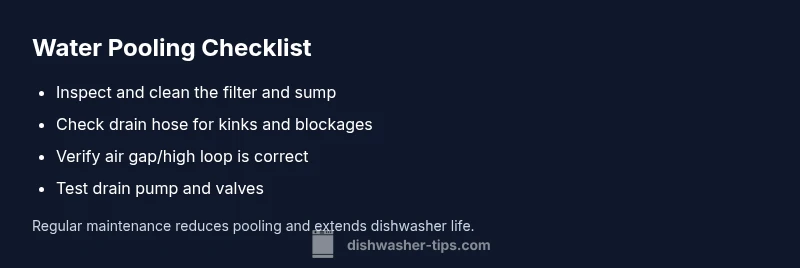
- Start with simple checks: filter, sump, hose.
- Verify proper hose routing and air gap where required.
- Test pump and valve if simple fixes fail.
- Call a professional for hard replacements or electrical issues.
- Maintain regular cleaning to prevent future pooling.