DIY Dishwasher Soap: Homemade Detergent Guide
Learn to make your own dishwasher soap with simple, kitchen-safe ingredients. This guide covers powder and liquid formulas, storage tips, and troubleshooting to keep your dishes sparkling.

Learn to make your own dishwasher soap using everyday ingredients. This guide covers powder and liquid formulations, test tips for residue, and storage advice to keep costs down and waste low. Perfect for homeowners and renters who want a reliable, eco-friendly alternative. By following tested ratios and safe handling practices, you can customize scents and adjust for water hardness.
Why DIY dishwasher soap matters
Across kitchens worldwide, homeowners and renters are seeking practical, affordable ways to keep dishes clean without relying on commercial brands. According to Dishwasher Tips, DIY dishwasher soap can reduce plastic waste and give you control over ingredients, which matters for people with sensitivities or restricted budgets. When you choose to make your own detergent, you join a growing trend toward transparency in cleaning products, with benefits like reduced packaging, lower cost per load, and the satisfaction of tailoring formulas to your water and soil levels. In this section, we'll explore the core reasons people adopt a DIY approach and how to get started with confidence. Knitting together thriftiness with precision, a well-made DIY detergent can rival many store-bought options when you understand the basics. The goal here is not just saving money, but creating a reliable routine you can repeat week after week.
Safety first: ingredients, storage, and shelf life
Safety should be your top priority when creating any household cleaner, including dishwasher soap. Keep all powders out of reach of children and pets, store blends in airtight containers away from moisture, and label batches with preparation dates. Citric acid and washing soda are the backbone of most DIY recipes and are generally safe when handled properly. If you’re using borax, wear gloves and avoid inhaling dust. Shelf life for a dry powder blend is typically several months when kept dry and sealed, so you’ll want to rotate batches and avoid making more than you can use in a reasonable time. The goal is a clean, residue-free load without compromising your family’s safety.
Powder vs liquid: which formula should you start with?
Powdered detergents are simple, versatile, and easy to customize for different water qualities. They’re often less messy to prepare and store, and they dissolve well in hot water during the wash cycle. Liquid concentrates offer flexibility for people who prefer a pre-mixed solution or who want a ready-to-use spray for pre-washing dishes. In hard water, powders with citric acid or extra washing soda can improve performance, while liquids may require careful dosing to avoid oversuds. Your choice should depend on your dishwasher model, soil level, and water hardness. Either option can work well with a well-tested formula.
Powder recipe: ingredients, ratios, and mixing technique
A reliable powder blend typically combines washing soda, borax (optional), citric acid, and baking soda. A common starting ratio is 1 cup washing soda, 1/2 cup borax (optional), 1/2 cup citric acid, and 1/4 cup baking soda. Mix thoroughly in a dry bowl to achieve a uniform texture with no clumps. If you want a light scent, add 5–10 drops of your favorite essential oil per batch and blend again. After mixing, store the powder in an airtight container away from moisture. For large batches, scale the ingredients proportionally and keep the container sealed.
Liquid/dissolved soap option: how to adapt, yield, storage
If you prefer a liquid concentrate, dissolve 1/2 cup washing soda in 2 cups hot water, then add 1/4 cup citric acid and 1/4 cup borax, plus a small amount of dish-safe surfactant if desired. This concentrate can be diluted with hot water to form a ready-to-use solution. Use 1–2 tablespoons per cycle in a standard dishwasher. Store the concentrate in a tightly sealed bottle and shake before each use to re-dissolve settled solids. Remember that high concentrations can cause foaming in some machines, so start with the lower end of the dosage range.
Testing and adjusting for your water hardness
Water hardness significantly affects dishwasher performance. If you notice film or dull spots, your solution may need more citric acid or a higher ratio of washing soda to balance pH. Test outcomes by running a small load with a lightly soiled plate and inspecting for residue. If residue persists, try increasing citric acid by 1–2 tablespoons per batch, or add a percent more washing soda in the next batch. Keep notes on soil levels, detergent amounts, and the kinds of dishes you wash to refine your formula over time.
Using DIY soap with your dishwasher: tips to avoid residue
To minimize residue, thoroughly dry all jars after mixing and avoid adding water directly to dry powders. Always use the recommended dosage for your load size and soil level. Pre-rinse heavily soiled items, especially pots and pans, to prevent excessive residue. Ensure that your rinse cycle in the dishwasher is functioning correctly and consider using a compatible rinse aid if your water is particularly hard. A properly formulated DIY soap should dissolve cleanly without leaving crystals or streaks.
Troubleshooting common issues
If you observe white film, cloudy glassware, or grit on dishes, you may be using too much detergent or the water is very hard. Try reducing the amount by 25% for a few cycles and observe the results. If a sour or chemical odor persists, your formula may have absorbed moisture or the fragrance components are overpowering. In that case, start fresh with a dry mixing environment, use fresh citric acid, and consider rebalancing the ratios. Regularly cleaning the dishwasher’s spray arms and filters can also improve performance after switching to DIY soap.
Maintenance, storage, and eco considerations
DIY dishwasher soap reduces plastic packaging and often lowers per-load costs, but it requires careful handling and storage. Keep ingredients in a dry, cool place and seal containers tightly after each use. Label batches with the preparation date so you can rotate inventories. Consider using glass or metal jars instead of plastic to cut down on waste. If sustainability is a goal, document your recipes and share results with friends and neighbors to encourage safer, economical cleaning practices.
Tools & Materials
- Washing soda (sodium carbonate)(Coarse or fine crystals; store in a dry place)
- Borax (sodium borate)(Optional; boosts cleaning power)
- Citric acid(Food-grade or cosmetic-grade)
- Baking soda(Sodium bicarbonate; helps neutralize odors)
- Fine salt(Not required for most recipes; optional for very hard water)
- Essential oils(Optional for scent; use sparingly)
- Airtight jar or container(Keep moisture out)
- Measuring cups/spoons(Accurate measurements matter)
- Glass or metal mixing bowl(Non-reactive surface)
Steps
Estimated time: 45-75 minutes (prep plus drying time for tablets)
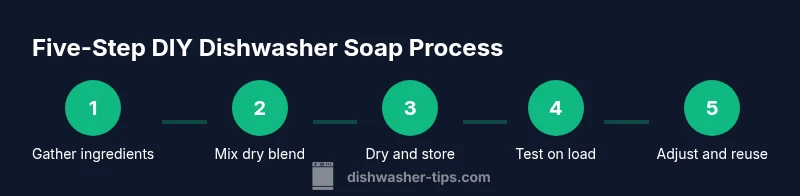
- 1
Gather ingredients and tools
Collect all dry ingredients and equipment before you start to minimize spills and mis-measures. Having everything ready keeps the workflow smooth and reduces errors in ratios.
Tip: Lay everything out on a clean tray to keep your workspace organized - 2
Measure dry ingredients accurately
Use dry measuring cups or a scale to ensure exact weights or volumes. Inaccurate measurements can lead to ineffective cleaning or residue on dishes.
Tip: Tare your scale with the container before weighing - 3
Mix dry ingredients thoroughly
Combine washing soda, citric acid, baking soda, and borax (if using) in a large bowl. Stir until the blend looks uniform with no visible clumps.
Tip: Sift powders if you see lumps to ensure even distribution - 4
Add optional scent and color (optional)
If you like, add 5–10 drops of a safe essential oil for fragrance and a tiny amount of natural colorant. Mix again to distribute evenly.
Tip: Avoid strong fragrances that could irritate sensitive users - 5
Complete drying and storage
Spread the mixture on a parchment-lined tray and allow to dry for at least 1–2 hours, then transfer to an airtight container.
Tip: Store in a cool, dry place to prevent moisture absorption - 6
Prepare a test load
Choose a lightly soiled load to test the powder. Use the low end of the dosage range and observe results over the cycle.
Tip: Check for any residue before proceeding with larger batches - 7
Adjust dosage for future runs
If residue is present, slightly increase citric acid or reduce the total detergent amount for next batches.
Tip: Keep a small notebook of loads and outcomes - 8
Safety and cleanup
Wash hands after handling powders; wipe down surfaces; rinse utensils. Keep the mixture away from children and pets.
Tip: Label all containers clearly with ingredients and date - 9
Finalize and reuse
Use the powdered blend regularly, rotating batches to prevent moisture buildup. Reassess every few months to stay aligned with water changes.
Tip: Re-seal containers after each use to maintain dryness
People Also Ask
Is DIY dishwasher soap as effective as store-bought detergent?
DIY dishwasher soap can be very effective when ratios are tuned for water hardness and soil levels. Start with a basic powder blend and adjust citric acid and washing soda as needed. Always test on a small load before using it regularly.
DIY dishwasher soap can work as well as store brands when you tailor the formula to your water and soil level. Start with a simple blend and test on a small load.
Can I substitute borax in the recipe?
Yes, you can increase citric acid or baking soda as alternatives if borax isn’t available. Borax boosts cleaning power, but many households succeed with citric acid as the primary booster.
You can substitute borax with extra citric acid or baking soda if borax isn’t available.
Will DIY dishwasher soap affect warranty?
Most manufacturers do not void warranties for using DIY cleaners, but it’s wise to consult your manual for model-specific guidance. If you notice weird behavior, revert to a recommended product and seek support.
DIY cleaners typically don’t void warranties, but check your manual if you’re unsure.
How long does a DIY dishwasher soap batch last?
Dry powder blends stored in a sealed container in a dry place typically last several months. Rotate batches to avoid moisture buildup and label with the preparation date.
Stored properly, DIY detergent lasts for months; keep it dry and labeled.
Is it safe to use essential oils in DIY dishwasher soap?
Essential oils can add a pleasant scent but may leave residues; use only small amounts and choose oils known to be safe for household cleaning (e.g., lemon, orange). Test for any sensitivity.
Oils are optional; use them sparingly and test for residues.
How should I adjust for very hard water?
Hard water can reduce cleaning power and cause spots. Increase citric acid slightly and consider a touch more washing soda. You may need to experiment to find the best balance for your appliance.
Hard water needs more citric acid and possibly more washing soda; test and adjust.
Can I make dishwasher soap tablets at home?
Yes, you can compress the powder with a binding agent and dry completely to form tablets. Use caution to ensure proper dryness to prevent caking or dissolving in the container.
Tablets are possible with proper drying and binding; test for proper dissolution.
Watch Video
What to Remember
- Make a powder detergent with pantry staples.
- Test on a small load to tailor the formula to your water.
- Store in an airtight container to maximize shelf life.
- Adjust for water hardness with citric acid as needed.
- DIY reduces packaging waste and can lower per-load costs.