DIY Dishwasher Tablets: Step-by-Step Guide
Learn to make dishwasher tablets at home with a simple, safe DIY recipe. Includes dry mix, binding, drying times, and storage tips from Dishwasher Tips today.

With this guide, you will learn how to make dishwasher tablets at home from common kitchen ingredients. The quick answer covers the goal, essential supplies, and safety basics, plus prep and drying times to ensure tablets hold together and work reliably in most dishwashers, including in hard water. You’ll save money while reducing packaging waste.
What are dishwasher tablets and why DIY?
Dishwasher tablets are compact, pre-measured detergent blocks designed to release cleaning agents in your dishwasher during a wash cycle. They simplify loading and dosing compared with powders or liquids. For households aiming to reduce plastic waste or avoid certain synthetic additives, making dishwasher tablets at home offers a practical alternative. DIY tablets let you customize scent, adjust ingredients for water hardness, and tailor formulas to your dishwasher model. Start by understanding the basic chemistry: the tablet combines alkaline salts with acids that react in the wash to produce cleaning power. To keep things safe and effective, use food-grade or lab-grade ingredients and avoid additives that could leave residue or corrode seals. Remember to dry and store tablets properly and test them in a few loads before scaling up. This approach aligns with Dishwasher Tips’ practical, evidence-based guidance for homeowners and renters troubleshooting appliance issues.
Safety and ingredient overview
DIY dishwasher tablets involve chemicals that can irritate skin or eyes if mishandled. Always use gloves when measuring powders and work in a well-ventilated area. Keep all containers tightly closed and away from children and pets. Choose ingredients with clear labeling and avoid anything labeled for “industrial use” unless you fully understand the risks. Typical ingredients include alkaline salts (like washing soda), mild acids (such as citric acid), and optional scents or stabilizers. If you have sensitive skin or chemical sensitivities, opt for fragrance-free formulations and consider using gloves and eye protection during mixing. The plan should also account for the dishwasher’s tolerance to different ingredients; some models respond differently to residual compounds. By reading manufacturer guidance and testing on small batches, you minimize potential issues and safeguard your appliance.
Core ingredients and their roles
The success of a DIY dishwasher tablet rests on how the components interact during the wash cycle. The base typically combines washing soda (sodium carbonate) for grease cutting, citric acid for effervescence and softening, and baking soda (sodium bicarbonate) to balance pH and help with mild scouring. A small amount of salt can boost scrubbing power in some formulations, while a binder (like glycerin or a moisture-moderated agent) helps the tablet hold its shape. Optional additives include a rinse aid to reduce spotting and a few drops of essential oil for scent. Water content must be carefully controlled; too much moisture will prematurely react the mixture, while too little will prevent binding. For safety and performance, ensure all ingredients are food-grade or lab-grade and clearly labeled. This section explains how each component contributes to cleaning effectiveness while remaining dishwasher-safe.
Choosing molds and binders for tablet formation
Molds play a pivotal role in shaping dishwasher tablets. Silicone ice cube trays or small silicone molds are ideal because they release tablets easily after drying. Metal molds can work, but they may retain moisture or rust if not dried properly. Bindings are crucial for tablet stability. Common binders include a small amount of glycerin or witch hazel, or a minimal water spray to achieve a clumpable texture without triggering premature reaction of the acids. Cornstarch or arrowroot can aid binding and reduce clumping during storage. The goal is a tablet that holds together firmly in the dispenser but dissolves completely in the wash. After forming, allow tablets to dry in a warm, dry area away from humidity for at least 12-24 hours or longer for larger batches. When fully dry, store in an airtight container to maintain potency and prevent moisture uptake.
A basic DIY recipe: dry mix and binding agent
A simple, reliable base uses common, inexpensive ingredients. A common starting recipe is: 2 cups washing soda, 1 cup citric acid, 1/2 cup baking soda, and 1/4 cup coarse salt (optional). For binding, add 1-2 teaspoons glycerin or a light spray of water or witch hazel until the mixture just clumps when pressed. Optional fragrance can come from a few drops of essential oil, but avoid strong scents that may irritate users or leave residue. Adjust the ratio slightly to fit your dishwasher’s performance and water hardness. Always mix dry ingredients first, then introduce the binder gradually to avoid fizzing from citric acid. A small test batch (4–6 tablets) helps you gauge hardness and dissolution before scaling up.
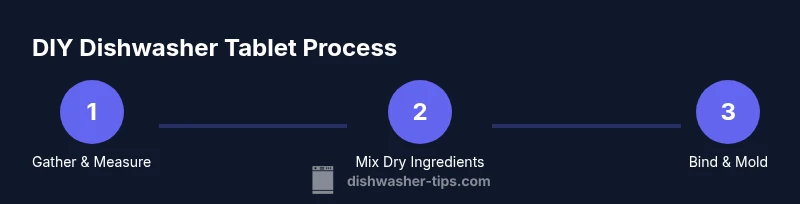
Step-by-step process: making and curing
- Gather all ingredients and equipment, including a silicone mold, a mixing bowl, a whisk, measuring cups, and protective gear. 2) Whisk dry ingredients (washing soda, citric acid, baking soda, salt) until evenly distributed, ensuring there are no clumps. 3) Add a binder (glycerin or water/witch hazel spray) gradually while mixing, aiming for a texture that holds shape but dissolves readily. 4) Pack the damp mixture into molds, pressing firmly to create compact tablets. 5) Tap out tablets onto a drying rack or parchment-lined tray and leave in a warm, dry area. 6) Allow 12-24 hours for full curing; longer is better for large batches. 7) Store in an airtight container away from moisture and sunlight before use. Pro tip: test one tablet in your dishwasher on a small load to confirm performance before batching.
Hard water considerations and performance tips
Hard water can impede tablet dissolution and leave mineral deposits on dishes. If you have hard water, consider increasing citric acid slightly or adding a small amount of distilled white vinegar to your rinse cycle (be cautious of vinegar exposure to seals and hoses in some machines). You can also incorporate a small rinse aid-like additive into your formulation or rely on post-wash rinse aids. If you notice residue, recheck your binder ratio and ensure tablets are completely dry before storage. Document changes and test across several loads to ensure consistency. In some cases, reducing moisture during mixing and using a slightly drier final mix can improve dissolution in hard water.
Storage, safety, and environmental impact
Store finished tablets in an airtight, moisture-proof container away from heat sources. Label with ingredients and batch date. Properly dried tablets reduce the risk of premature reaction in storage. From an environmental perspective, DIY tablets reduce plastic packaging and can lower chemical waste when used with appropriate, non-corrosive ingredients. If you have septic systems, choose ingredients that are septic-safe and avoid phosphate-heavy additives. Always dispose of any waste according to local guidelines. Dishwasher Tips encourages experiments that prioritize safety, cleanliness, and minimizing environmental impact while maintaining dish performance.
Troubleshooting common issues
If tablets crumble, they likely need more drying time or a slightly drier initial mix. If tablets fail to dissolve, reassess the moisture content or consider increasing citric acid to improve dissolution. Sticky batches indicate too much moisture; add a touch more cornstarch or baking soda and re-mix, then re-form. Visual cues like uniform color and consistent weight indicate even distribution of ingredients. Keep notes on batch size, mold type, and drying duration to refine your recipe over time. Remember to test in a small load first before large-scale production.
Tools & Materials
- Washing soda (sodium carbonate)(Powder, fine grind for even dissolution)
- Citric acid(Pure citric acid, food-grade if possible)
- Baking soda (sodium bicarbonate)(Helps balance pH and cleaning power)
- Coarse salt (optional)(Small amount can boost scrubbing)
- Binder (glycerin or witch hazel)(1-2 tsp if using liquid binder)
- Water spray or small amount of water(Light mist to help binding)
- Essential oil (optional)(A few drops for scent, avoid strong fragrances)
- Cornstarch or arrowroot (optional)(Aids binding and reduces clumping)
- Silicone mold (ice cube tray works)(Silicone preferred for easy release)
- Mixing bowl(Non-reactive bowl)
- Whisk or spoon(For even blending)
- Measuring cups/spoons(Accurate measurements are key)
- Protective gloves(Guard hands from powders)
- Airtight storage container(Keep dry until use)
Steps
Estimated time: 2-3 hours active, plus 12-24 hours drying time
- 1
Gather ingredients and equipment
Collect all dry ingredients and binders, along with a silicone mold and basic mixing tools. This ensures you can work smoothly without interruptions and prevents moisture exposure that could prematurely activate the mixture.
Tip: Lay out a clean workspace and wear gloves to minimize skin contact with powders. - 2
Whisk dry ingredients together
In a large bowl, thoroughly whisk washing soda, citric acid, baking soda, and salt until evenly distributed with no visible clumps. Uniform distribution is essential for predictable tablet performance.
Tip: Sift powders if you see any lumps before mixing. - 3
Add binder and moisture gradually
Spritz or lightly mix in the binder (glycerin or water) in small increments until the mixture just clumps when pressed. Avoid over-wetting, which can cause fizzing and weak tablets.
Tip: A misting bottle helps control moisture precisely. - 4
Incorporate optional additives
Stir in essential oil for scent if desired, and add cornstarch to improve binding and reduce clumping. Keep additives minimal to prevent residue.
Tip: Test one tablet for scent and residue before scaling up. - 5
Pack mixture into molds
Firmly press the damp mixture into each mold cavity, ensuring no air pockets. Compacting helps tablets stay intact through storage and in the dispenser.
Tip: Use a small dowel or the back of a spoon to level the surface. - 6
Unmold and arrange for drying
Carefully release tablets from molds and lay them on parchment or a drying rack in a warm, dry area. Keep them spaced to ensure even drying.
Tip: Avoid stacking; air needs to circulate for complete drying. - 7
Dry and cure completely
Allow 12-24 hours (or longer for larger batches) for full curing. Moisture must be gone before storage to prevent premature activation.
Tip: If weather is humid, extend drying time and place near a fan. - 8
Store properly for longevity
Transfer tablets to an airtight container away from heat and moisture. Label batches with dates to track freshness.
Tip: Use a silica gel pack in the storage container to improve shelf life.
People Also Ask
Can I use borax in dishwasher tablets?
Borax is optional and may raise safety concerns for some users. If you choose to include it, use small amounts and ensure the final product is clearly labeled and tested for residue and compatibility with your dishwasher.
Borax can be used in some DIY formulas, but be mindful of safety and test thoroughly before regular use.
Will DIY dishwasher tablets work in hard water?
Yes, but you may need to adjust the recipe. Increase citric acid slightly to aid dissolution and use a rinse aid or mineral-softening agents as needed. Test on several runs to optimize.
They can work, but you might have to tweak acidity and add a rinse aid for mineral-rich water.
How long do DIY dishwasher tablets last?
When stored in an airtight, moisture-free container, DIY tablets can remain effective for several months. Always check for signs of moisture exposure or crumbling before use.
Stored properly, they last for months; if they crumble, dry longer or reduce moisture during mixing.
Do DIY tablets leave residue on dishes?
Residue is usually linked to moisture or over-wetting during mixing. Ensure complete drying and proper bonding, and consider adjusting moisture levels or adding a touch more citric acid for better dissolution.
If you see residue, it’s often due to moisture or incomplete dissolution; re-test with a drier mix.
Should I add fragrance to tablets?
Fragrance is optional. Use mild essential oils and test for residue or irritations. Some users prefer fragrance-free formulations for sensitive households.
Fragrance is optional—test first to avoid residue or sensitivities.
Are there safety concerns with using essential oils?
Essential oils should be used sparingly and not in excess, as they can irritate skin or affect seals in some dishwasher models. Use only a few drops per batch and ensure full drying.
Oil use is optional; keep it minimal and ensure tablets dry fully to prevent residue.
Watch Video
What to Remember
- Gather all ingredients before starting.
- Balance moisture to prevent fizzing and ensure binding.
- Dry thoroughly to maximize shelf life.
- Test on a small load before scaling up.
- Store in an airtight container to prevent moisture uptake.