DIY Dishwasher Soap: A Practical Guide
Learn how to make your own dishwasher soap with common pantry ingredients. This comprehensive guide covers recipes, safety, storage, troubleshooting, and eco-friendly considerations for effective, affordable dishwashing.

You can make your own dishwasher soap at home using simple pantry ingredients to clean dishes effectively. This DIY approach is budget-friendly, reduces exposure to commercial detergents, and can be tailored to your water hardness. Start with a basic blend of washing soda, baking soda, citric acid, and a gentle soap base, then adjust scent and rinsing aids. Test on a small load first.
Why DIY dishwasher soap makes sense for homeowners
For many households, making your own dishwasher soap is a practical way to cut costs and reduce packaging waste. The DIY approach lets you tailor cleaning power to your water supply and family needs, which matters in areas with hard water or soft water. According to Dishwasher Tips, homemade options can be competitive with store-bought detergents when you adjust the blend for your water supply and load types. The Dishwasher Tips team found that simple blends can deliver clear rinsing and decent degreasing for everyday dishes, especially when you stick to tested ratios and use a compatible rinse aid system. Keep expectations aligned with the dishwasher’s design and your water conditions, and you’ll often enjoy comparable results without the extra additives.
What ingredients you need for a DIY dishwasher soap
The core idea behind a DIY dishwasher soap is to combine cleaning power with mineral conditioning. You’ll typically rely on a mix of alkaline cleaners, a gentle soap base, and a touch of acid to counter hard water. Essential items include washing soda for alkalinity, baking soda for mild scrubbing, and citric acid to soften mineral deposits. Optional salt can aid rinsing, while soap flakes or grated mild soap enhances sudsing control without introducing harsh chemicals. Stock up on airtight containers to keep the powder dry and prevent clumping. For scent, you can add a few drops of essential oil, though this is optional and not necessary for cleaning power. Like any DIY project, the cleaner should be tested with your specific dishwasher model and water conditions to ensure reliable results.
Basic recipe: a simple powder formula
A straightforward powder blend makes a solid starting point for most homes. Use the following ratios as a baseline and adjust based on water hardness and personal preference:
- 1 cup washing soda (sodium carbonate)
- 1 cup baking soda
- 1/2 cup citric acid
- 2-3 tablespoons fine salt (optional, helps with mineral deposits and drying)
- 1/4 cup grated castile soap or unscented soap flakes (optional, for added cleaning action)
- 1 teaspoon essential oil for scent (optional)
Instructions: In a large bowl, whisk all dry ingredients until evenly distributed and fully combined. If using soap flakes, add them last and mix gently to prevent clumping. Store in an airtight container away from humidity.
Adjusting for water hardness and dishwasher pressure
Water hardness greatly affects cleaning performance. In hard water, increase the citric acid portion slightly to help soften minerals that cause filming on dishes. If your home has very soft water, you can reduce citric acid and rely more on washing soda for cleaning power. For high-efficiency (HE) machines, use only the recommended dose (typically 1-2 tablespoons per load) and ensure the powder dissolves well by using warmer wash cycles whenever possible. If you notice white residue, this may indicate too much detergent for the water hardness, so scale back by 1/4 to 1/2 the blend and rerun a test cycle.
Safety, storage, and shelf life
Store DIY dishwasher soap in a cool, dry place in an airtight container to prevent moisture absorption and clumping. Label the container with the date and ingredients. Keep out of reach of children and pets, especially if essential oils are included. Citric acid and baking soda are generally safe when handled normally, but avoid inhalation of powder dust and wash hands after handling. With proper storage, the powder blend remains effective for several months, though performance is best when used within a reasonable timeframe after mixing.
How to test and troubleshoot
Start with a small test load (1-2 items) to gauge cleaning power and rinse behavior. If dishes appear dull or show residue, check water hardness and consider increasing citric acid or reducing the amount used if the residue is mineral-based. Ensure the powder dissolves completely in the wash; if it clumps, break up clumps with a whisk or sift the blend before loading. If you still don’t achieve satisfactory cleaning, try a slightly higher wash temperature or a small plug in rinse aid inside the detergent compartment. Regularly run an empty wash with hot water and a splash of vinegar to clean the dispenser and prevent buildup.
Pros and cons compared to commercial detergents
Pros include lower cost per load, customizable formulation, and fewer synthetic additives. You can tailor the blend to your water conditions and avoid fragrances or dyes if sensitive. Cons may include inconsistent performance across different dish types, potential for more residue in hard water without proper adjustments, and extra time spent mixing and testing. For some families, a hybrid approach—using DIY soap with a commercial rinse aid—strikes a balance between performance and eco-friendliness.
Variations: liquid vs powder, scents
Powder blends are simple to store and measure, but you can experiment with liquid formulations by dissolving the solids in a small amount of hot water and pouring into a container designed for liquids. When scent is desired, use a mild essential oil or fragrance, but avoid strong concentrations that could irritate sensitive individuals or affect the dishwasher’s sensors. If you prefer an unscented option, simply omit the essential oil. Always ensure your mixture stays dry to prevent caking and clumping, especially in humid climates.
Cleaning and maintenance with DIY soap
Regular cleaning of the dishwasher itself helps maximize the effectiveness of any soap, including DIY blends. Run an occasional hot wash with a cup of white vinegar (in a separate compartment) to remove mineral buildup and grease. Clean the detergent compartment and seals with a damp cloth to prevent residue. By pairing effective DIY soap with periodic maintenance, you can extend the life of your appliance and maintain consistently clean dishes.
Common mistakes to avoid
Avoid overloading the bin with too much powder, especially in hard water areas, as this can cause residue on dishes. Do not mix with bleach or ammonia cleaners, as chemical interactions can create hazardous fumes. Store the blend in a sealed container; humidity can quickly lead to clumping and reduced effectiveness. Finally, test the formula on a small load before committing to a full detergent batch for regular use.
Cost considerations and environmental impact
DIY dishwasher soap can significantly reduce per-load costs by using affordable, widely available ingredients. It also minimizes plastic packaging waste when you buy staples in bulk and reuse jars. While the eco-benefits are clear, the environmental footprint depends on sourcing and disposal of certain minerals; choosing locally produced ingredients and avoiding unnecessary fragrances improves sustainability. Dishwasher Tips analysis indicates that many households experience both cost savings and environmental advantages when switching to a DIY approach.
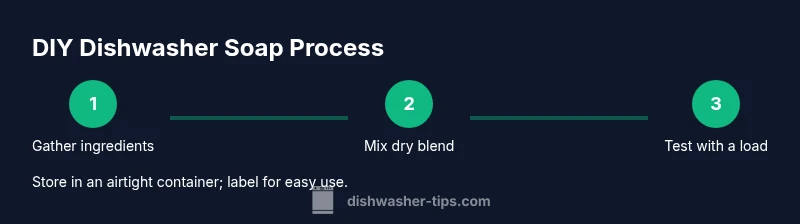
Step-by-step: how to mix and store
This section walks you through the hands-on process of creating your DIY dishwasher soap from start to finish. First, gather your ingredients and keep your workspace clean. Second, blend the dry components in a dry bowl, breaking up any lumps with a whisk. Third, if using soap flakes, fold them in gently to avoid creating dust clouds. Finally, transfer the finished powder to an airtight container, label with date and ingredients, and store in a cool, dry place. Use 1-2 tablespoons per standard load and adjust for hardness of water as needed.
Tools & Materials
- Washing soda (sodium carbonate)(Powdery, high-alkaline base for cleaning power)
- Baking soda(Mild abrasive helps lift residue)
- Citric acid(Softens minerals; improves rinse efficiency in hard water)
- Fine salt (optional)(Small amount can help mineral handling and drying)
- Castile soap flakes or mild soap (optional)(Adds gentle cleaning action; use sparingly to avoid residue)
- Airtight storage container(Keeps powder dry and clump-free)
- Measuring cups and spoons(Accurate measurements matter for performance)
- Whisk or spoon for mixing(Use to blend ingredients evenly)
- Label maker or marker(Date and ingredients on the container)
Steps
Estimated time: 15-30 minutes
- 1
Gather materials and prepare workspace
Lay out all dry ingredients, measuring tools, and a clean mixing bowl. Put on gloves if desired and ensure your storage container is dry and ready. Clear the area to prevent spills and keep moisture away from your blend.
Tip: Organize ingredients by order of use to streamline the mixing process. - 2
Measure dry ingredients precisely
Use measuring cups for the powders and level off each measure so you don’t add extra air or clumps. Precision matters because small deviations can affect cleaning and residue.
Tip: Sift citric acid before measuring to minimize clumping. - 3
Whisk dry ingredients into a uniform blend
Pour all dry components into a large bowl and whisk vigorously until the mixture looks uniform and free of visible lumps. A uniform blend ensures consistent performance across loads.
Tip: Break up any remaining clumps with a quick pass of a sift or a whisk. - 4
Incorporate optional soap flakes
If you’re using soap flakes, add them slowly and fold into the blend to prevent dust clouds. Soap acts as a mild cleaning agent but can affect sudsing and residue if overused.
Tip: Add soap last to minimize moisture exposure. - 5
Add salt and citric acid, then mix again
Stir in salt and citric acid to balance mineral content in hard water. A thorough re-mix after adding these components helps avoid uneven distribution.
Tip: A quick final whisk ensures even distribution across the entire batch. - 6
Check for clumping and adjust if needed
If the blend shows any damp spots or lumps, spread it on a parchment-lined tray and allow it to air-dry for 15-20 minutes, then remix. Store in an airtight container promptly.
Tip: Humidity is the enemy of powder detergents; keep a dry environment during mixing. - 7
Package, label, and store
Transfer the finished powder into the jar, seal tightly, and label with the date and ingredients. Store in a cool, dry place away from sunlight to maximize shelf life.
Tip: Use a desiccant pack if your environment is particularly humid. - 8
Test on a small load and adjust usage
Run a test load with 1-2 tablespoons of powder in hot water. Observe the cleaning, rinsing, and any residue. If needed, adjust the blend slightly in future batches or scale the amount per load.
Tip: Document what worked for future batches to improve consistency.
People Also Ask
Is DIY dishwasher soap as effective as store-bought detergents?
DIY dishwasher soap can be very effective, especially with adjustments for water hardness and dishwasher model. Results vary, so testing and tuning the blend is important.
DIY dishwasher soap can work well, especially after tuning for your water. Test on a small load to confirm effectiveness.
Will using DIY soap void my dishwasher warranty?
Most dishwashers tolerate standard detergents, including DIY blends. Always check your manufacturer guidelines to ensure compatibility and avoid voiding warranties.
Check your dishwasher manual; many brands allow DIY detergents, but some warranties may have restrictions.
How long does DIY dishwasher soap last in storage?
When stored in a cool, dry place in an airtight container, the powder can last several months with consistent performance. Moisture can shorten shelf life and lead to clumping.
If kept dry and sealed, DIY soap can last months; moisture is the main enemy.
Can I use DIY soap in high-efficiency (HE) machines?
Yes, but use only the recommended dose for your HE machine and ensure the blend dissolves well in hot water. Excess detergent may reduce efficiency.
Yes, but stick to small doses and ensure proper dissolution.
Is DIY dishwasher soap safe for septic systems?
Most DIY blends using basic, non-toxic ingredients are septic-friendly when used in normal amounts. Avoid adding large quantities of citric acid or salts that could alter pH dramatically.
For septic systems, use in moderation and avoid harsh additives.
Can I customize scent or add boosters?
You can add a mild essential oil for fragrance, but use sparingly to avoid residue or irritation for sensitive users. For boosters, keep it simple and test performance first.
Yes, with caution—use small amounts and test before regular use.
Watch Video
What to Remember
- Use precise measurements for reliable results
- Adjust for water hardness to prevent residue
- Test with a small load before regular use
- Store in an airtight container to avoid moisture
- DIY soap can lower costs and packaging waste