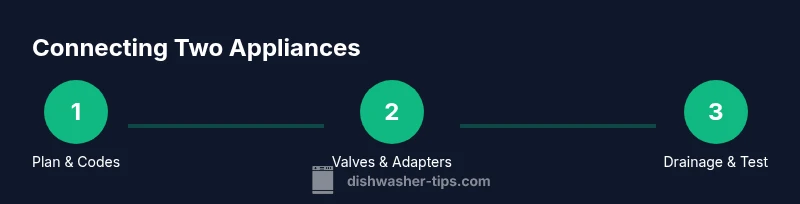
How to Connect Dishwasher and Washer: A Practical Guide
Learn how to safely connect a dishwasher and washing machine to a shared water supply with proper valves, drainage, and electrical considerations. This step-by-step guide covers planning, components, testing, and maintenance to prevent leaks and warranty issues.

By the end of this guide you will safely connect a dishwasher and a washing machine to a shared supply, including water shutoffs, drainage, and electrical considerations. You’ll learn layout options, required valves and hoses, and the steps to test for leaks and proper drainage. Always follow local codes and manufacturer recommendations.
Overview: Why this setup matters
Connecting a dishwasher and a washing machine to a single water supply can simplify plumbing, save wall space, and reduce clutter behind cabinets. However, it requires careful planning to avoid backflow, cross-contamination of detergents, and code violations. This block outlines the big-picture feasibility, typical configurations, and decision points. According to Dishwasher Tips, the most dependable outcomes come from a clear layout, compatible valves, and adherence to both local plumbing codes and appliance manuals. Expect to review code requirements, potential warranty impact, and the need for reliable drainage and electrical safety before you begin. A well-planned setup also leaves room for future maintenance or upgrades without major rework.
Key questions to answer before starting include: Do local regulations permit shared supplies for these appliances? Are the units compatible with a single shutoff point, or is a dedicated manifold required? Do you have the right hose sizes and an appropriate air gap or high-loop drainage solution? With these answers in mind, you can design a safe, efficient configuration that minimizes leaks and downtime.
Safety first: Codes, warranties, and risk management
Any attempt to link a dishwasher and a washing machine to one supply should begin with safety and compliance. The Dishwasher Tips team stresses that plumbing codes vary widely by region, and some manufacturers discourage or prohibit non-standard hookups. Before you buy fittings, check your local building codes, homeowners association rules, and each appliance manual for guidance on shared supply, backflow prevention, and drainage arrangement. If you believe your plan may affect warranty terms, contact the manufacturers or a licensed professional to confirm. Planning for safety reduces the risk of recalls, leaks, and electrical hazards during daily use.
Planning the layout: Distances, routes, and accessibility
Create a basic floor plan that shows where the two appliances sit, how water and drain lines will run, and where connections can be accessed for maintenance. Prefer exposed hose routes over concealed runs to simplify inspection. Measure the available space, confirm clearance for door openings, and account for the depth of both units with hoses connected. A neat, accessible layout minimizes bending, reduces wear on hoses, and makes future service easier. Involve a second pair of eyes—someone experienced can spot potential stress points that you may miss.
Water supply: Valves, adapters, and safe connections
The water-supply portion is the heart of this install. Decide early whether you will use a dual shutoff valve, a manifold, or a dedicated Y-adapter designed for two appliances. Ensure the chosen valve or manifold is rated for household pressures and is compatible with the thread sizes of both machines’ inlet hoses. Replace any aging hoses and use stainless steel braided lines where possible for durability. Apply Teflon tape to threaded connections to minimize leaks, and tighten fittings evenly with a wrench to avoid cross-threading. If you’re not sure about the right adapter sizes, bring a hose or fittings to a hardware store for verification.
Drainage and backflow prevention: Air gaps and loops
Proper drainage is essential to prevent dirty water from flowing back into either appliance. Many codes require an air gap or a high loop on the drain hoses to stop backflow. Plan the drain routes so that both hoses rise to their highest point before descending to the household drain. If your local code allows it, a built-in air-gap device on the countertop or under the sink can simplify compliance. Always verify that the drain line diameter and slope meet relative requirements, and keep the drain line clear of kinks and sharp bends.
Electrical considerations: Power, outlets, and safety
Do not share a dedicated appliance outlet between a washer and a dishwasher. Each appliance should be plugged (or hard-wired) according to its manual and local electrical codes. If you use extension cords or shared outlets, you risk overload, tripping breakers, or violation of electrical code. Evaluate whether hard-wiring is needed for one or both units, and consider a dedicated circuit for each if required by code. Install a GFCI outlet as appropriate and keep cords away from water sources. If in doubt, hire a licensed electrician to verify circuit requirements and safety clearances.
Testing, troubleshooting, and long-term maintenance
Once connections are made, run a cautious test cycle with towels ready to catch any drips. Inspect every connection for signs of moisture, including the intake hoses and drain fittings. If you notice seepage, tighten fittings incrementally and recheck. Keep a maintenance schedule: replace hoses every 5–7 years or as recommended by manufacturers, inspect fittings for corrosion, and verify drainage is not blocked. Document any changes and keep a note of dates and part numbers for future reference.
The final checklist: Ready for use
Review your plan against local codes and manufacturer guidelines. Confirm that each valve is accessible, hoses are secure, and there is no backflow risk in the drainage. Ensure proper clearance around both appliances for service and ventilation. If all checks pass, you’re ready for regular operation. Remember, a well-executed setup from the start reduces the likelihood of leaks, warranty disputes, and downtime.
Real-world note: Maintenance and donor tips
For ongoing reliability, maintain the system as you would any major home plumbing project. Periodically inspect connections, replace older hoses, and watch for signs of wear or corrosion. The Dishwasher Tips team recommends maintaining a simple record of part replacements and service dates. With proper care, your dual-appliance hookup can provide years of dependable service and avoid common problems like backflow, leaks, and drainage blockages.
Tools & Materials
- Adjustable wrench(For tightening hose fittings and shutoff valves)
- Bucket or towels(To catch drips during installation)
- Teflon tape (thread sealant)(Wrap on threaded connections to prevent leaks)
- New inlet hoses for both appliances(Prefer stainless steel braided hoses)
- Dual shutoff valve or compatible 2-outlet manifold(Ensure rating for household water pressure)
- Backflow prevention device or air gap kit (if required)(Check local code; some areas require air gaps)
- Plumber’s tape or mounting hardware(Optional for extra security or wall mounting)
- Flashlight or headlamp(For inspecting tight or dim spaces)
Steps
Estimated time: 90-150 minutes
- 1
Check codes and plan
Review local plumbing codes and appliance manuals to confirm that a shared supply is permitted. Identify required approvals, drainage standards, and whether a dual valve or manifold is recommended for your home. Draft a simple plan showing valve locations, hose routes, and access points.
Tip: If unsure, contact a licensed plumber for an early code check. - 2
Shut off water and power
Turn off the main water supply and the breakers or disconnects for both appliances. Drain any residual water from hoses by disconnecting them at a safe location. This prevents accidental leaks while you work.
Tip: Have towels ready and avoid working on a live circuit. - 3
Plan space and hose routes
Measure space around both appliances and mark routes for supply and drain hoses. Ensure hoses won’t kink and will reach connections without strain. Plan the high point of drain hoses to prevent backflow and keep access for maintenance.
Tip: Keep a clear path to the nearest drain with minimal bends. - 4
Install valve or manifold
Mount the dual shutoff valve or manifold at the chosen wall location. Align fittings toward the appliance inlets and ensure secure mounting. Use tape on threads if applicable and tighten evenly to avoid leaks.
Tip: Check valve orientation to match the flow direction for each appliance. - 5
Connect supply hoses
Attach new inlet hoses to the appliances and to the valve/manifold. Make sure threads are clean and fittings are snug but not overtightened. Replace any hoses showing signs of wear and avoid crossing threads.
Tip: Use a second wrench to stabilize the appliance hose while tightening the valve side. - 6
Route drain hoses and install air gaps
Position drain hoses with a high loop or install an air gap per code. Connect to the drain line or sink trap as required. Ensure there are no low spots where water could stagnate and that hoses are supported to prevent sagging.
Tip: If your code requires an air gap, install it at the highest practical point. - 7
Restore power and test for leaks
Turn on the water supply and electricity. Run a short test cycle without laundry or dishes, watching for leaks at every connection. If a leak appears, tighten fittings gradually and re-test until dry.
Tip: Use a paper towel to help detect slow drips you might miss visually. - 8
Document, label, and maintain
Label hoses and valves for easy service later. Create a maintenance log noting part replacement dates and inspection results. Schedule routine checks and hose replacements per manufacturer recommendations.
Tip: Set calendar reminders to inspect hoses annually.
People Also Ask
Is it legal to share a water supply between a dishwasher and a washing machine?
Legal permission depends on local plumbing codes and appliance guidelines. Always verify with local authorities and manufacturers before proceeding.
Whether it's legal depends on your local codes and the appliance manuals; check first.
What plumbing parts do I need for this setup?
A dual shutoff valve or manifold, suitable adapters, and new inlet hoses are essential. Depending on your code, an air gap or backflow prevention device may also be required.
You’ll typically need a dual valve, adapters, and new hoses, plus an air gap if required by code.
Will connecting appliances affect warranties?
Warranties may be affected if the installation violates manufacturer guidelines. Always confirm wiring, drainage, and valve configurations with the manuals or a professional.
Warranties can be affected if you don’t follow manufacturer guidelines, so verify first.
What about drainage and air gaps?
Follow code requirements for air gaps or high loops to prevent backflow. Ensure drain lines are properly sloped and free of kinks.
Install an air gap or a high loop as your code requires, and keep the drain clear.
What signs indicate a leak after testing?
Look for damp spots at hose fittings, water pooling, or residue around connections. If you see any, shut off water and re-tighten or replace fittings.
If you notice any damp spots, stop and fix the connection before proceeding.
Should I hire a professional?
If you’re unsure about code compliance, electrical safety, or drainage, a licensed plumber or electrician is advised to prevent costly mistakes.
Yes, consider a pro if you’re not confident about code and safety aspects.
Watch Video
What to Remember
- Plan with local codes and manuals before any hookup.
- Use proper valves and drainage to prevent backflow and leaks.
- Test thoroughly and maintain hoses regularly.
- Document setup for easier future maintenance.