Cleaning drain hose on dishwasher: A practical guide
Learn to safely clean the drain hose on your dishwasher to prevent backups and odors with a clear, step-by-step guide from Dishwasher Tips.

In this guide you will learn how to clean the drain hose on a dishwasher to prevent backups and odors. You’ll safely disconnect the hose, remove debris, flush with water, and reattach seals. Before starting, turn off power at the breaker and shut off the water supply; allow the unit to cool if recently used.
Why cleaning drain hose on dishwasher matters
A clean drain hose is essential for reliable drainage and odor control. When food particles, grease, and mineral deposits build up inside the hose, water backs up into the tub, causing slow draining and unpleasant smells. According to Dishwasher Tips, the majority of drainage issues start with a clogged or kinked hose behind the dishwasher. Regular cleaning keeps flow unobstructed, reduces strain on the pump, and extends the life of seals and connections. In this section, you will understand the signs of a clogged hose, how deposits form, and why routine checks are worth your time. Expect to learn what to inspect, how to plan a cleanup, and how to evaluate whether repairs are needed.
Safety and prep before you start
Before you touch any wiring or plumbing, ensure safety. Start by unplugging the dishwasher or switching off the circuit at the breaker and turn off the water supply to the machine. Move the unit away from the wall to access the back or underside where the drain hose connects. Place a shallow tray or towels to catch any residual water and prevent slips. Wear sturdy gloves and safety glasses if you anticipate splashes. Having the right setup reduces mess and protects you from scalding water and sharp metal clamps.
Common causes of clogs in the drain hose
Over time, debris from dishes can travel down the drain hose and accumulate in bends. Grease and soap scum combine with hard water minerals to form a sticky residue. A kinked or crushed hose can restrict flow even if the interior is clear. Other issues such as a loose clamp or a misrouted hose behind the dishwasher can mimic a drainage problem. Understanding these causes helps you decide whether to clean, replace, or call a professional.
How to clean the drain hose: overview of the process
While the exact steps vary by model, the general approach remains consistent. You will access the drain hose, remove it from the fitting, clear debris, flush with water, and inspect for cracks. After cleaning, you reattach the hose with secure clamps, run an empty cycle, and observe drainage. Keep in mind that older hoses may crack, and replacing a brittle hose is safer than attempting to force it.
Reassembly, testing, and drainage verification
Reattach the drain hose firmly to its inlet and tailpiece, ensuring the clamps bite into clean metal or plastic. Tighten by hand and then with a screwdriver to the recommended torque. Reconnect the power and water, and run a short empty cycle. Check under the unit for leaks and observe the drain flow. If water remains in the bottom after the cycle, that indicates a separate issue.
Maintenance and future prevention
Schedule regular inspections every 6 to 12 months depending on usage and water quality. Use a brush to remove debris from the hose ends during routine sink-level cleaning. Install a simple dishwasher hose sleeve or anti-kink device if your model supports it. Ensure the hose route avoids sharp bends and is not crushed by cabinets. Finally, consider adding a rinse aid and adjusting detergent quantity to reduce suds that can contribute to buildup.
Troubleshooting common problems after cleaning
If backups persist after cleaning, verify the drain hose is not routed into a garbage disposal or branch that is clogged. Check the sink trap for blockages and ensure the drain is clear. Inspect the check valve and the air gap if your setup includes one. For ongoing issues, diagnose whether the pump or filter is blocked, which would require professional service.
When to call a professional
Not all drain hose problems are simple to fix. If you cannot access the hose safely, if the hose or clamps are damaged, or if you continue to see leaks after reseating the hose, contact a licensed technician. A professional can evaluate the entire drainage system and replace worn parts to prevent future failures.
Tools & Materials
- Safety gloves(Protect hands from sharp edges and dirty water)
- Screwdriver set (flathead or Phillips)(Loosen clamps and fittings)
- Pliers(Helpful for stubborn clamps)
- Bucket or shallow tray(Catch water and minimize spills)
- Old towels or rags(Wipe surfaces and absorb spills)
- Flexible brush or old toothbrush(Scrub hose ends and fittings)
- Dish soap (optional)(Mild cleaner for freshening the area)
- Water source (tap) or garden hose (optional)(Flush hose if accessible)
Steps
Estimated time: 30-45 minutes
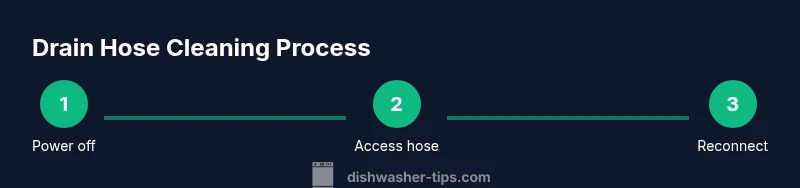
- 1
Power off and prepare
Power off at the wall or unplug the unit. Shut off the water supply and move the dishwasher away from the wall to access the drain hose. Place towels around the work area and keep a bucket handy to catch drips. This minimizes shock risk and keeps your workspace clean.
Tip: Always disconnect power before touching any electrical components. - 2
Access the drain hose behind the dishwasher
Reach to the back or underside of the unit to locate the drain hose. Note how the hose is routed and how clamps secure it. If your model has a protective kick plate, remove it carefully to expose fittings. A clear view helps you avoid damaging the hose during removal.
Tip: Take a quick photo of the original routing for easy reassembly. - 3
Disconnect the drain hose clamps
Loosen the clamps at both ends of the drain hose using the appropriate screwdriver. Gently slide the hose away from the fittings without tearing the hose. If clamps resist, apply a small amount of penetrating oil on stubborn screws and allow a minute to work.
Tip: Do not force clamps; prying can crack fittings. - 4
Remove debris from the hose interior
Inspect the hose interior from both ends and remove any visible food particles, grease, or mineral buildup. Use a flexible brush or pipe cleaner to reach bends. If you find cracks or significant wear, plan for replacement instead of forcing a seal.
Tip: Wear gloves and work over a tray to control debris. - 5
Flush the hose with water
Rinse the hose ends with clean water to dislodge hidden debris. If you have access to a low pressure water source, gently flush through the hose from the inlet to the discharge end. Inspect for any remaining material and repeat briefly if needed.
Tip: Avoid high pressure that could damage fragile hose walls. - 6
Reconnect the hose and secure clamps
Place the hose back onto the fittings and tighten clamps firmly by hand, then snug with a screwdriver. Ensure the hose is routed to avoid sharp bends or kinks. Reattach any protective plates and restore power/water connections only after you confirm clearance.
Tip: Double-check that the hose is fully seated before testing. - 7
Test the dishwasher drainage
Plug in or restore power and run a short empty cycle to test drainage. Observe for leaks at both ends and listen for a smooth draining sound. If water pools in the bottom after the cycle, pause to inspect for hidden leaks or blockages in other parts of the drain path.
Tip: Never run a full cycle until you confirm there are no leaks.
People Also Ask
What are the signs that my drain hose needs cleaning?
Backups, slow draining, and foul odors are common signs. If water drains slowly or sits after a cycle, inspect the drain hose for blockages and kinks. Cleaning the hose often resolves the issue.
If you notice backups or slow draining plus odors, check the drain hose for clogs. Cleaning usually fixes it.
Is it safe to clean the drain hose myself?
Yes, with basic safety steps: unplug the machine, shut off water, wear gloves, and follow the steps to remove debris and flush the hose. If you encounter damage, stop and consult a professional.
Yes, you can clean it yourself as long as you follow safety steps and stop if you find damage.
How often should I clean the drain hose?
Aim for a routine check every 6 to 12 months, or sooner if you notice slow drainage or odor. More frequent cleaning may be needed in areas with hard water or frequent use.
Most homeowners check every six to twelve months, or sooner if you notice problems.
Can a clogged drain hose cause leaks?
A clogged hose can cause pressure buildup and leaks at clamps or fittings. If you see leaks after cleaning, reassess clamps and seals and ensure the hose is correctly seated.
Yes, clogs can lead to leaks if fittings are stressed or seals fail.
What if the hose is cracked or brittle?
A cracked or brittle hose should be replaced. Attempting to repair can fail and cause bigger leaks. Use a hose of compatible diameter and material recommended by your model.
If you see cracks, replace the hose rather than patching it.
Do I need a professional if I cannot access the hose safely?
Yes. If access is blocked or you are unsure about electrical or plumbing connections, contact a licensed technician to avoid risks and ensure proper repairs.
If you cannot access it safely, call a professional.
Will cleaning the hose fix other drainage issues?
Cleaning the hose can fix hose-related drainage, but other problems like pump failure, clogged filters, or disposal plumbing may still cause backups. Inspect these components if problems persist.
It may solve hose problems, but other parts could still cause issues if problems continue.
Watch Video
What to Remember
- Power off before starting any work
- Access behind the dishwasher to inspect routing
- Ensure clamps are tight but not over-tightened
- Flush and inspect for cracks or wear
- Test with a short cycle and verify no leaks