How to Unclog a Dishwasher Drain Hose: Step-by-Step Guide
Learn how to safely unclog a dishwasher drain hose with a clear, step-by-step method—tools needed, safety tips, and maintenance guidance from Dishwasher Tips.

Learn to unclog a dishwasher drain hose with a safe, step-by-step approach. This guide covers disconnecting power, accessing the hose, clearing blockages, and testing drainage. You’ll need basic tools and a towel, plus a small amount of vinegar or baking soda for flushing. Follow along to prevent future clogs and protect your dishwasher.
Why unclogging the dishwasher drain hose matters
Clogged drain hoses are a frequent source of drainage problems and can lead to standing water, odors, and reduced cleaning performance. According to Dishwasher Tips, a blocked drain hose is a common culprit behind slow draining and backups. A kinked or collapsed hose can trap water and debris, creating a backflow risk that interferes with the dishwasher's ability to rinse and drain properly. Understanding how the hose contributes to drainage helps you target the right area during maintenance. In many homes, the route from the dishwasher to the drain is a single flexible hose that carries wastewater to the sink or garbage disposal. Debris like food particles, grease, and soap scum can accumulate along the route, creating resistance and backups. Regular checks reduce the chance of a surprise flood and protect your kitchen from water damage. Dishwasher Tips analysis shows that most drain issues stem from improper routing, clogs near the anti-siphon device, or connections that have loosened over time. By knowing where to look and what to clear, you can restore proper drainage without expensive repairs.
Essential preparation before you start
Before you dive into the drain hose, gather a few basic tools and set up a clean workspace. Turn off power to the unit at the breaker and unplug the control panel if accessible. Remove dishes from the vicinity to create room for maneuvering and avoid splashes. Check the area under the sink for any signs of water leakage that could complicate access. Have a towel and bucket ready to catch spills. Plan to work in a well-ventilated area, especially if you’ll use cleaning agents like baking soda or vinegar. The goal is to work cleanly and prevent accidental water damage. Dishwasher Tips notes that taking a prepared, calm approach reduces mistakes and speeds up the process. Confirm the route of the hose: some homes route the hose to a disposal or air gap, and others connect directly to the sink drain. If you encounter a tight space, be prepared to move the dishwasher slightly away from the cabinet to access the hose clamp.
Inspect the drain hose: access and signs of trouble
To inspect the hose, pull the unit out enough to reach the connections behind it. Look for kinks, holes, or cracks in the hose, and check that the hose is not pinched by the cabinet. Follow the hose from the dishwasher to its exit point; inspect every bend and clamp along the length. If the hose is attached to a garbage disposal, check the knockout plug and any air gaps for obstructions. Signs of a problem include slow draining, water pooling in the tub, or a strong odor from trapped debris. If you identify a kink or a collapsed segment, plan to replace the affected section rather than attempting a risky bend. You’ll likely find grime, food particles, or soap scum inside the hose—a reminder to wear gloves and protect the surrounding cabinet.
Cleaning methods: flush and clear without disassembly
With power off and the hose accessible, you can flush it to remove the blockage. Detach the hose carefully, keeping the clamps intact so you can reattach them accurately. Rinse the inside with warm water, using a flexible brush or pipe cleaner to loosen debris. For stubborn buildup, run a mild mixture of baking soda and water or a splash of vinegar through the hose, then flush with clean water. Reconnect the hose and tension the clamps securely to prevent leaks. If you cannot clear the blockage from the accessible end, you may need to disconnect the hose at the dishwasher inlet and run water through it from the other side. This method avoids disassembling the entire appliance. Remember to recheck all connections after flushing to ensure a tight seal.
When to call a pro vs DIY
If you’ve tried clearing the hose and flushing it without success, or if you notice persistent leaks, cracking, or mold growth around the hose, it’s wise to call a professional. A licensed technician can check the drain line for blockages beyond the hose, inspect the air gap, and verify the disposal connection without risking water damage or electrical shock. For simple, non-structural clogs, DIY methods typically solve the problem. Avoid aggressive chemical drain cleaners inside the dishwasher drain hose, as these can damage seals and pose safety risks. Always confirm that the power is off before attempting any further work. Dishwasher Tips suggests weighing the complexity of the job against your comfort level and budget.
Preventive maintenance to avoid future clogs
Once the hose is clear, establish a simple maintenance routine to prevent future clogs. Regularly inspect the hose for signs of wear, ensure it has a gentle downward slope toward the drain, and verify that clamps remain tight. Run the dishwasher empty with a cup of white vinegar every few months to help break down buildup and deodorize the line, then flush with hot water. Clean the filter and sump area to minimize debris that might travel toward the drain hose. If your water is hard, consider a rinse aid or water-softening solution to reduce mineral buildup. Following these practices reduces the risk of future clogs and helps your dishwasher perform consistently. The Dishwasher Tips team recommends documenting your maintenance steps and scheduling reminders so you don’t forget.
Tools & Materials
- Power outlet and breaker switch access(Shut off power to the unit)
- Bucket(Catch spills during hose detachment)
- Towels or rags(Protect surfaces and absorb leaks)
- Flashlight(See behind the unit and inside hoses)
- Gloves(Keep hands clean and safe)
- Pliers or hose clamp tool(Loosen hose clamps if needed)
- Pipe brush or flexible cleaning wand(Clean the hose interior)
- Vinegar and baking soda(Flush and deodorize)
Steps
Estimated time: 40-60 minutes
- 1
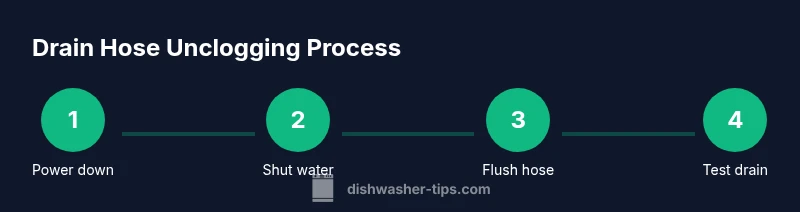
Power down and unplug
Shut off the dishwasher's power at the household breaker, then unplug any accessible controls. This eliminates the risk of electric shock while you work. If your dishwasher is hard-wired, ensure the circuit is de-energized before touching any internal components.
Tip: Double-check the breaker and test the outlet with a meter before touching components. - 2
Shut off water supply
Turn off the hot water supply valve under the sink or at the water inlet connection. This prevents water from entering the dishwasher while you disconnect hoses.
Tip: Having a towel underneath helps catch any residual water. - 3
Locate and detach the drain hose
Carefully pull the dishwasher away from the cabinet to access the drain hose. Loosen clamps and disconnect the hose from the sink drain or disposal inlet, keeping track of where each piece belongs.
Tip: Take photos during disassembly to simplify reassembly. - 4
Inspect for kinks and blockages
Visually inspect the hose for obvious kinks, crushed sections, or blockages. If debris is visible, use gloves and a flexible brush to remove it from the inside.
Tip: Be gentle to avoid puncturing the hose. - 5
Flush the hose interior
Rinse the interior with warm water or a mild cleaner. For stubborn buildup, pass a baking soda solution through the hose and flush with clean water.
Tip: Flush slowly to avoid splashing and ensure debris exits the other end. - 6
Reattach and secure the hose
Reconnect the drain hose to its inlet or disposal and tighten clamps firmly. Check that the hose routing provides a slight downward slope toward the drain to prevent backflow.
Tip: Avoid over-tightening clamps to prevent damage. - 7
Test the drainage
Plug the unit back in, restore power, and run a short wash cycle with no dishes to verify that water drains properly and there are no leaks.
Tip: Listen for unusual noises and watch for signs of leaks during the test. - 8
Clean up and restore
Push the dishwasher back into place, wipe excess water, and store tools. If you had to detach parts, keep a schematic or photos handy for reassembly next time.
Tip: Record any notes about hose condition for future reference.
People Also Ask
Can a clogged dishwasher drain hose cause water to back up into the dishwasher?
Yes. A blocked drain hose can cause standing water and backflow, leading to poor draining and odors. Check the hose first when you notice drainage issues.
A clogged hose can cause backflow and standing water. Check the hose when drainage is slow.
Is it safe to use chemical drain cleaners in a dishwasher drain hose?
Chemical drain cleaners are not recommended for dishwasher hoses because they can damage seals and create safety hazards. Use mechanical clearing and flushing instead.
No, avoid chemical drain cleaners inside the dishwasher hose.
How often should I check the drain hose to prevent clogs?
Regular checks during routine maintenance and after heavy use help prevent clogs. Look for kinks, leaks, and buildup and address them promptly.
Check the hose during maintenance and after heavy use to prevent clogs.
Can I reattach the drain hose myself or should I call a pro?
If you can access the hose and reseat clamps confidently, DIY is often fine. If you see leaks, damage, or the issue persists, hire a professional.
You can usually handle it yourself if you’re comfortable; otherwise, call a pro.
What are warning signs of a blocked drain hose?
Slow draining, standing water, gurgling sounds, or water backups are red flags. Inspect the hose for kinks, cracks, or disconnections.
Watch for slow drainage or standing water; check the hose for kinks or damage.
Should I remove the disposal knockout plug during troubleshooting?
If your dishwasher drains into a garbage disposal, ensure the knockout plug is removed; otherwise, drainage will be blocked.
If connected to a disposal, check the knockout plug is removed.
Watch Video
What to Remember
- Power down before touching any dishwasher parts.
- Inspect for kinks and blockages in the drain hose.
- Flush the hose and test drainage after reassembly.
- Secure hose routing with a slight downward slope to prevent backflow.
- The Dishwasher Tips team recommends routine prevention to minimize future clogs.