Repair a Commercial Dishwasher: Step-by-Step Troubleshooting Guide
Comprehensive, AI-informed guide to diagnosing, repairing, and maintaining a commercial dishwasher. Safety, tools, step-by-step repair, and preventive maintenance to reduce downtime and extend equipment life.

You're about to learn how to diagnose and repair a commercial dishwasher safely and effectively. This guide walks you through common failure modes, required tools, step-by-step repair procedures, and maintenance tips to prevent recurrences. You'll also discover when to replace components, how to source quality parts, and cost considerations to minimize downtime.
Understanding the Demand: Why Repair Commercial Dishwasher Matters
For any food-service operation, a reliable dishwasher is a lifeline. Downtime means delayed service, backlogs in cleaning, and unhappy customers. When a commercial dishwasher falters, decisions must be made quickly: repair what’s affordable, or replace if the fault is likely to recur. This guide focuses on practical, end-to-end repair techniques that help you restore performance while keeping safety, cost, and uptime in mind. According to Dishwasher Tips, tackling a repair on a commercial dishwasher early saves downtime and water waste, and helps protect your investment over time. We’ll cover diagnostic workflows, safety steps, tool selection, and when to call a pro. The goal is to empower facility managers, property owners, and maintenance staff to make informed choices that balance cost, uptime, and longevity. This approach emphasizes repeatable checks and proven fixes, not guesswork, so you can resume normal operation confidently.
Common Symptoms and Quick Diagnostics
Commercial dishwashers are designed for heavy use, but they share a handful of symptoms when something goes wrong. Not draining, not heating, or dishes coming out still dirty are classic signs of a fault in the drain, heater, or spray system. Leaks and unusual noises can indicate worn seals or a failing pump. Before diving into parts, perform a quick diagnostic check: confirm the unit is supplying water at the correct pressure, verify the door switch is engaged, and listen for the pump sound during run. In many cases, simple maintenance like cleaning filters or clearing a clogged spray arm restores performance. Dishwasher Tips analysis shows that many failures stem from routine neglect rather than a single catastrophic defect. Document any codes or alarm lights, as these guide both troubleshooting and parts selection. Keep a log of symptoms, cycle times, and observed faults to track recurring issues over time.
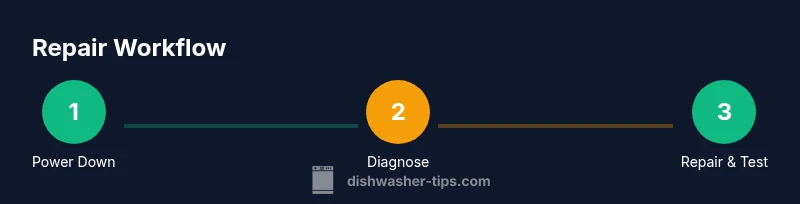
Safety First: Power Down, Lockout, and PPE
Safety is non-negotiable when repairing heavy kitchen equipment. Start by shutting off power at the disconnect and turning off the water supply. Use lockout-tagout procedures so the machine cannot be started while you work. Wear appropriate PPE: safety glasses to protect eyes from splashing water and cleaning chemicals, chemical-resistant gloves, and a long-sleeve shirt. If you must drain hot water, use heat-resistant gloves and a sturdy bucket. Never bypass safety interlocks or tamper with wiring while a live circuit could energize. If you smell gas or hear unusual electrical arcing, stop immediately and call a pro. By following these precautions, you reduce the risk of shock, burns, and chemical exposure, while keeping your team safe and compliant with local regulations.
Foundational Tools and Measurement Basics
A successful repair relies on the right toolkit and basic measurements. Essential items include a digital multimeter for voltage, continuity, and resistance tests; a screwdriver set (Phillips and flat-head); an adjustable wrench and nut drivers for hose fittings and clamps; pliers and channel-locks for hose clamps and retention parts; a bucket and absorbent towels for spill management; a flashlight or headlamp for dim cabinets; chemical-resistant gloves and splash goggles; and manufacturer-supplied parts when possible. A clean, well-lit work area helps you trace wires and identify connectors. For precision, keep a notebook or digital log of readings, codes, and parts replaced. While not every repair requires every tool, having a solid baseline toolkit reduces diagnostic time and protects components during service.
Not Draining or Filling: Drain System and Plumbing Checks
If the unit won’t drain or won’t fill correctly, start with the plumbing and pump path. Inspect the drain hose for kinks or clogs, and verify the drain valve or sump filter is clear. Check the sump pump screen, filters, and spray arms for debris that can obstruct flow. Ensure the water inlet valve opens fully and that the supply line is not restricted by mineral buildup. Clean or replace filters as needed and test the pump by running a short wash cycle (with water only) to observe the drain function. Many drainage problems originate from a plugged filter or a blocked trap, so address those first before swapping components. If the alarm or fault code persists, consult the manufacturer’s service manual for wiring diagrams and approved testing procedures. Use only compatible parts to avoid repeated clogging or leakage.
Heating and Cleaning: Heaters, Thermostats, and Spray Arms
A dishwasher’s ability to sanitize hinges on heat, chemical strength, and spray pressure. If dishes come out warm but not hot, inspect the heater element and thermostat; measure resistance with your multimeter and compare to the manufacturer’s specs. Inspect the high-temperature cutout and thermal fuse for signs of burnout. Inspect the spray arms for clogs or worn nozzles that impair cleaning performance, and verify that the sump cover seals properly to prevent heat loss. If the machine runs but water isn’t reaching the spray arms, check the circulation pump. Clean all orifices with a soft brush and approved cleaner, avoiding corrosive chemicals that can degrade metal components. When replacing a heater component, ensure the electrical connections are secured and insulated. After adjustments, run a test cycle with a calibrated thermometer to confirm the final wash temperature meets sanitation targets. Note: compromised heating can increase energy use and reduce cleaning effectiveness.
Leaks, Seals, and Gasket Integrity
Water leaks are a common sign of worn seals, misaligned panels, or loose fittings. Inspect door gaskets for cracks, tears, or hardened rubber that could allow steam and water to escape during cycles. Check the door latch alignment and hinge hardware for proper sealing. Examine hose connections and clamps for tightness, and replace any damaged clamps that could contribute to drips. If you notice dampness around the base or behind panels, inspect the sump seal and drain pump housing for cracks or loose fasteners. Cleaning and resealing gaps with the right gasket material can usually restore a leak-free operation. After repairs, run a short cycle with water present and inspect all seams for fresh leakage.
Cost, Labor, and When to Replace Components
Repair decisions balance component cost, downtime, and expected service life. If a motor, pump, or heater is showing frequent failures, you can estimate replacement costs by referencing manufacturer price ranges and service charges from local technicians; however, avoid quoting exact prices. When a unit is approaching end-of-life or when recurring failures occur despite repairs, replacement may be more cost-effective in the long run. Consider the facility’s uptime requirements, energy efficiency, and water usage when deciding. In some cases, upgrading to a newer model with better energy and water efficiency yields long-term savings that offset upfront costs, especially in high-volume settings. By assessing the repair vs. replace decision with a clear financial analysis and a spare parts strategy, you minimize downtime and maintain productivity. According to Dishwasher Tips, data-informed maintenance planning can substantially extend equipment life and lower total cost of ownership over the machine’s lifetime.
Maintenance Plan: Proactive Care for Longevity
Prevention is the best medicine for commercial dishwashers. Implement a regular cleaning schedule for filters, spray arms, and seals; check water quality and hardness, and adjust rinse aid and detergent dosages accordingly. Create a simple weekly checklist: inspect spray arms, test the heater, drain the filter, and visually inspect door seals. Schedule a professional service every 6–12 months to calibrate the control system and verify electrical safety. Keep a parts inventory and reorder essential items to reduce downtime when a component fails. Maintain water connections and inspect hoses for signs of wear or cracking. A disciplined maintenance program improves reliability, reduces emergency repairs, and makes budgeting easier for facility managers and maintenance teams.
Tools & Materials
- Digital multimeter(Test voltage, resistance, and continuity of controls and heating elements.)
- Screwdriver set (Phillips and flat-head)(Access panels and terminals.)
- Nut drivers(For hose clamps and fittings.)
- Adjustable wrench(Fittings and pump connections.)
- Needle-nose pliers(Grasp small components, secure wires.)
- Channel-lock pliers(Grip hoses and clamps securely.)
- Bucket and towels(Spill management during drainage.)
- Flashlight/headlamp(Bright, focused lighting for cabinets.)
- Chemical-resistant gloves(Protect hands from cleaners and hot water.)
- Safety glasses(Eye protection from splashes.)
- Replacement seals/gaskets(Stock common sizes for quick fixes.)
- Manufacturer-approved replacement parts(Use when available to ensure compatibility.)
- Cleaning brushes(Gentle brushes for filters and spray arms.)
Steps
Estimated time: 60-120 minutes
- 1
Power down and lockout
Shut off power at the disconnect and close the water supply. Apply lockout-tagout to prevent accidental re-energizing. Verify there is no voltage at exposed terminals before touching any wiring.
Tip: Tag personnel to avoid re-energizing during service. - 2
Access control panels
Remove access panels to reach the control board and pumps. Photograph connectors before disconnecting, and label wires for accurate reassembly. Keep work area dry to avoid slips.
Tip: Use a magnetic parts tray to prevent misplacing screws. - 3
Test electrical components
With the unit powered down, use the multimeter to verify supply voltage, pump continuity, and thermostat resistance. Compare readings to the manufacturer specs and note any deviations for parts sourcing.
Tip: Double-check ground connections for safety. - 4
Inspect filtration and spray system
Remove and clean filters, screens, and spray arms. Clear any debris from the sump area and verify there are no obstructions in the wash manifold.
Tip: Do not use metal tools on spray arms to avoid damage. - 5
Check heater and thermostat
Measure heater element resistance and test thermostat operation. If readings are out of spec, replace the component and re-test the cycle temperature.
Tip: Ensure the heater has a proper heat sink and clean connections. - 6
Inspect drain path and pump
Trace the drain path for kinks, blockages, or collapsed hoses. Inspect the pump housing for cracks and verify clamps are secure.
Tip: Backflush the drain with hot water and approved cleaner if needed. - 7
Replace and verify
Install the identified faulty component using manufacturer guidelines. Run a full cycle with water and monitor for leaks, proper fill, and correct wash temperature.
Tip: Keep a repair log with part numbers and readings for future reference.
People Also Ask
What is the most common cause of a commercial dishwasher not draining?
Most drain failures are due to a clogged filter, debris in the sump, or a blocked drain hose. Start with the filter and sump before replacing pumps.
Usually it’s a clog in the filter or drain line.
Can I perform repairs myself?
Some fixes are doable with this guide, but avoid electrical work or high-pressure components if you’re not trained. When in doubt, hire a licensed technician.
Yes for simple fixes, but call a pro for electrical work.
How long does a typical repair take?
Most repairs take a few hours, depending on the fault and parts availability.
Most repairs take a few hours.
Should I replace or repair components?
Compare part cost, labor, and the unit’s age; replacement may be cheaper long-term if failures are frequent.
Weigh cost, age, and reliability.
What safety precautions are essential?
Always shut off power and water, use lockout-tagout, wear PPE, and avoid touching live circuits.
Turn it off and lock it out; protect yourself.
How can I prevent future breakdowns?
Follow a maintenance schedule, clean filters, and monitor water quality; regular professional inspections help.
Stay on a maintenance routine.
Watch Video
What to Remember
- Diagnose root cause before replacing parts.
- Safety comes first: lockout, PPE, and cautious handling.
- Maintenance reduces downtime and extends life.
- Know when to call a professional for complex electrical/high-pressure work.