Dish Washer Machine: The Complete Home Troubleshooting Guide
A comprehensive, step-by-step guide to diagnosing, maintaining, and repairing a dish washer machine for homeowners and renters. Learn safety, detergent choices, routine maintenance, and practical troubleshooting to keep your dishwasher running efficiently.

By the end of this guide, you’ll be able to diagnose and fix common issues with a dish washer machine, improve cleaning performance, and extend its lifespan. You’ll learn essential safety steps, how to select the right detergent, and a practical maintenance routine you can perform in under an hour. This quick answer outlines the key steps you need to start, plus what not to do to avoid damage.
Understanding how a dish washer machine works
A typical dish washer machine comprises a detergent dispenser, a water inlet valve, a circulation pump, spray arms, filters, a heater, and a control system. Water is heated to an optimal temperature and pumped through the spray arms to blast away food and grease from dishes. Debris is captured by filters and drained through the drain hose. Recognizing these parts helps you diagnose why a cycle isn’t performing as expected and makes conversations with service technicians more productive. For homeowners and renters, basic familiarity with the water inlet and filtering system reduces guesswork during repairs and improves your ability to plan safe, effective checks. When you hear unusual noises or notice streaky or dirty dishes, knowing where these components live—behind the lower rack and near the back of the tub—lets you plan safe, targeted inspections.
Common Problems and Diagnostics
Most issues fall into a few categories: poor cleaning, draining problems, leaks, unusual noises, and improper drying. Start with the simplest explanations: check for a full detergent cup, ensure the door seal is intact, and verify the spray arms aren’t blocked by oversized dishes. If dishes come out wet, confirm you’re selecting an appropriate wash cycle and that the rinse aid is not depleted. A clogged filter or spray arm reduces water flow and cleaning power; a kinked drain hose or blocked pump also stops drainage. Document symptoms, then work through your checklist: power to the unit, water supply, filters, spray arms, and drain components. Understanding these symptoms helps you decide whether a quick fix is enough or a professional assessment is needed.
Detergent, Rinse Aids, and Cleaning Agents
Choosing the right detergent and rinse aid is essential for consistent results with a dish washer machine. Prefer a proven dishwasher detergent designed for automatic machines and follow the manufacturer’s dosing recommendations. Pods, powders, and liquids all have distinct dosing and dissolving characteristics—some formulations work better in hard water than others. Rinse aids help reduce spotting and improve drying by promoting sheeting action. Avoid using regular dish soap, which creates excessive suds and can damage the unit. Keep the detergent container sealed and store away from moisture. For best results, adjust the amount based on water hardness and the loading pattern, not on whim or guesswork.
Installation, Setup, and Immediate Checks
A proper setup ensures optimal performance and reduces early failures. Start by confirming the appliance is level on all sides, with adequate clearance for vents and airflow. Check that the water supply line is securely connected and not kinked, and verify the drain hose isn’t elevated or blocked. Some models require a dedicated circuit; if you notice frequent tripping, consult an electrician. Always connect the unit to a grounded outlet and ensure the door latch aligns with the strike for a proper seal. If this model is new to you, read the installation instructions carefully, as different brands may have model-specific quirks that affect wash quality and reliability.
Regular Maintenance for Longevity
Regular maintenance protects a dish washer machine from common failures. Clean the filter and spray arms monthly to prevent grease buildup and clogs, and run a cleaning cycle or a hot wash with a dishwasher-safe cleaner to remove residue. Wipe the door gasket to remove trapped crumbs and inspect for cracks or wear. Inspect hoses for signs of aging or leakage and replace any damaged components promptly. Periodic inspection of the interior tub for hard water deposits or mineral buildup helps sustain efficiency and prolongs service life. Create a simple log to track maintenance tasks and part replacements for easier diagnostics later on.
Energy Efficiency, Water Use, and Cost Savings
Modern dish washers offer multiple cycles that balance performance with energy and water usage. When possible, run full loads on eco or energy-saving cycles, avoid extra rinses, and skip heated dry in favor of air drying if your model supports it. Verify your water hardness setting and use the appropriate rinse aid to minimize mineral buildup that can reduce efficiency. Regular maintenance, including clean filters and working spray arms, ensures your machine uses less water and power per cycle. Even small optimizations add up over time and can significantly reduce utility bills.
Safety and When to Call a Pro
Safety comes first: unplug the unit before any disassembly, and never touch exposed wiring while water is present. If you suspect a gas leak, electrical fault, or persistent leak, stop work and call a qualified technician. Signs you should escalate include burning smells, repeated fuse trips, or error codes that you cannot clear. Document symptoms, model number, and service history before calling for repair. A pro can assess complex components like the pump, heater, or control board and prevent further damage that could void warranties.
Troubleshooting Quick Fixes for Common Symptoms
If your dishes aren’t clean, check the detergent amount, rinse aid level, and whether the spray arms are turning freely. If the dishwasher won’t drain, inspect the filter and drain hose for clogs and test the pump. Leaks around the door or tub often point to worn seals or the door gasket, which may require replacement. Unusual noises can indicate foreign objects in the pump or a failing bearing. Use this section as a rapid reference to prioritize checks and avoid unnecessary disassembly.
Tools & Materials
- Screwdrivers (Phillips #2 and flathead)(Essential for removing access panels and fasteners.)
- Multimeter(Optional for testing electrical components if you’re comfortable.)
- Bucket and towels(Gather and manage water from hoses and the tub.)
- Replacement filter or spray arm (if damaged)(Keep spare parts on hand for quick maintenance.)
- Owner’s manual(Model-specific guidance and part numbers.)
- Gloves and safety glasses(Protect hands and eyes during disassembly.)
- Dishwasher-safe cleaner(Used for periodic cleaning cycles.)
Steps
Estimated time: 60-90 minutes
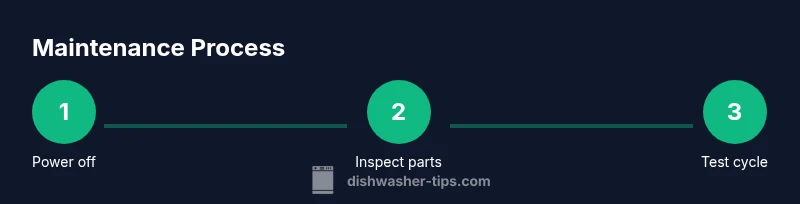
- 1
Power off and unplug the dishwasher
Before beginning any inspection, cut power at the breaker and unplug the unit. This prevents electric shock while you inspect or remove panels. If your model is hard-wired, ensure the circuit is fully de-energized before touching any wires.
Tip: Always dry hands and use a non-conductive tool when touching components. - 2
Check for obvious clogs and leaks
Look for standing water, debris in the filter, and kinks in the drain hose. Remove any obstruction and wipe the tub base dry. If water remains, run a quick drain test or diagnostic cycle to verify drainage.
Tip: Remove the lower rack to access the filter housing for a thorough check. - 3
Inspect spray arms and filters
Ensure spray arms turn freely and aren’t blocked by large dishes. Remove and rinse filters under running water to remove oil and food particles that reduce water flow.
Tip: Use a toothpick or small brush to clear stubborn nozzle holes without damaging the arms. - 4
Test the pump and motor with a short cycle
If you suspect a pump or motor issue, run a short wash cycle without load and listen for unusual sounds or stall conditions. Check for error codes on the display and reference the manual.
Tip: Do not run cycles with a visibly damaged hose; unplug and replace as needed. - 5
Check door latch and seals
A poor seal allows water leaks and ineffective cleaning. Inspect the door gasket for cracks and ensure the latch engages fully. Replace worn seals to restore proper operation.
Tip: Clean the gasket with a damp cloth to remove buildup that prevents a tight seal. - 6
Replace or call for professional service
If basic checks don’t resolve the issue, it may be a faulty pump, control board, or heating element. Record model and serial numbers and schedule a professional diagnosis.
Tip: Keep service records for warranty coverage and future maintenance planning.
People Also Ask
Why is my dish washer machine not draining?
Common drainage issues include a clogged filter, blocked drain hose, or a faulty pump. Start by inspecting the filter and drain hose for obstructions, then test the pump with a short cycle. If the problem persists, a professional check may be needed.
Not draining is usually caused by clogs in the filter or drain hose, or a failing pump.
How can I fix dishes that aren’t clean after a cycle?
Check the detergent amount and quality, ensure rinse aid is available, and inspect spray arms for blockages. Also verify that you’re loading dishes correctly so water can reach all surfaces.
Unclean dishes usually mean insufficient water distribution or detergent issues.
Is detergent choice important for dish washers?
Yes. Use a detergent designed for automatic dishwashers and follow the manufacturer’s dosing guidance. Hard water may benefit from specific formulas or additional rinse aids.
Detergent quality and water hardness matter for best results.
How can I reduce energy use with my dish washer machine?
Run full loads on eco or energy-saving cycles, avoid extra rinses, and air-dry if possible. Maintain seals and filters to keep efficiency high.
Choose energy-saving cycles and keep components clean for best efficiency.
When should I replace a spray arm?
Replace if there are cracks, missing nozzles, or if it doesn’t spin freely. A damaged arm reduces cleaning performance and may cause damage.
Replace a cracked spray arm to restore proper spray and avoid damage.
Can hard water affect performance?
Yes. Hard water can cause mineral buildup that reduces cleaning and efficiency. Use a compatible rinse aid and periodic descaling as recommended by the manufacturer.
Hard water can reduce performance; use rinse aid and occasional descaling.
Watch Video
What to Remember
- Inspect filters and spray arms regularly
- Choose the right detergent and rinse aid
- Check seals, hoses, and the drain system for leaks
- Know when to call a pro for complex failures