Replace Dishwasher Water Inlet Valve: A DIY Guide
Learn to replace the dishwasher water inlet valve with a clear, safe, step-by-step method. This guide covers symptoms, compatibility, tools, and testing for leaks.

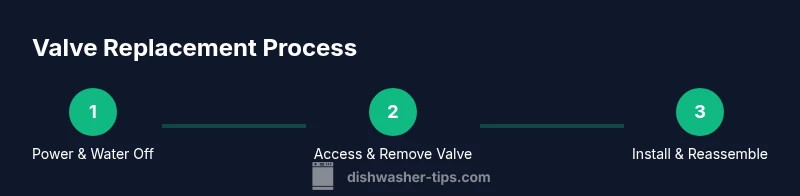
To replace dishwasher water inlet valve, gather basic hand tools, a compatible replacement valve for your model, and a shallow pan to catch leaks. According to Dishwasher Tips, start by disconnecting power, shutting off the water supply, and draining the dishwasher. Then remove the access panel, unplug wiring, swap the valve, reseat hoses, reconnect wiring, reassemble, and run a test cycle for leaks.
What is a dishwasher water inlet valve and why it fails
The water inlet valve is the gateway between your home's water supply and the dishwasher tub. When the valve opens, water flows into the machine; when it closes, the fill stops. A failing valve can cause no fill, overfill, or leaks around the valve body. Common culprits include mineral buildup, worn diaphragms, faulty solenoids, or damaged electrical connections. In many cases, a simple replacement restores proper fill timing and spray performance. According to Dishwasher Tips, valve-related fill problems are among the most frequent reasons for early dishwasher trouble. By understanding symptoms and testing the valve, you can decide whether a DIY replacement is appropriate for your situation.
Safety first: prepare and protect your environment
Before touching electrical components or water lines, protect yourself and your home. Unplug the dishwasher or switch off the circuit breaker to avoid shock. Shut off the cold-water supply valve that feeds the machine, then run a quick cycle to drain any residual water. Place towels and a shallow pan to catch leaks, and work in a dry, well-lit area. If you live in an area with hard water or mineral build-up, expect more mineral deposits around fittings—have extra towels ready. Dishwasher maintenance requires caution; the steps below are designed for homeowners, but if the unit is under warranty or you feel unsure, contact a technician. This approach minimizes the risk of injury and water damage.
Signs you need to replace the valve
The following signs point to a valve that should be replaced rather than repaired. You may notice that the dishwasher does not fill at the start of a wash cycle, fills partially, or overfills and triggers the overflow protection. You might hear a buzzing, humming, or clicking sound from the valve when the machine attempts to fill. Visible leaks around the inlet connection or dampness near the valve indicate a seal failure. If the valve lockout or wiring looks damaged, replacing it is usually safer than attempting a repair. Remember: intermittent symptoms may still indicate a valve problem, especially if the rest of the system is intact.
Tools and replacement parts you’ll need
- replacement inlet valve compatible with your dishwasher model — essential
- bucket to catch water — essential
- absorbent towels or rags — essential
- Phillips head screwdriver (medium) — essential
- flat-head screwdriver (if required by your model) — optional
- adjustable wrench or nut driver — essential
- needle-nose pliers — essential
- flashlight or headlamp — optional but helpful
- PTFE thread seal tape (plumber’s tape) — optional
- small container for fasteners — helpful
Note: Always verify valve compatibility with your model before purchase. If you aren’t sure, check the model number under the door frame or on the rating label and compare to the replacement valve listing. After replacement, you may need to reset the dishwasher’s control to clear fault codes.
Step-by-step overview: what you’ll do
The process breaks down into safe, sequential actions. You’ll disconnect power and water, access the valve, remove the old valve and hoses, install the new valve, and verify the installation. Having photos of the original wiring and hose routing can help you reassemble correctly. Plan 60–90 minutes for a careful DIY replacement, depending on your experience and the model.
Step-by-step: replace the valve (detailed actions)
-
Disconnect power and water: Unplug the dishwasher at the wall or switch off the circuit, then close the cold-water shutoff and place a bucket under the inlet line to catch any residual moisture. Tip: use a dry cloth to wipe the area as you work.
-
Access the valve: Remove the front kick panel or the lower access panel per your model’s manual. Move towels to protect the floor and avoid contact with hot surfaces. Tip: take a photo of hose routing before removing any parts.
-
Label and disconnect wiring: If the valve has multiple wires, label each connector. Disconnect the wiring harness gently, noting the sequence for reassembly. Tip: avoid tugging on the wires; disconnect at the connectors.
-
Detach hoses from the old valve: Loosen hose clamps with the appropriate screwdriver or pliers, and slide hoses off the valve barbs. Have a container ready for any remaining water. Tip: keep track of which hose goes where.
-
Remove the old valve: Unscrew mounting screws and lift the valve free. Inspect the mounting surface for cracks or mineral buildup. Tip: clean the surface before installing the new valve.
-
Install the new valve and reattach wiring and hoses: Position the new valve, secure with screws, reseat hoses with clamps, reconnect wiring in the original order, and ensure seals are snug. Tip: hand-tighten hoses first, then snug with a wrench.
-
Final checks and reassembly: Reattach any panels, restore water supply and power, and run a short test cycle with the door open to observe for leaks. Tip: listen for unusual sounds and watch for damp spots.
Common pitfalls and troubleshooting
Common pitfalls include mixing up hose routing, reusing old seals, or overtightening clamps, which can crack fittings or damage the valve body. Always label or photograph connectors before disconnecting, and replace any worn seals or gaskets. If you encounter electrical signs like scorched wires or a persistent short, stop and consult a professional. Inconsistent fill patterns might indicate a second issue beyond the valve, such as a faulty water supply line or a clogged filter.
Aftercare and long-term maintenance
After completing the replacement, monitor the dishwasher through multiple cycles to ensure reliable fill, proper spray action, and no leaks. Inspect hose connections monthly for signs of moisture, and replace worn clamps or cracked hoses promptly. Use filtered water if you live in a hard-water area, and consider a compatible water-softening strategy to minimize mineral buildup around fittings. Keeping the valve area clean can extend its life and reduce the chance of future failures.
When to call a professional
If you are uncomfortable with electrical components, cannot locate the valve, or your model uses a dual-valve system, professional service is recommended. Likewise, if replacing the valve does not resolve fill or leak issues, a licensed technician can diagnose related problems like control boards or water supply lines. Always prioritize safety and warranty considerations when deciding whether to DIY.
Tools & Materials
- replacement inlet valve compatible with your dishwasher model(Check model compatibility via rating label or manual)
- bucket(Catch residual water during valve removal)
- absorbent towels(Keep dry working area)
- Phillips head screwdriver (medium)
- flat-head screwdriver(Useful for some models)
- adjustable wrench or nut driver
- needle-nose pliers
- flashlight/headlamp(Improve visibility)
- PTFE plumber’s tape(Optional for threaded connections)
- small container for fasteners
Steps
Estimated time: 60-90 minutes
- 1
Power down and shut off water
Unplug the dishwasher or switch off the circuit breaker. Close the cold-water supply valve and drain residual water by running a short cycle. Have towels ready to absorb drips.
Tip: Double-check the breaker is off before touching any wiring. - 2
Access the valve area
Remove the front or lower access panel per your model. Clear the area and prepare a container for any remaining water. Take a photo of hose routing to guide reassembly.
Tip: Keep fasteners in a labeled container. - 3
Label and disconnect wiring
Label each wiring connector before detaching. Disconnect the wiring harness patiently, keeping track of which wire goes where.
Tip: If you’re unsure, stop and consult the manual. - 4
Detach hoses from the valve
Loosen hose clamps and slide hoses off the valve barbs. Have a container ready for any water left in the hoses.
Tip: Avoid bending the hoses sharply. - 5
Remove the old valve
Unfasten mounting screws and lift the valve out. Inspect the mounting surface for corrosion or mineral buildup and clean as needed.
Tip: Do not reuse damaged seals. - 6
Install the new valve and reassemble
Place the new valve, secure with screws, reconnect hoses and wiring in the correct order, and ensure seals are snug.
Tip: Hand-tighten clamps first, then snug with a wrench.
People Also Ask
What is a dishwasher water inlet valve?
The valve controls water flow into the dishwasher. When it fails, the machine may not fill, overfill, or leak. Replacement is often straightforward with the right model-specific valve.
The water inlet valve controls water flow into the dishwasher. If it fails, the dishwasher may not fill or may leak. Replacement is usually straightforward with the correct valve.
How do I know if the valve is faulty?
Symptoms include no fill, underfill, overfill, buzzing at the inlet, or visible leaks around the valve. Electrical signs or fault codes on the control panel can also indicate a valve issue.
Look for no fill or overfill, buzzing sounds, leaks, or fault codes from the control panel to indicate valve trouble.
Can I replace the valve myself?
Many homeowners can replace a valve with basic tools and model-specific guidance. Follow safety steps carefully and consult the manual if you’re unsure.
Yes, many people replace the valve themselves if they’re comfortable with basic tools and reading their manual.
What safety precautions should I follow?
Always unplug the unit, shut off water, and drain residual water before starting. Wear gloves and work in a dry area to reduce shock risk and slips.
Unplug the machine, shut the water, and drain it. Wear gloves and work dry to stay safe.
Is professional help always required?
Not always. If you’re unsure about electrical work, don’t locate the valve, or the model requires specialized tools, hire a technician.
If you’re unsure about electrical work or can’t locate the valve, consider a professional.
How can I prevent future inlet problems?
Keep the water filter clean, check hoses for wear, and use a compatible valve with correct flow rating. Regular maintenance reduces mineral buildup that can affect seals.
Regular maintenance and using compatible parts helps prevent future inlet issues.
Watch Video
What to Remember
- Identify valve symptoms before replacing to avoid unnecessary work.
- Power off and water off before any disassembly to prevent shock.
- Test multiple cycles after replacement to confirm a leak-free seal.
- Keep routing and fasteners organized for a smooth reassembly.