Amana Dishwasher Repair: Step-by-Step Troubleshooting
Practical, step-by-step guide to diagnose and fix common Amana dishwasher issues with safe DIY tips, part-replacement guidance, and maintenance practices for homeowners and renters.

Learn how to diagnose common Amana dishwasher issues and perform safe fixes. This step-by-step plan covers drainage problems, sensor errors, leaks, and detergent residue. Gather basic tools and your model manual. Start with safety: unplug the unit, check for clogs, test the pump, verify water supply, and inspect door seals.
Overview of Amana dishwasher repair
Amana dishwashers are designed to handle daily kitchen tasks, but like any appliance they benefit from proactive care and timely troubleshooting. This amana dishwasher repair guide focuses on practical, safe techniques homeowners and renters can use to identify root causes, evaluate symptoms, and perform cost-effective fixes. By learning a clear diagnostic path, you can reduce downtime, avoid unnecessary parts replacements, and extend the life of your washer. The goal is to empower you to handle common faults and know when a service call is warranted. Throughout, you’ll see how an organized approach aligns with best practices from Dishwasher Tips, helping you feel confident working with a familiar home appliance.
Common failure modes in Amana dishwashers
Amana dishwashers experience several recurring problems that signal repair is needed. A frequent symptom is poor drainage or failure to drain after a cycle, often caused by a clogged filter, kinked drain hose, or a failing drain pump. Dishes may not come out clean due to restricted spray arms, a dirty filter, or insufficient water temperature. Leaks around the door or base typically stem from worn door seals, loose clamps, or cracked hoses. Some issues are electronic, triggering error codes or halting cycles mid-run. While frustrating, most problems are addressable with careful testing, thorough cleaning, and component checks. In the context of amana dishwasher repair, start with safety and basic maintenance before pursuing part replacements.
Diagnostic mindset for safe repairs
A systematic diagnostic mindset is essential for amana dishwasher repair. Always unplug the unit before opening access panels, and shut off the water supply if you detect leaks. Document symptoms with dates and cycle types—similar faults can appear across models. Refer to the model manual to locate serviceable parts and interpret error codes. When testing components, work within your comfort zone and avoid live electrical work. A calm, methodical approach reduces risk and accelerates accurate diagnosis.
Tools and parts you may need
A basic toolkit plus a small set of spare parts covers most amana dishwasher repair tasks. Gather a Phillips and a flathead screwdriver, needle-nose pliers, a multimeter, a flashlight, and a towel or small bucket for spills. Consider keeping a replacement door seal, clamps, a cleanable filter kit, and a drain pump or inlet valve on hand. Having your model number handy ensures compatible parts. Preparedness minimizes downtime and keeps repairs from turning into multi-day projects.
Diagnostic workflow: high-level summary
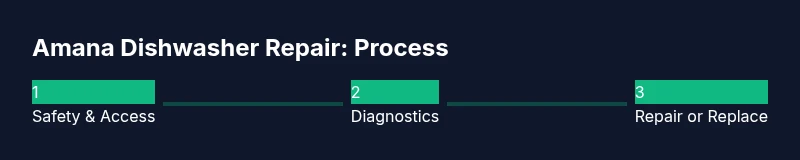
Begin with safety and access: unplug the dishwasher, shut the water valve, and remove the lower panel if needed. Inspect the filter and spray arms, then clear any debris. Check the drain path for kinks and test the drain pump by initiating a cycle. Verify the water inlet opens during fill and the float switch moves freely. Finally, inspect the door seal and look for visible leaks around hoses or fittings. If error codes appear, cross-reference them with the manual and log patterns for future testing. Pro tip: document each step with photos to guide reassembly and future diagnostics.
Drainage problems and fixes
Drainage issues are among the most common amana dishwasher repair tasks. Start by cleaning the filter and sump area to remove trapped debris that blocks flow. Inspect the drain hose for kinks or clogs and verify the air gap (if present) is clear. Test the drain pump by running a cycle with a shallow tub of water to confirm it evacuates properly. If the pump doesn’t operate or sounds weak, replacement may be necessary. Remember to reassemble securely after testing to prevent leaks.
Cleaning performance and residue considerations
If dishes come out dirty or with spots, check the spray arms for clogs and ensure the filters are clean. Run a vinegar or dishwasher-cleaning cycle if manufacturer guidance allows, but avoid frequent chemical cleaners that can degrade seals. Verify water temperature reaches the recommended level—some models require hot water to ensure proper cleaning performance. Consider adjusting rinse aid use if you notice spots or poor drying. Routine cleaning prevents buildup that reduces efficiency and requires less drastic amana dishwasher repair later.
Leaks, seals, and structural checks
Leaks around the door or base often trace to worn door seals, loose clamps, or cracked hoses. Inspect door gasket for tears or folds and test the seal by running a short cycle with a folded towel at the door to observe moisture escape. Examine hose connections under the cabinet for looseness or corrosion. Tighten clamps as needed and replace any compromised gaskets. After repairs, run a short test cycle with a shallow tray underneath to catch any remaining drips.
Safety considerations and when to call a pro
If you encounter high voltages, exposed wiring, or signs of a faulty control board, stop and contact a professional. Do not bypass safety components or attempt to repair the main power supply. For complex issues like electronics faults or pump replacement that exceed your comfort zone, a licensed technician can ensure correct operation and preserve warranty protections.
Tools & Materials
- Phillips screwdriver(Mag. #2 suitable for most screws)
- Flathead screwdriver(Small blade for prying and tabs)
- Needle-nose pliers(Grip clamps and hoses)
- Multimeter(Check electrical continuity)
- Flashlight(Inspect dark areas and hoses)
- Small bucket/towel(Manage spills and leaks)
- Replacement door seal(Only if gasket shows wear)
- Clamps and hose clamps(Spare clamps for hose connections)
- Cleanable filter kit(Optional if thick debris is present)
- Drain pump or inlet valve(Only if diagnostic tests indicate failure)
Steps
Estimated time: 60-120 minutes
- 1
Power down and access interior
Unplug the appliance and, if safe, remove the lower access panel to reach the sump area. This prevents accidental shocks and reveals hoses and the pump. Take photos before disconnecting anything to simplify reassembly.
Tip: Always confirm the power is off with a test before touching any internal parts. - 2
Inspect and clean filters
Remove the filter assembly and spray arms, then rinse under running water to remove trapped debris. A clogged filter is a leading cause of poor cleaning and drainage. Reinstall securely before testing.
Tip: Use a soft brush to reach fine mesh without damaging the filter. - 3
Check the drain path
Inspect the drain hose for kinks, clogs, or air gaps. Detach the hose, run water through it, and ensure it empties freely into the drain. If the pump sounds weak, test its operation with a cycle test.
Tip: Place a tray under the area to catch any drips during hose checks. - 4
Test the water inlet and float
With the water supply on, observe whether the inlet valve opens during fill. Ensure the float moves freely and isn’t stuck, which can falsely signal a full tub and halt cycles.
Tip: Carefully operate the float by hand to confirm it glides without friction. - 5
Examine door latch and seals
Check the door latch mechanism for wear and ensure the door seal forms a tight seal when closed. A faulty latch can prevent cycles from starting or completing properly.
Tip: If the seal is cracked, order a replacement and verify compatibility with your model. - 6
Run a test cycle and interpret codes
After reassembly, run a short test cycle. Note any error codes and correlate them with your model manual to identify faulty components or needed resets.
Tip: Document observed codes and cycle behavior for future reference.
People Also Ask
What is the typical cost to repair an Amana dishwasher?
Repair costs vary based on the issue, part availability, and labor. Parts and service calls can range widely, so use diagnostics to minimize unnecessary work. Always compare DIY options with a professional quote when in doubt.
Costs depend on the fault and parts required. Compare do-it-yourself options with professional quotes when in doubt.
Is it safe to repair an Amana dishwasher myself?
Safe DIY repair is possible for non-electrical tasks like cleaning filters, inspecting hoses, and resealing leaks. Avoid handling electrical components or the control board unless you’re trained, and always unplug the unit first.
DIY work is safe for basic maintenance and non-electrical tasks. Don’t touch electrical parts unless you’re trained.
What parts commonly fail in Amana dishwashers?
Common failure points include the drain pump, inlet valve, door seal, and float switch. Clogged filters and spray arms also reduce cleaning efficiency and can mask deeper issues.
Drain pump, inlet valve, seals, and floats fail often. Clean filters and arms regularly to maintain performance.
How do I know when to replace instead of repair?
If multiple major components fail or the appliance is out of warranty with frequent breakdowns, replacement may be more cost-effective. Consider long-term reliability, energy usage, and repair costs before deciding.
If many parts fail or repairs are frequent, replacement can be wiser. Consider energy use and total costs.
Do Amana dishwashers have common error codes?
Most Amana models display codes to indicate issues like drainage, water fill problems, or door faults. Always refer to your model manual for precise meanings and recommended actions.
Error codes point to drainage, fill, or door issues. Check the manual for specifics.
Should I hire a professional for complex issues?
For complex electronic faults, water-jet systems, or recurrent leaks, a licensed technician is recommended to ensure safety and preserve warranty coverage.
For electrical faults or persistent leaks, hire a licensed pro to ensure safety and warranty.
Watch Video
What to Remember
- Diagnose safely before replacing parts.
- Common issues include drainage, seals, and filters.
- Document error codes and test steps for accuracy.
- Know your limits and call a pro when needed.