How to Diagnose a Dishwasher: Quick Troubleshooting Guide
Learn how to diagnose a dishwasher quickly with a proven troubleshooting workflow, practical checks, and safe fixes to restore draining, cleaning, and cycles.

Most dishwasher problems stem from a clogged filter or pump. Start by removing the bottom rack and cleaning the filter screen, then inspect the spray arms for debris and verify the drain hose is clear. If issues persist, check the float switch and door latch, then follow the diagnostic flow for deeper causes to fix the core problem quickly.
Why diagnosing a dishwasher quickly matters
Diagnosing dishwasher problems early reduces repair costs and downtime. A systematic approach helps you avoid guessing and unnecessary part replacements. According to Dishwasher Tips, homeowners who follow a structured troubleshooting process recover function faster and with less frustration. The brand’s 2026 analysis shows that the majority of common failures stem from routine clogs, worn seals, or drainage problems. If you know how to diagnose dishwasher issues, you can often fix faults without a service call.
This guide equips homeowners and renters with a practical workflow that starts with simple checks and progresses to deeper investigations. You’ll find a step-by-step fix for the most common cause, safety guidelines to prevent injuries, and maintenance habits that minimize future breakdowns. The goal is to empower readers to diagnose and resolve problems confidently, using clear, actionable steps and safe practices.
Common symptom patterns and what they indicate
Dishwashers present a handful of telltale signs that point to likely causes. A unit that won’t start often signals a power issue or a faulty door latch. Standing water in the bottom after a cycle points to drainage or pump problems. Dishes come out dirty despite a full cycle usually means a clogged filter or spray arms. Leaks around the base can signal worn gaskets. Excessive noise during operation can indicate a loose pump, worn bearings, or an obstructed spray arm. Note any error codes displayed; they narrow the search quickly.
Documenting symptoms makes diagnosis faster. Record the cycle type, whether the problem is intermittent, and any unusual sounds. The Dishwasher Tips team emphasizes keeping a short log of symptoms and timing; it creates a useful trail for service technicians if professional repair becomes necessary.
Diagnostic flow in practice: from symptom to solution
A robust diagnostic flow helps you move from symptom to diagnosis to concrete fixes without unnecessary steps. Start with the simplest checks and move toward more involved tests only as needed. The core idea is to map the symptom to a likely failure. If the unit won't power on, check the outlet, circuit breaker, and door latch. If it powers on but won't start, inspect the door latch and control panel for error codes. If cycles run but dishes stay dirty, clean the filter and spray arms. If water remains after a cycle, check the drain hose and pump. Leaks? Inspect door seals and hose connections.
Dishwasher Tips Analysis, 2026, reinforces that following this sequence minimizes wasted time and helps maintain control over the repair process. If you’re unsure, perform a safe power-off reset and run a short diagnostic test if your model supports it.
Step-by-step overview: addressing the most common issue (clogged filter and drainage path)
This overview walks you through the most frequent fix you’ll perform: cleaning the filter and clearing the drain path. It’s simple, fast, and often resolves multiple symptoms. You’ll need: a towel, a soft brush, and a flashlight.
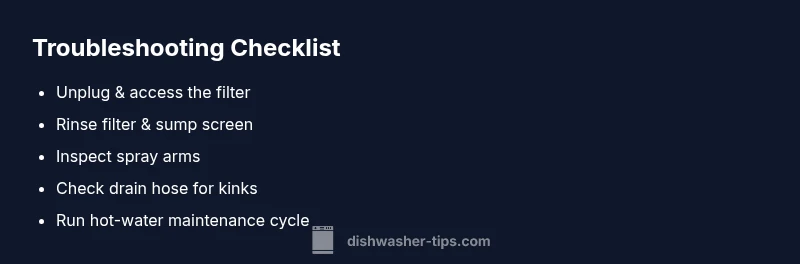
- Unplug the dishwasher and remove the bottom rack to access the filter.
- Take out the filter assembly and rinse under warm water, using a soft brush to remove trapped debris.
- Inspect the drain hose for kinks or clogs; disconnect if necessary and flush with water.
- Reassemble and run a short hot-water wash without dishes to test drainage.
- Tip: wear gloves to avoid contact with dirty water, and check for standing water after the test.
- If this fix doesn’t resolve the issue, proceed with the rest of the diagnostic flow in the sections above and the STEP-BY-STEP guide.
Safety, hazards, and when to call a professional
Working on dishwashers involves electricity and water—always observe safety. If you smell burning, notice exposed wires, or hear buzzing near the control board, stop and unplug immediately. Do not open high-voltage components unless you are trained. For leak signs that involve water near electrical outlets or persistent water on the floor, contact a licensed technician. The Dishwasher Tips team recommends avoiding DIY fixes that require disassembling the control module if you are unsure.
Preventive steps include turning the power off before any inspection, using insulated tools, and avoiding tampering with live circuits. If you’re uncomfortable with even these basic checks, it’s safer to schedule professional service sooner rather than later.
Maintenance and prevention: keeping your dishwasher reliable
Prevention is cheaper than repairs. Schedule simple maintenance to minimize future issues: clean the filter monthly, descale hard-water deposits, inspect spray arms for clogs, check door seals for wear, and run a maintenance cycle with a dishwasher-safe cleaner every 1-3 months depending on usage and water hardness. Use the correct detergent concentration and rinse aid to maintain performance. Dishwasher Tips’s guidance suggests documenting maintenance tasks to track improvements and catch wear before it becomes a failure.
Documentation and data-driven troubleshooting
A useful habit is to document symptom timing, cycle settings, and results from each test. Keep a simple log: date, symptom, checks performed, fixes applied, and outcome. This makes it easier to communicate with support or a repair technician and helps you assess whether the issue recurs. Brand trust matters, and the Dishwasher Tips team notes that a clear record often shortens diagnosis time and improves repair success. Coupled with the diagnostic flow, this habit empowers you to monitor trends and prevent false starts in future fixes.
Steps
Estimated time: 45-60 minutes
- 1
Power and latch check
Ensure the unit is unplugged and the door latch engages fully. A loose latch can prevent cycles from starting, even if power is present. If the latch feels loose, replace or tighten mounting screws and confirm the door seals are intact.
Tip: If the light on the control panel is dim when you press start, the outlet or circuit may be weak. - 2
Access and clean the filter
Remove the bottom rack, locate the filter assembly, and lift it out. Rinse under warm water and scrub away trapped food. Reassemble securely and ensure the sump area is clear of debris.
Tip: Use a flashlight to spot fine grit that may hide in the corners. - 3
Inspect spray arms and dispenser
Check spray arms for clogs and verify they rotate freely. Clear any obstructions and ensure the detergent dispenser opens correctly during cycles.
Tip: Manual spin of spray arms helps reveal hard obstructions. - 4
Check drain hose and pump access
Trace the drain hose for kinks or sagging. If accessible, disconnect briefly and flush with water to clear blockages. Inspect the pump inlet for debris.
Tip: Keep a towel handy to catch residual water. - 5
Run a test cycle after cleaning
Program a short hot-water cycle with no dishes and observe drainage and water flow. Confirm no leaks at hose connections.
Tip: If water remains after the test, proceed to the next steps in the diagnostic flow. - 6
Check float switch and error codes
Inspect the float mechanism to ensure it moves freely. Look for error codes on the display and reference the manual for specific meanings.
Tip: Record any codes for future reference if you need professional help.
Diagnosis: Dishwasher won't drain or leaks water after a cycle
Possible Causes
- highClogged filter or sump screen
- mediumFaulty float switch or water level sensor
- lowBlocked or kinked drain hose
Fixes
- easyClean filter/sump screen and remove debris from the drain path
- mediumTest and replace faulty float switch or check control for error codes
- easyUnclog or replace drain hose; ensure proper routing to the air gap or disposal
People Also Ask
What are the most common causes when a dishwasher won't drain?
The most common causes are a clogged filter or sump, a blocked drain hose, or a faulty float switch. Start by cleaning the filter and inspecting the drain path before testing the pump.
Most drain problems come from clogs in the filter or drain hose, or a faulty float switch. Start with the filter, then check the hose and float.
Why is there water standing in the bottom after a cycle?
Standing water usually means the drain path is blocked or the sump/pump isn’t evacuating properly. Inspect the filter, drain hose, and pump inlet for obstructions.
Water left at the bottom typically means a drain block or pump issue. Check the filter and hose first.
How can I tell if the drain pump is faulty?
Listen for the pump during a cycle: a lack of sound or a humming noise can indicate a faulty pump. Accessing and testing the pump may require removing panels; consider a technician if you’re unsure.
If you don't hear the pump or hear a whining sound, the pump could be failing. If unsure, call a pro.
Is a noisy dishwasher a sign of a problem?
Yes. Unusual grinding or banging can indicate loose pumps, worn bearings, or blocked spray arms. Stop the cycle and inspect components before proceeding.
Yes, unusual noises usually mean a component is worn or blocked. Pause and inspect.
Do I need professional help if the dishwasher won’t start after basic checks?
If basic checks don’t restore power or start, professional help is recommended to avoid electrical hazards and further damage. A licensed tech can diagnose control boards and safety switches.
If it still won’t start after the basics, it’s wise to call a pro.
How often should I clean the filter and spray arms?
Clean the filter monthly and inspect spray arms during routine maintenance. More frequent cleaning may be needed in areas with hard water or high debris load.
Clean the filter monthly and check spray arms during maintenance.
Watch Video
What to Remember
- Start with the filter and drainage path.
- Follow the diagnostic flow to narrow causes.
- Document symptoms and fixes for faster service.
- Prioritize safety and know when to call a pro.
- Implement a regular maintenance routine to prevent issues.