Dishwasher Tube Replacement: A Practical Tutorial
Learn how to replace a dishwasher tube safely and effectively. This practical guide covers tools, steps, safety, testing, and maintenance to prevent leaks and improve drainage in 2026.

In this guide you will learn how to replace a dishwasher tube (hose) safely and correctly, including locating the worn hose, removing it without spilling water, installing a replacement, and testing for leaks. You will need basic tools, a replacement hose of the right size, clamps, towels, and a bucket.
What you’ll accomplish with dishwasher tube replacement
Replacing a dishwasher tube is a practical repair that prevents leaks, minimizes water damage, and restores reliable draining. In this guide you will learn what a successful tube replacement achieves, how to recognize when you need a replacement, and the safety steps you should take before you begin. According to Dishwasher Tips, a worn or cracked hose is the most common cause of slow draining and puddles around the base after a cycle. By following a careful replacement process, you will ensure a secure connection, minimize future leaks, and extend the life of your appliance. This section also covers how to identify whether you are dealing with an inlet hose or a drain hose, and why routing matters for reliable operation. You will learn how to plan the task, gather the right materials, and complete the replacement with confidence. The goal is a leak-free seal, proper water flow, and a tidy under-sink area that reduces the risk of mold or corrosion. With the right approach, you can perform this repair yourself without professional help in many models.
Across models and setups, the key is precision, not force. Take your time aligning the hose so it does not kink or rub against sharp edges. A well-installed hose reduces the chance of pinching and prolongs lifespan. If you notice continuing leaks after installation, recheck clamps and fittings and verify that the hose is fully seated at both ends.
Safety and prerequisites
Working on a dishwasher involves both electrical and plumbing safety. Before you touch any part, unplug the unit from the wall outlet and shut off the water supply to the machine. If you do not know where the shutoff valve is, turn off the main water valve to avoid a sudden spray. Wear protective gloves and keep a bucket and towels within reach to catch spills. Do not operate the dishwasher when hands are wet or when you see damaged cords, frayed hoses, or corroded fittings. If you encounter stubborn fittings or a hose that is heavily corroded, stop and reassess the situation rather than forcing a connection. After completing the installation, run a short test cycle with the door open and a towel beneath the machine to monitor for leaks. These precautions help prevent electric shock, water damage, and injury during the repair. Pro tip: use a non-contact tester to confirm no live circuits before handling any internal components.
Safety first is the rule, so do not rush past prechecks. A deliberate, stepwise approach minimizes risk and helps you identify issues early rather than after a leak appears.
Types of dishwasher tubes and compatibility
Dishwashers use two main hose types: supply hoses that bring water into the unit and drain hoses that carry wastewater away. The supply hose is often connected to a shutoff valve behind the machine, while the drain hose routes to a standpipe or disposal. There are also differences in outer diameter, connector type, and clamp style. Most home models use standard flexible hoses with worm-gear clamps, but some compact or high-end models use reinforced hoses with different end fittings. To avoid leaks, measure the old hose end-to-end and the fitting size before ordering a replacement. If you are replacing a drain hose, ensure the end clip design matches the inlet or disposal connection on your unit. When in doubt, take measurements or photograph the hose and fittings and bring them to the hardware store. Using the wrong size or incompatible fittings is a common source of leaks and poor drainage. Proper routing prevents hose contact with sharp edges and helps minimize vibration.
Knowing whether you need a supply hose or a drain hose matters because the clamps, end fittings, and routing paths differ. A wrong type can force you to redo the job and extend downtime. Always verify compatibility with your model’s manual or manufacturer site before purchasing.
Planning the replacement: pre-checks and setup
Before you start, identify the correct replacement hose for your model by checking the manual or model plate. Lay out your tools and a clean workspace. Place towels, a bucket, and a shallow pan to catch residual water. Make sure you have fresh hose clamps and the correct length—ideally a bit longer than the old route to avoid tension. If your model uses a metal hose with a plastic sheath, inspect the metal ends for burrs or corrosion and trim as needed. Mark the hose route on the cabinet or floor with tape to keep the new hose aligned. If you find any signs of mold around the hose or fittings, address that area after removal and before installation. Finally, ensure you can test the assembly by running a brief cycle with the access panel closed. A thorough pre-check reduces the chance of a leak after you finish and helps you complete the task in a single session.
Authority sources and references
- OSHA safety guidelines: https://www.osha.gov
- U.S. Department of Energy: https://www.energy.gov
- Federal Trade Commission: https://www.ftc.gov
Common mistakes and how to avoid them
Common mistakes include rushing through the detach/attach steps, using the wrong hose size, and not securing clamps properly. To avoid leaks, always inspect the hose ends for cracks or burrs and replace any damaged clamps. Do not overtighten clamps, which can damage plastic fittings, and ensure the hose sits without sharp bends. Finally, never skip the test cycle after installation; a brief run helps you spot leaks before you complete the project.
Maintenance tips to extend tube life
After replacement, periodically inspect both ends of the hose for signs of wear or cracking. Keep the hose away from heat sources and sharp edges. If you notice reduced drainage or a new leak, reassess the clamps and fittings first, then the hose length or routing. Regular checks can catch issues early and save cost on water damage. Clean up the area after each test and store tools properly to maintain a tidy workspace for future repairs.
Tools & Materials
- Safety gloves(Cut-resistant if using metal clamps or sharp edges)
- Non-contact voltage tester(Confirm power is off before touching electrical components)
- Bucket or shallow pan(Capture residual water during hose removal)
- Old towels or rags(Mop spills and keep area dry)
- Replacement dishwasher hose(Match correct diameter and end fittings for your model)
- Screwdrivers (flathead and Phillips)(Loosen clamps and connect fittings)
- Hose clamps (stainless steel)(New clamps prevent rust and ensure a tight seal)
- Pliers or hose clamp tool(Assist with clamp removal and placement)
- Utility knife or tin snips(Trim hoses if necessary)
- Teflon tape or thread sealant(Only if required by the connection type)
- Permanent marker or tape(Mark routing path for alignment)
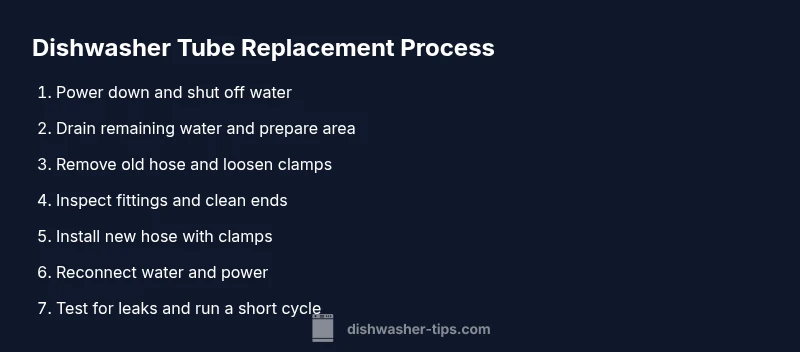
Steps
Estimated time: 45-60 minutes
- 1
Power down and shut off water
Unplug the dishwasher from the wall outlet and shut off the water supply to the machine. This prevents electrical shock and water spray during removal. Have a bucket and towels ready for any residual moisture.
Tip: Verify power is off with a tester before touching electrical components. - 2
Drain remaining water
Place towels and a bucket under the hose connections to catch water as you loosen fittings. Tilt the machine slightly if needed to drain the remaining water from the line.
Tip: Keep a rag at hand to wipe drips and keep the workspace safe. - 3
Loosen clamps and disconnect old hose
Use the screwdriver to loosen hose clamps and carefully disconnect the old hose from the fittings. Do not yank; support the fittings as you release the clamp to prevent damage.
Tip: Take a quick photo of the routing for reference when installing the new hose. - 4
Inspect and clean fittings
Examine the ends for burrs, cracks, or corrosion. Clean the connectors and deburr any sharp edges before attaching the new hose.
Tip: If you see corrosion, consider replacing the entire connector or valve assembly. - 5
Prepare and measure the new hose
Measure the replacement hose against the old one to confirm length and end types. Cut or trim only if necessary, ensuring clean, straight ends for a good seal.
Tip: Choose a hose slightly longer than the path to minimize tension and kinking. - 6
Install new hose and clamps
Attach the new hose to the fittings and secure with fresh clamps. Tighten evenly and avoid overtightening, which can crack plastic fittings.
Tip: Start clamps from the bottom and work upward for a stable seal. - 7
Reconnect power and water
Reconnect the dishwasher to power and turn the water supply back on. Double-check that the connections are aligned and not cross-threaded.
Tip: Do not reuse old clamps if they appear stretched or corroded. - 8
Test for leaks
Run a short cycle with the access panel closed and observe all hose connections. Look under the unit for at least 5 minutes for any signs of dripping.
Tip: If you see leaks, power down and re-tighten clamps; re-test until dry. - 9
Final check and cleanup
Clean up spills and store tools properly. Make a note of the area where you worked and consider reporting any unusual wear to prevent future issues.
Tip: Document the replacement in case you move or resale the unit.
People Also Ask
What is the most common cause of a dishwasher tube leak?
The most common cause is a worn or cracked hose, often with loose or damaged clamps. Inspect the ends for cracks and replace the hose if in doubt. Ensure clamps are tight but not over-torqued.
Most leaks come from worn hoses or loose clamps; check ends and replace if needed, then re-test.
Can I replace the hose myself without a professional?
Yes, for standard replacement hoses you can DIY. If you suspect damage to the inlet valve or pump, or if you encounter stubborn fittings, consider professional help.
Yes, it’s doable as a DIY task if you stay cautious and follow steps.
What hose sizes are common for dishwashers?
Common diameters range from about 1/2 inch to 5/8 inch inner diameter. Measure your old hose and fittings to select the correct replacement.
Most dishwashers use standard hoses; measure the old hose before buying a replacement.
Do I need sealant or Teflon tape for hose connections?
Usually not required for standard hose connections with clamps. Only use sealant if the manufacturer specifies it for threaded joints or if you encounter persistent leaks that clamps alone cannot fix.
Typically no sealant is needed; clamps and clean threads usually suffice.
How long does a hose replacement take?
A straightforward hose replacement typically takes about 45 to 60 minutes. More complex routing or difficult access can extend the time.
Most homeowners finish in under an hour if the space is accessible.
What should I do if leaks persist after replacement?
If leaks persist, power down and recheck all connections, clamps, and hose ends. If leaks continue, it's best to consult a professional to inspect related components like the valve or pump.
If leaks persist after replacement, stop and recheck everything or call a pro.
Watch Video
What to Remember
- Inspect hose before and after replacement.
- Use the correct hose type and clamps.
- Test thoroughly for leaks after installation.
- Maintain hoses to prevent future failures.