How to Fit a Dishwasher Drain Hose
Learn how to fit a dishwasher drain hose safely and correctly with our step-by-step guide. From hose selection to leak testing, Dishwasher Tips covers practical tips to prevent overflows and backflow.

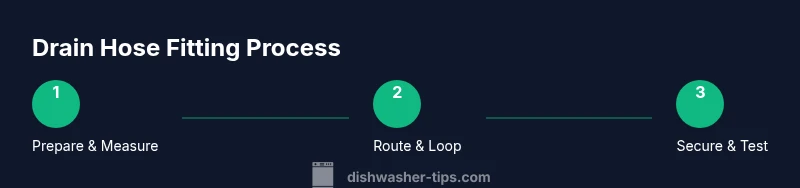
You will learn how to fit a dishwasher drain hose safely and correctly. This step-by-step guide covers choosing the right hose, measuring and trimming, securing with clamps, creating a proper high loop or air gap, routing to the waste line, and testing for leaks. Follow these steps to prevent overflows, backflow, and water damage in your kitchen.
Understanding drain hose types and configurations
Dishwasher drain hoses come in several configurations, including straight hoses and corrugated hoses designed to flex around cabinets. The right choice depends on your appliance model, the distance to the disposal or waste line, and whether your local code requires an air gap. The standard connection on many machines fits a common diameter, but some models require a different size or a dedicated air-gap kit. When planning the fit, consider whether your kitchen has a garbage disposal, whether you’ll use a high loop or an external air gap, and how you will route the hose without sharp bends. A well-fitted hose reduces leaks and prevents backflow, mold growth, and water damage in cramped cabinet spaces. According to Dishwasher Tips, starting with the correct hose type sets the foundation for a reliable drain path and minimizes surprises during installation. Also, be mindful of material compatibility with hot water and detergents, especially in homes with hard water, which can accelerate wear on plastic hoses. If you’re unsure about model compatibility, consult your appliance manual or the manufacturer’s online support pages. In many cases, upgrading to a reinforced hose improves longevity when the dishwasher is used daily.
Why proper fit matters: leaks, backups, and code compliance
A poorly fitted drain hose can cause backflow into the dishwasher or sink, leading to standing water in the cabinet and potential mold growth. Leaks at clamps or fittings are common when hoses are too short, misrouted, or pinched behind cabinetry. The drain path must rise above the connection point to prevent siphoning, which can push dirty water back into the dishwasher. Additionally, several jurisdictions require an air gap as part of the drainage system; skipping this step not only increases risk of backflow but can also fail an inspection. Dishwasher Tips analysis shows that homeowners frequently underestimate the importance of uncomplicated routing and secure clamps. By choosing the right length and route, you reduce bending stress, prevent kinks, and maintain a clear path for wastewater. Keep in mind that hard plastics can crack under repeated bending, and metal clamps can corrode in humid cabinets if not stainless steel. Finally, always verify that the drain hose exits above the main trap or disposal inlet to encourage gravity drainage and minimize clogs.
Common drain hose setups and considerations
There are several typical configurations. A straight hose connected directly to the disposal inlet is common for short runs, but it can be prone to kinking if the routing is tight. A corrugated hose traveling through a cabinet corner offers flexibility but a greater opportunity for sagging if not supported. For homes with a sink disposal, many plumbers recommend a high loop or an integrated air gap to prevent backflow. If your model includes an internal air vent, you may have more flexibility with the routing, but you should still follow local code. When selecting clamps, stainless steel worm-gear clamps are preferred over cheaper sheet-metal alternatives, as they resist corrosion and provide a more reliable seal. The hose diameter should match the machine outlet; using a hose that’s too large can create loose connections, while one that’s too small can restrict drainage. Finally, consider future service access—leave enough slack behind the appliance so you can inspect connections without fully removing the unit.
Preparing for the installation: measuring, cutting, and routing
Before you start, clear the under-sink area and unplug the dishwasher if accessible. Remove the old hose and inspect the vendor fittings for wear. Measure the distance from the dishwasher outlet to the chosen drain point, then add a safety margin for movement and clamps. Mark the cut line on the new hose and trim straight to avoid burrs that could damage the fitting. Dry-fit the hose to check alignment and the high loop height; adjust as needed. If your local code requires an air gap, install it per the manufacturer’s instructions and secure with appropriate mounting hardware. Once you’re satisfied with the routing, slide the hose onto the drain or disposal inlet and secure with stainless steel clamps, ensuring even tightening without crushing the hose. Finally, route any loose cables or wires away from hot surfaces and sharp edges to prevent damage.
Troubleshooting and maintenance tips
If you notice damp cabinets after a wash, check all clamp positions and verify there are no small cracks in the hose. A pinhole or crack can be invisible at first, so inspect the entire length with a bright light. If the hose is visibly worn or aged, replace it rather than attempting patch repairs. Periodically inspect the hose for kinks and ensure the high loop remains intact, especially after moving appliances for cleaning or reorganization. If you use an air gap, confirm that the connection between the air gap and the drain line is clear and free of debris. For hoses routed through tight spaces, add soft supports or clips to maintain a gentle bend and reduce stress on connections. Finally, keep the cabinet dry by wiping up any condensation and using a drip tray under the dishwasher if you have persistent leaks.
What to expect after installation: testing and safe operation
Once the connections are secure, restore power and run a short wash cycle with only water to test the drainage pathway. Look for leaks around clamps and joints, and check that the hose maintains a clean, unobstructed path to the disposal or waste line. If you observe drips during the test, re-tighten clamps and reposition as needed. After a successful test, run a full cycle to ensure the hose carries away water without backflow. If you detect backflow, recheck the height of the drain loop or air gap and verify the disposal inlet is clear. Regular checks every few months help catch aging clamps or cracking hoses before a major flood. When you’re finished, save the packaging and model details for future reference and record the date of installation for maintenance reminders.
Tools & Materials
- Dishwasher drain hose(Choose length to reach from machine outlet to disposal/standpipe with slack for movement)
- Hose clamps (stainless steel, worm-gear or pinch clamps)(2-3 clamps; ensure secure seal without damaging hose)
- Adjustable pliers(For loosening fittings and tightening clamps)
- Scissors or utility knife(Trim hose cleanly; avoid jagged edges)
- Screwdrivers (flathead and Phillips)(For clamps and mounting hardware)
- Bucket or towels(Catch water when disconnecting the old hose)
- Air-gap kit (optional, code-dependent)(Install where required by code or personal preference)
- Cable ties/zip ties(Secure hose along cabinet or under-sink area)
- Flashlight(Inspect connections in dim spaces)
Steps
Estimated time: 45-60 minutes
- 1
Prepare and gather tools
Clear the area under the sink, unplug the dishwasher if accessible, and shut off the water supply to prevent any accidental leaks. Put towels and a bucket in place to manage residual water. Take a quick photo of current connections for reference before removal.
Tip: Set up a dedicated work zone; this reduces misplacing parts and speeds up reassembly. - 2
Disconnect and inspect old hose
Loosen the clamps and carefully detach the old hose. Inspect fittings for wear, cracks, or corrosion; replace any worn parts to ensure a proper seal with the new hose.
Tip: Document how the old hose was routed to replicate or improve on the new routing. - 3
Measure and cut the new hose
Measure the distance from the dishwasher outlet to the chosen drain point, adding extra length for movement. Mark a straight cut and trim with scissors or a utility knife to avoid frayed ends.
Tip: Cut squarely to maintain a clean seating surface inside the fittings. - 4
Route hose and install loop/air gap
Position the hose so it rises to create a high loop, or install an air gap if required by code. Use clips to keep the hose elevated and away from sharp edges or hot surfaces.
Tip: The high loop should be as high as practical within the cabinet and not press against other plumbing. - 5
Attach hose to drain/disposal and secure
Slide the hose onto the disposal inlet or waste line, then tighten the clamps evenly to seal without crushing the hose. Ensure the hose sits on a smooth, unobstructed path.
Tip: Place clamps over the raised ring if present and avoid over-tightening. - 6
Test for leaks and finalize
Reconnect power and run a test cycle with water to verify drainage. Check all joints and clamps for moisture; re-tighten or readjust if any leaks appear.
Tip: Test with a quick cycle first before running a full wash.
People Also Ask
Do I need an air gap for the dishwasher drain hose?
Air gaps are required in some areas by code; if your local jurisdiction allows, a high loop may suffice. Always check local codes and the dishwasher’s manual.
Air gaps are required in some places by code. If your area allows, a high loop may be enough, but check local codes and your manual.
What diameter hose do I need?
Most dishwasher drain hoses use a standard 5/8 inch inner diameter. Verify with your model’s manual and measure the connection to ensure a proper fit.
Most hoses are 5/8 inch inner diameter; confirm with your manual.
Can I reuse the old hose?
If the old hose is cracked, brittle, or swollen, replace it. Reusing a worn hose increases the risk of leaks and failures.
Don’t reuse a damaged hose; replace it.
How do I know I installed it correctly?
Run a test cycle with water only and inspect clamps and joints for leaks. Re-adjust if you see moisture or damp spots.
Run a quick test cycle and check for leaks.
What safety precautions should I take?
Disconnect power and shut off the water supply before starting. Use towels or a bucket to manage water and wear gloves if desired.
Always unplug and shut off water before starting.
What if water backs up into the dishwasher?
Backflow usually signals an improper hose height or a clogged drain. Re-check the loop height, ensure proper routing, and clear the drain if needed.
Backflow means check height and route, and clear the drain if needed.
Watch Video
What to Remember
- Measure twice, cut once for accurate fit
- Use a proper high loop or air gap to prevent backflow
- Secure all clamps and route away from heat or sharp edges
- Test thoroughly for leaks after installation
- Follow local codes and manufacturer instructions for best results