Edgestar Dishwasher Troubleshooting Guide
Learn practical, AI-informed steps to diagnose, fix, and maintain your Edgestar dishwasher. Troubleshooting, cleaning, and prevention tips for homeowners and renters.

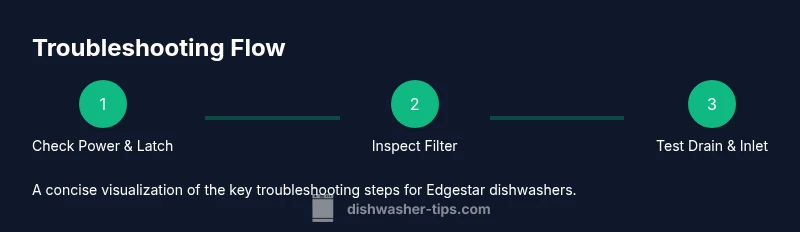
To diagnose and fix your edgestar dishwasher, start with the basics: confirm power and door latch, and check for error codes. Then clean the filter, inspect spray arms, and ensure the drain is clear. Run a short cycle with a clean filter and rinse aid. Gather basic tools and follow safety steps for reliable results.
Understanding Your Edgestar Dishwasher
Edgestar dishwashers are designed to simplify kitchen cleanup, combining a compact footprint with efficient cleaning cycles. While models vary, most share core components: a control board, motor and pump assembly, spray arms, filters, a heat source for drying, and a water inlet valve. Knowing these parts helps you diagnose common issues without guesswork. According to Dishwasher Tips, start by verifying basic power and the door latch, since a common cause of non-start issues is a simple electrical or door-seal fault. A brief inspection of the user manual can also reveal model-specific indicators or error codes that point you toward the right service steps.
When you understand the flow of water, heat, and detergent through the system, you can distinguish between a mechanical issue (like a clogged filter) and a control issue (like a faulty sensor). This foundation makes the subsequent steps clearer and reduces the chance of unnecessary fixes.
Routine Maintenance that Prevents Breakdowns
Preventive care is cheaper than repairs. A proactive maintenance routine for an Edgestar dishwasher includes regular cleaning of the filter and spray arms, inspection of door seals, and timely replacement of worn components. The dishwasher should be checked on a monthly basis, with deeper cleanings every 2–3 months depending on usage and water hardness. Dishwasher Tips analysis shows that residue buildup from hard water, soap scum, or leftover detergent can lead to poor cleaning performance and odd noises. A consistent schedule helps catch issues before they become costly repairs.
Keep a simple log: note when you cleaned the filter, when you inspected spray arms, and any recurring noises or leaks. A quick audit every month makes a big difference in overall performance and longevity.
Diagnosing Common Problems
Not every dishwasher problem requires a professional visit. Common symptoms and quick checks include: not starting, not draining, dishes not coming clean, leaks, or strange noises. Start by confirming power and door latch, then inspect the filter and drain for clogs. If a failure persists, check the spray arms for obstruction, ensure the water inlet valve opens during cycle, and test for a blocked or kinked drain hose. Remember to inspect gaskets and door seals for wear, as a damaged seal can cause leaks that sabotage performance. As you diagnose, keep track of any error codes on the display; these codes map to specific conditions such as water fill faults or drainage issues.
Step-By-Step Troubleshooting Overview
This section provides a concise bridge between quick answers and the detailed, step-by-step instructions provided below. Use it to orient yourself and determine which area to focus on first: power and door latch, filtration and spray arms, drainage and inlet, or control board indicators. If you encounter persistent error codes or unusual behavior after completing the steps, consult a service technician. For safety, unplug the unit before touching any internal components and avoid forcing hoses or connectors.
Cleaning and Preventive Care
Cleaning is as important as washing. Regularly remove and rinse filters, and use a soft brush to clear out debris from spray arms. If mineral buildup is present, you can soak removable parts in warm vinegar solution (1:1 with water) for a short period, then scrub and rinse. Use a high-quality dishwasher cleaner or a vinegar rinse cycle monthly to prevent odor and residue buildup. Replace rinse aid as recommended by the manufacturer, and consider a water-softening system if you have hard water—soft water improves detergent effectiveness and reduces mineral deposits.
A clean dishwasher not only cleans better but lasts longer. If you notice persistent residue on dishes despite cleaning, reassess detergent choice, ensuring you’re using recommended products suitable for your water hardness level.
When to Call a Professional
If your Edgestar dishwasher exhibits persistent leaks, frequent error codes that don’t resolve after cleaning, or unusual noises that don’t resolve after steps you’ve taken, a professional service call is warranted. Electrical faults, faulty pumps, or cracked seals often require specialized tools and replacement parts. Before calling, gather your model number, recent symptom descriptions, and any error codes observed. A technician can verify wiring integrity, test the inlet valve, and confirm proper heater operation and safety Interlocks.
Energy Efficiency and Detergent Tips
To maximize efficiency, use a detergent formulated for automatic dishwashers and stay within recommended detergent quantities. Add rinse aid to improve drying performance and reduce water spots. If your water is hard, salt designed for dishwashers can help maintain water softness and protect the heating element. Avoid overloading the dishwasher; proper spacing ensures optimal spray coverage. Energy-efficient cycles often run longer but use less water, so choose the appropriate cycle for the load type.
Dishwasher Tips analysis shows that choosing the right cycle and detergent combination can significantly reduce post-wash rewashes and improve overall cleanliness, especially in homes with hard water.
Troubleshooting by Symptom: Not Cleaning, Not Draining, Leaks
Not Cleaning: Check filters, spray arms, and pre-rinse residues. Run a cleaning cycle with a mineral deposit remover if buildup is suspected. Not Draining: Inspect the drain hose for kinks, verify the pump is functioning, and ensure the garbage disposal inlet (if connected) is clear. Leaks: Inspect door seals, tub gaskets, and brackets for wear. Tighten clamps and replace worn seals promptly. Each symptom can point to a distinct subsystem, so tracking symptoms over time helps identify the root cause.
Safety Considerations and Warnings
Always unplug the dishwasher before opening the access panels. If you hear buzzing or see sparking near electrical components, stop and call a professional. Water supply lines and electrical connections can pose shock risks, so handle hoses and wires with care. If a leak is present, shut off the water supply valve to minimize damage and dry the area promptly to prevent mold growth. Never run the unit if you notice a damaged power cord or damaged insulation in the wiring.
Common Error Codes and What They Mean
Error codes provide quick clues about the root causes. While specific codes vary by model, typical categories include a water fill fault, a drainage obstruction, or a heating element issue. When an error code appears, note the exact code and cycle stage, then consult the manual or the manufacturer’s website for a model-specific interpretation. If the code persists after basic checks, a professional assessment is recommended to avoid improper repairs.
DIY Maintenance Schedule and Checklists
Create a simple quarterly maintenance plan: inspect seals, clean filters and spray arms, and check hoses for cracks or wear. Every six months, run an appliance cleaner through a cycle to remove mineral buildup and odors. Maintain a log of service visits, part replacements, and notable performance changes. This structured approach helps you extend the lifespan of your Edgestar dishwasher and maintain consistent cleaning results.
Tools & Materials
- Screwdriver set (Phillips and flathead)(Phillips #2 and small flathead for panel access)
- Multimeter(For checking continuity on wiring and sensors)
- Bucket(Catch water when removing hoses)
- Towel or absorbent cloth(Dry spills and protect cabinetry)
- Soft brush or old toothbrush(Clean filters and spray arms)
- Plastic putty knife(Loosen panels without scratching)
- Gloves(Protect hands during cleaning and parts handling)
- Vinegar/water solution or dishwasher cleaner(For mineral buildup removal and odor control)
- Rinse aid(Improve drying and reduce water spots)
Steps
Estimated time: 20-40 minutes
- 1
Check power and door latch
Ensure the unit is plugged in and the door latch engages fully. A loose door or tripped safety interlock will prevent any cycle from starting. If there’s an error code, note it for reference.
Tip: If the door won’t latch, inspect the switch and the latch mechanism for visible wear. - 2
Inspect and clean the filter and spray arms
Remove the bottom rack and take out the filter assembly. Rinse under warm water, scrub with a brush, and reassemble. Rotate the spray arms to ensure no clogs or stuck nozzles block the jets.
Tip: Cold water can help set debris; wash with warm water for better residue removal. - 3
Check the drain hose and pump
Trace the drain hose from the sump to the disposer or sink, ensuring there are no kinks. If you suspect a blocked pump, disconnect power and carefully inspect the pump impeller for obstructions.
Tip: Use a flashlight and a thin tool to dislodge any embedded debris. - 4
Run a cleaning cycle
Run a cycle with a cleaning agent or a vinegar-water solution to dissolve mineral deposits. After the cycle, inspect for improved drainage and cleaning performance.
Tip: Do not mix cleaners with vinegar in high concentrations; follow product directions. - 5
Check water inlet and temperature
Verify the water inlet valve opens during the cycle, and confirm adequate water temperature (usually around 120–140°F/49–60°C) for effective cleaning.
Tip: If you suspect a valve fault, test for continuity with a multimeter or replace the valve if necessary. - 6
Test run and verify results
Run a full cycle with a small load to confirm that cleaning improves and no leaks occur. Listen for unusual noises or a persistent leak around seals.
Tip: Keep a log of test cycles and observed symptoms for future reference.
People Also Ask
What are common reasons an Edgestar dishwasher won't start?
Common causes include a tripped breaker, a faulty door latch, or a blown fuse. Check the power supply, door interlock, and error codes. If these basics fail, proceed with the step-by-step troubleshooting.
Common causes are power issues, a faulty door latch, or an interlock problem. Check power and latch first, then continue with deeper checks if needed.
How do I fix not draining water from the unit?
Inspect the drain hose for kinks and the filter area for clogs. Verify the pump is functioning and there’s no obstruction at the sump. If water remains, check for a blocked garbage disposal or air gap.
Check the drain hose, filter, and pump. Clear any blockages and test the pump operation to restore drainage.
Why are my dishes still dirty after a cycle?
This usually means dirty spray arms, a clogged filter, or insufficient detergent. Clean the filter and arms, verify detergent quality, and ensure you’re using a cycle appropriate for the load.
Dirty dishes are usually from a clogged filter or spray arms; clean them and use the right cycle and detergent.
Is vinegar safe to use for Edgestar dishwasher cleaning?
Vinegar can be used for descaling in moderation, but follow manufacturer guidelines. Use a dedicated dishwasher cleaner if in doubt, and avoid mixing cleaners with vinegar in high concentrations.
Vinegar can help with mineral buildup when used carefully and per guidelines; use cleaners designed for dishwashers if unsure.
How often should I clean the dishwasher filter?
Clean the filter monthly as a baseline, and more often if you notice buildup or reduced cleaning performance.
Clean the filter about once a month, more if you notice buildup.
What do error codes on an Edgestar dishwasher indicate?
Error codes point to specific issues like drainage, water fill, or heating faults. Note the code, refer to the manual or website for model-specific explanations, and follow recommended steps.
Error codes guide you to the faulty subsystem; check the manual for exact meanings and follow the steps.
Watch Video
What to Remember
- Diagnose with power and latch checks first
- Regular cleaning prevents buildup and failures
- Not all issues require a pro—start with the basics