How to Check Dishwasher Level: A Practical Guide
Learn how to check your dishwasher level and keep it properly aligned to prevent leaks and improve cleaning. This Dishwasher Tips guide covers tools, steps, safety, and maintenance for DIY fixes and long-term reliability.

Today you will learn how to check your dishwasher level and adjust the feet for an even stance. You’ll need a spirit level or laser level, a tape measure, and a stable surface. According to Dishwasher Tips, starting with a level check often prevents leaks and poor cleaning before more extensive repairs.
Why how to check dishwasher level matters for performance
Having the right level is more than a matter of appearance. A correctly leveled dishwasher seals properly, drains efficiently, and distributes water evenly during cycles. When the unit sits crooked, the door may not seal, leading to leaks, standing water, and detergent residue on dishes. A tilted machine can wobble during operation and stress the support feet, cabinet frame, and flooring. For homeowners and renters troubleshooting issues, starting with a level check is a practical first step that prevents wasted effort on misdiagnosed problems. The Dishwasher Tips team emphasizes that many service calls trace back to installation or shifting after movement rather than a faulty pump or motor. In this guide, you’ll find practical, safe methods to assess level using common tools, with tips that protect the floor and cabinet and a plan to relevel if needed. By mastering how to check dishwasher level, you gain control over performance, noise, and the life of your appliance. You’ll also learn how to document measurements for future reference, which can simplify future moves or repairs.
Quick tests to determine current dishwasher level
Before you touch any screws, perform a quick baseline test. Move the dishwasher gently away from the wall enough to slide a level across the front edge and a second check along the side. Place the level across the door lip when the door is closed, and also on the inner edge of the tub if possible. Read both axes: left-to-right and front-to-back. If the level is off in either direction, you’ll know which set of feet to adjust. This simple check gives you a clear picture of how far the unit is from true plumb. Dishwasher Tips analysis shows that many leveling issues stem from door sag or feet loosening with use, rather than a failed component. If you observe a tilt after moving the machine back, verify there’s no debris under the feet and that the flooring is not uneven. Record the tilt direction so you can plan precise adjustments.
Reading the level: front-to-back and side-to-side
Understanding the readings from the level matters because the goal is a uniform, level plane in all directions. Place the level in several strategic locations: across the top edge of the door, along the bottom kick plate, and diagonally corner-to-corner if you’re comfortable. In most homes, the critical checks are front-to-back and side-to-side. If the bubble sits closer to one edge in any reading, note whether the front or back feet need lowering or raising. Small shifts can come from uneven flooring, flooring thickness under the appliance, or a settled cabinet. Use your notes to map out a plan for adjusting the feet in small increments. Re-test after each adjustment to avoid overshoot. The key is consistency: level readings should be nearly identical when you test from different angles. As you gain experience, you’ll be able to spot a tilt at a glance and know which feet to adjust without repeated measurements.
Step-by-step: preparing and measuring before adjustment
Before you adjust anything, ensure the machine is safe and stable. Unplug the dishwasher and turn off the water supply to prevent accidental operation. Clear the area around the feet so you can access them from the front. Wipe away dust or spilled detergent so the feet contact the floor evenly. Place the level on the door lip to take an initial reading and then verify with the level on the top edge of the tub. This preparation saves you from chasing phantom tilts caused by misreadings. If your unit sits on an uneven floor, plan a path for adjustments that keeps the appliance aligned with your counter space. Keep the level steady while you take readings, and have a helper to hold the level steady if needed. This groundwork ensures that the subsequent foot adjustments are purposeful and won’t require repeated re-reading. After this setup, you’re ready to begin actual leveling.
Adjusting the feet: the practical process
With the readings in hand, adjust the leveling feet in small increments. Use a wrench or pliers if the feet have a hex or square section. Turn each foot slowly and check the level after every few turns to avoid overshooting. If your unit has both front feet connected to a common crossbar, adjust them together to maintain even front-to-back balance, then check the side-to-side axis. Prioritize the most out-of-balance axis first. Remember that some feet thread counterclockwise to raise and clockwise to lower. If your floor is very soft or there’s a carpet edge near the unit, you may need to place a rigid shim or a sturdy mat underneath to prevent the feet from sinking. As you work, keep your hands dry and avoid tipping the dishwasher further than necessary. This step-by-step approach prevents misalignment and helps the unit settle securely on the floor.
Rechecking and running a test cycle to confirm results
Once you believe the level is correct, re-check from multiple positions and double-check the door seal alignment. Lower and raise the feet a little if any axis shows a persistent tilt. After confirming the level, plug the unit back in, turn on the water supply, and run a short wash with a rinse cycle. Observe for leaks around the door, check that the spray arms rotate unobstructed, and listen for unusual vibration. If leaks occur, recheck the feet and door seal, and inspect the drain hose for kinks or misrouting. This validation step is essential to confirm that the leveling work translates into real performance improvements. If you’re unsure, it’s wise to pause and review the steps or consult a professional. The goal is a quiet, stable operation that keeps your kitchen floor dry.
Special considerations for renters and compact dishwashers
For renters or people with smaller kitchens, leveling can be trickier because there’s less space to work and limited options for shims. Portable dishwashers also require careful verification of stability because their freestanding legs may sink into soft flooring. In these cases, use a rigid mat or plywood under the unit to create a uniform base. If you cannot adjust the feet enough due to cabinet restraints, consider speaking with your landlord or a technician to discuss an approved modification. Document your readings with photos and dates so future maintenance can build on your notes. Maintaining a level dishwasher in tight spaces reduces leaks and helps ensure consistent cleaning results, even when space is at a premium.
Final checks and quick maintenance to keep level
After leveling, perform periodic checks every few months or after moving the appliance. Wipe the feet and contact points clean to prevent dirt buildup that can affect stability. Keep the area beneath clear to allow air circulation and inspect the drain hose for kinks that could cause backflow. If you notice the dishwasher is drifting again, re-run the level test and adjust as needed. Finally, logging the measurements in a simple notebook makes it easier to maintain level during future moves or renovations. The Dishwasher Tips team recommends keeping a small maintenance log and rechecking the level whenever you install or relocate the unit. A well-leveled dishwasher pays off in quieter operation, fewer leaks, and better cleaning performance.
Tools & Materials
- Spirit level or carpenter’s level(12-inch or longer; place on door lip or tub edge)
- Tape measure(To confirm level across front-to-back and side-to-side)
- Wrench or pliers for feet(Use for any hex or square leveling feet)
- Anti-slip mat or thick cardboard(Protect floor while adjusting)
- Notebook and pencil(Record readings and foot positions)
- A helper(Helpful for steadying the level and guiding moves)
Steps
Estimated time: 20-40 minutes
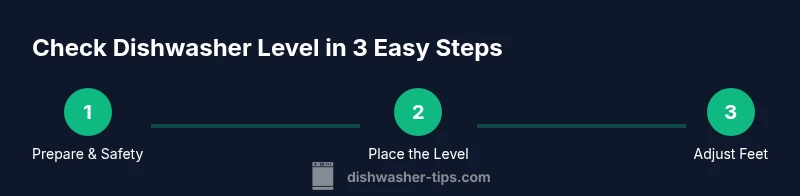
- 1
Prepare and safety check
Unplug the dishwasher and shut off the water supply. Clear space around the feet for easy access, and wipe away detergent residue to ensure stable contact with the floor.
Tip: Keep a second person nearby to stabilize the unit while you read measurements. - 2
Position the level
Place the spirit level across the door lip with the door closed, then verify along the top edge of the tub. Check both front-to-back and side-to-side axes.
Tip: Hold the level steady to prevent it from sliding during readings. - 3
Read and record tilt directions
Note whether the bubble centers on each axis. Mark which feet or corners need elevation or lowering based on your readings.
Tip: Write down each axis so you can plan precise adjustments. - 4
Adjust the feet incrementally
Turn the leveling feet slowly in small increments. Recheck the level after a few turns to avoid overshooting the target.
Tip: Work on the most out-of-balance axis first. - 5
Recheck from multiple angles
Place the level in a second location and along a diagonal if needed to confirm a truly level plane.
Tip: If readings diverge, make tiny additional adjustments and recheck. - 6
Test with a cycle
Plug back in, restore water, and run a short wash to verify no leaks and proper spray arm operation.
Tip: Watch for leaks at the door and around the feet during the cycle.
People Also Ask
Why is my dishwasher not level after installation?
Common causes include an uneven floor, misadjusted feet, or the unit shifting during delivery. Relevel using the steps above and test again.
Typical causes are an uneven floor or feet that weren’t set properly; relevel and test again.
Do I need to unplug the dishwasher during leveling?
Yes. For safety, unplug the appliance and shut off water supply before starting. Keep the area dry and avoid contact with hot parts.
Yes, unplug and turn off the water first.
Can I level a dishwasher on a sloped floor?
Yes, with adjustments and possibly shims. Level front-to-back and side-to-side; use shims under feet if the floor is uneven.
Yes, you can, but you may need shims for a truly level setup.
How often should I check the level?
Check after installation and after moving the dishwasher. Recheck if you notice leaks or poor cleaning performance.
Check after installing and after moving it; recheck if leaks show up.
What if I can’t reach the leveling feet?
If you can’t reach the feet safely, move the unit slightly, or ask for professional help. Avoid forcing moves that could damage cabinets.
If you can't reach them safely, call a pro instead of forcing moves.
Watch Video
What to Remember
- Level the dishwasher to prevent leaks and ensure proper cleaning
- Use a spirit level to measure front-to-back and side-to-side tilts
- Adjust feet in small increments and recheck from multiple angles
- Run a test cycle to validate sealing, drainage, and arm rotation
- Keep a simple maintenance log of levels and adjustments