How to Check a Dishwasher for Leaks: A Homeowner's Guide
Learn a safe, step-by-step method to check your dishwasher for leaks. Identify door seals, hoses, and drain issues to prevent water damage and costly repairs.

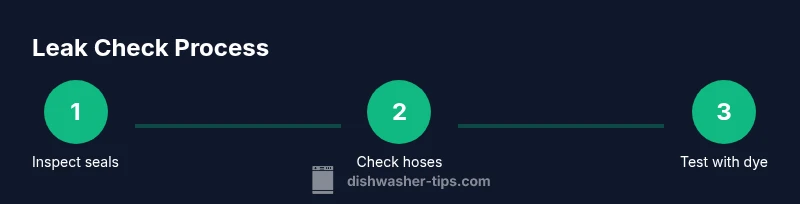
By the end of this guide, you will know how to check a dishwasher for leaks and what to inspect first. Start with the door seal, hoses, and sump area, then test with a cycle to observe any drips. According to Dishwasher Tips, most leaks originate around seals and connections that wear with time.
What counts as a leak and why it happens
Water around the base, puddles after cycles, or damp cabinet floors signal a leak. Leaks can stem from worn door seals, loose hoses, cracked tub, loose clamps, or a faulty inlet valve. According to Dishwasher Tips, most leaks originate where seals and connections meet the tub or door. If you're wondering how to check dishwasher for leaks, this guide covers the key areas to inspect first. Regular wear, mineral buildup, and improper installation increase risk. Understanding these sources helps you target the right fixes without unnecessary repairs. In this section, we break down the common failure points and how they show up in daily use.
Quick diagnostics you can perform safely
Before you touch any electrical components, unplug the dishwasher and turn off the water supply. Use towels or a shallow tray to catch drips; keep a bucket handy for larger leaks. Inspect the door gasket by opening the door and running a flashlight along the seal for cracks or gaps. Check exterior hoses where they connect to the tub and to the supply valve. If you notice water inside the base, that may indicate a seal or drain issue. These checks are non-invasive and reduce the risk of electric shock while you investigate.
Common leak sources to inspect first
Start with the door gasket: a brittle, cracked, or stretched seal is a frequent culprit. Next, inspect the inlet valve and the hose that brings water into the machine; loose clamps or cracks here allow water to escape under pressure. The drain hose and clamped connections deserve attention, especially where the hose meets the pump and the sink drain. Don’t overlook the tub base and the spray arms—cracked tub walls or gaps where spray arms attach can channel water to the bottom. Dishwasher leaks often travel along small paths; tracing the path helps you pinpoint the source quickly.
How to prepare your space for inspection
Clear the area around the dishwasher and remove the bottom rack to access the base and hoses. Dry the floor to easily spot new drips and protect it from soaking, then lay an absorbent towel along the front kick panel. Have a shallow tray ready for under-sink hoses, and keep a bucket to catch any overflow during tests. If you need to remove panels, photograph each connection before loosening screws so you can reassemble precisely. Preparation reduces mess and speeds up accurate diagnosis.
Documenting leaks and planning next steps
Keep a simple log that records what you observed, where the water was, and the cycle during which it appeared. Note whether leaks occur only during fill, wash, or drain phases, and whether water is clear or colored (if you used dye during testing). Attach photos or sketches of hose clamps and gasket edges to your notes. This documentation is invaluable if you call a professional or order replacement parts, and it helps you compare before-and-after results after repairs.
When to attempt a sealant or DIY repair vs. calling a pro
Minor issues like replacing a worn door gasket or tightening loose hose clamps are often DIY-friendly for confident homeowners. If you see cracks in the tub, a warped base, or persistent leaks after routine fixes, it’s safer to call a professional. DIY attempts near electrical components carry risk; always ensure the unit is unplugged and the water supply is off before starting any repair. When in doubt, schedule a professional evaluation to avoid further damage.
Preventative maintenance to reduce future leaks
Regular maintenance lowers the chance of leaks over the life of the dishwasher. Wipe the seals dry after cycles, inspect hoses every 6–12 months, and replace worn gaskets at the first sign of cracking. Use the manufacturer-recommended detergent and avoid overfilling, which can strain seals. Consider adding a loose-leaf note on your appliance calendar for annual checks and a quick visual scan of door seals before loading dishes.
Tools & Materials
- Protective gloves(to handle sharp edges and avoid skin irritation)
- Flashlight(for inspecting tight corners and seals)
- Absorbent towels or rags(to soak up drips and keep area dry)
- Bucket or shallow tray(catch water during tests)
- Screwdriver set (Phillips & flathead)(for panel screws and hose clamps)
- Pliers(help with clamps or clamps on hoses)
- Replacement door gasket (if worn)(only if you identify a damaged seal)
- Plumber's silicone or sealant (as directed by manufacturer)(use only per instructions; not for all models)
Steps
Estimated time: 30-60 minutes for inspection; up to 2 hours if you need to disassemble panels or replace parts
- 1
Power down and prep area
Unplug the machine and shut off the water supply. Move dishes aside and clear the floor so you can observe any drips during tests. Prepare towels and a small bucket for any overflow. Why: prevents electrical risk and makes leaks easier to see.
Tip: Take photos of any hose clamps before loosening; this helps you reassemble correctly. - 2
Inspect the door gasket
Close the door and manually feel the gasket for cracks, hardening, or gaps. Look for water tracking along the seal once you run a short test cycle with just water. If you see gaps, replacement is usually needed rather than repair.
Tip: Use a magnifying glass or microfiber to inspect fine cracks. - 3
Check the water inlet hose and clamps
Follow the hose from the water supply to the valve; check for cracks, splits, or bulges. Gently tug on clamps to ensure they’re secure. Replace any damaged hoses or loose clamps before running a full cycle.
Tip: Have a bucket ready; hoses can spray when loosened. - 4
Inspect the drain hose and connections
Trace the drain hose from the tub to the drain pump and onward. Look for kinks, cracks, or loose clamps where the hose meets the pump or sink drain. Tighten or replace as needed.
Tip: Check at both ends because leaks often start mid-hose. - 5
Examine the tub and spray arms
Check the tub floor for cracks or warping that could let water seep underneath. Inspect spray arms for missing nozzles or cracks that could channel spray toward seams. A compromised tub or arms can cause creeping leaks.
Tip: Do not force the tub; replace damaged parts via manufacturer kit. - 6
Run a test cycle and observe
With the unit reassembled, run a short wash cycle and carefully watch the base and door area for drips. If you see color trace using dye, note its path to identify the leak source.
Tip: Keep a flashlight angled along possible paths to catch slow drips. - 7
Check under the base after cycle
Stop the cycle early if you can safely do so and inspect the bottom panel area and floor. A second pass confirms whether a leak persists or was cleared by adjustments.
Tip: Use a dry towel to help detect new moisture quickly. - 8
Decide on repair path
If the leak remains near hoses or gaskets, order replacement parts or schedule a professional repair. If the leak is due to structural damage in the tub, professional service is usually required.
Tip: Keep receipts and part numbers for future maintenance.
People Also Ask
What are the most common causes of dishwasher leaks?
Most leaks stem from worn door seals, loose hoses, or cracks in the tub. Start by inspecting the door gasket and inlet/drain hoses before considering hardware replacement.
Common causes include worn door seals and loose hoses. Start with the gasket and hoses to identify the leak path.
Can a dishwasher leak cause water damage in nearby cabinets?
Yes. A persistent leak can saturate the cabinet base and insulation, promoting mold and wood damage if not addressed promptly.
Yes, leaks can damage cabinets if not fixed quickly.
Is it safe to run a cycle if I suspect a leak?
Avoid running multiple cycles if a leak is suspected. If testing, use a controlled load and observe carefully from a distance.
Don't run full cycles if you suspect a leak; watch carefully.
How often should I replace door seals?
Door seals wear over time; replace when you notice visible cracking, tearing, or hardening and poor sealing during cycles.
Replace seals when you see cracks or leaks around the door.
Do I need special tools to diagnose leaks?
Most leaks can be diagnosed with basic tools: flashlight, towels, bucket, and a screwdriver set. More involved repairs may require clamps or replacement hoses.
Basic tools suffice for many leaks; more complex repairs may need parts.
When should I call a professional?
If the tub is cracked, leaks persist after tightening seals, or you encounter electrical components, contact a professional for safety and proper repair.
Call a pro if the tub is cracked or leaks persist after basic fixes.
Watch Video
What to Remember
- Inspect seals and hoses first.
- Unplug and shut off water before work.
- Document leaks with notes and photos.
- DIY fixes are viable for minor seal wear; call a pro for tub damage.