How to Drain a Dishwasher Manually
Learn how to drain a dishwasher manually with a safe, step-by-step approach. Unplug, bail out water, access the sump and filter, and prevent future drainage problems. This guide covers tools, safety tips, and troubleshooting.

To drain a dishwasher manually, first unplug the unit and shut off the water supply. Bail out the standing water with a cup or sponge, access the sump and filter, and use a pitcher to pour water out in controlled bursts while towels catch spills. This guide provides exact steps, safety tips, and troubleshooting if drainage continues to fail.
Understanding Why You Might Need to Drain a Dishwasher Manually
If you're faced with a dishwasher that won't drain, you can fix the issue yourself by draining manually. This is especially useful when the appliance has standing water at the bottom after a cycle or a suspected drain blockage. The process is safer and faster than waiting for a service call, and it gives you a chance to inspect the sump, filter, and drain hose for obvious obstructions. According to Dishwasher Tips, manual drainage is a practical skill for homeowners to prevent minor failures from becoming costly repairs. The audience here—homeowners and renters—can handle this with the right precautions and a calm, methodical approach. In many cases, the reason for poor drainage is a simple clog or buildup that you can remove with basic tools. Additionally, identifying whether the problem is localized to the dishwasher or related to the home’s plumbing can save you a service visit. The key is to stay organized, work in a dry area, and document any recurring issues for future reference.
Safety First: Prep, PPE, and Tools
Safety is the foundation of any DIY repair. Before you touch the dishwasher, unplug it from the outlet and shut off the water supply to prevent accidental leaks or electric shock. Wear protective gloves, and use old towels to absorb spills. A flashlight helps you see into the tub and the drain area. This phase is also when you gather your tools and set up a dry workspace. The Dishwasher Tips team emphasizes documenting steps as you go so you can reassemble correctly. If your unit is in a tight cabinet, clear space around the front panel and identify any screws or clips that secure the toe-kick access panel. Remember: never attempt a repair if you see exposed wiring or corrosion. Keep pets away and ensure children are supervised.
The Flow: What Happens During Manual Drain
Water in the tub is typically held back by the filter and the sump, then pumped out during a normal cycle. When you drain manually, you take control of that flow, removing water level by level and inspecting for debris. The drain hose can also trap air or become kinked, which prevents drainage. Understanding this flow helps you diagnose where trouble starts: a blocked filter, a kinked hose, or a clogged drain path. The goal is to reduce water safely, preserve the seal, and avoid splashing into cabinets. This section sets the stage for the practical steps you’ll perform, and it frames how to watch for signs that you’ve achieved a successful drain.
Step-by-Step: Quick Reference for the Manual Drain Process
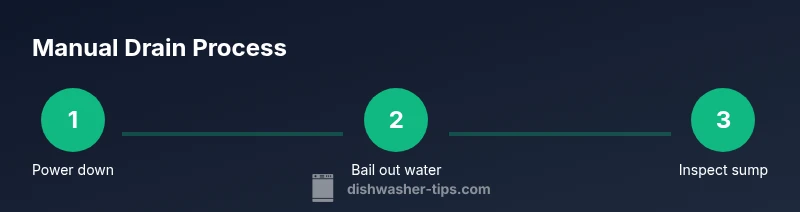
Here is a concise overview of the manual drain workflow so you know what to expect as you perform the detailed steps. First, power down and prepare the workspace. Next, remove the bottom rack and bail out the largest amount of water with a pitcher. Then, access the sump and filter to clear debris. After that, inspect and clear the drain hose for kinks or clogs. Finally, reassemble, run a test cycle, and keep an eye out for leaks.
Common Pitfalls and How to Avoid Them
Common mistakes include starting work with the power on, neglecting to drain the tub completely, and ignoring a clogged drain hose. These missteps can lead to electric shock, spills, or a recurring drainage problem. To avoid them, always unplug the unit, remove water gradually, and inspect all components (filter, sump, and hose) thoroughly. Taking photos as you disassemble helps ensure you reassemble correctly. If you encounter stubborn clogs, resist the urge to force tools into tight spaces; instead, use a flexible cleaning brush or pipe-cleaner to minimize damage.
Post-Drain Maintenance to Prevent Recurrence
After you’ve drained the dishwasher, perform a quick maintenance routine to prevent future drainage problems. Clean the filter and sump, inspect the drain hose for signs of wear, and ensure the hose connections are secure. Run a short drain cycle with an empty dishwasher to confirm there are no leaks and that water exits cleanly. Regular cleaning reduces buildup and improves overall performance. Keeping a small checklist can help you track when maintenance is due and avoids slipping back into the same issue.
When to Seek Professional Help
If manual drainage fails to clear the issue, if you hear grinding noises, or if there are leaks around the door or base, it’s time to contact a professional. Electrical concerns, persistent drainage problems, or unusual odors may indicate more serious faults with the pump, motor, or internal seals. A licensed technician can diagnose and repair the root cause without risking damage to the unit or your home.
Tools & Materials
- Gloves (protective)(Waterproof if possible)
- Old towels or rags(Protect floor and cabinet)
- Bucket(For collecting water)
- Plastic pitcher or cup(Scoop water out safely)
- Sponge and scrub pad(Wipe debris and spills)
- Flashlight(Illumination for dark interiors)
- Screwdriver set(Access panels if needed)
- Pliers or tongs(Remove clogs safely)
Steps
Estimated time: 45-60 minutes
- 1
Power down and prepare area
Unplug the unit and shut off the water supply. Clear space and layout towels to catch spills. This ensures no electricity or water is live during the procedure.
Tip: Double-check power with a quick plug-in test away from the work zone. - 2
Remove bottom rack and bail out water
Take out the lower rack to access the tub. Use a plastic pitcher and towels to remove the majority of standing water.
Tip: Work from the outer edge inward to minimize splashes. - 3
Access the sump and filter
If your model requires it, remove the toe-kick panel to reach the sump and filter. Photograph as you go to aid reassembly.
Tip: Keep track of screws and their locations. - 4
Clean the sump and filter
Remove debris from the sump and rinse the filter under running water. Use a sponge to scrub away stubborn grime.
Tip: Avoid metal tools that could scratch the surface. - 5
Inspect drain hose and check for clogs
Trace the drain hose to its connection. Check for kinks or visible clogs and loosen them carefully.
Tip: Have a bucket ready for any water that drains during inspection. - 6
Scoop out remaining water and test drainage
Pour out residual water into the bucket. Reconnect and run a short drain test or an empty cycle to see if water exits.
Tip: If water remains, stop and re-evaluate for deeper clogs. - 7
Reassemble and run a quick test
Reinstall the filter and toe-kick panel, plug the unit back in, and run a dry cycle to confirm proper drainage.
Tip: Watch for leaks and ensure all hose clamps are secure. - 8
Clean up and drying
Wipe surfaces dry, store tools, and launder towels. Consider keeping a small maintenance log for future reference.
Tip: Document recurring issues for future service if needed.
People Also Ask
Is it safe to drain a dishwasher manually?
Yes, as long as you unplug the unit and avoid contact with hot water or exposed wiring. Follow steps carefully and wear protective gloves.
Yes, safety comes first: unplug, protect yourself, and follow the steps.
What if water won't drain after manual steps?
A clogged drain hose or pump is common. Inspect the hose, filter, and pump for debris and test each path. If unresolved, call a professional.
If it won’t drain, check hoses and pump for clogs; seek a professional if needed.
Can I use a vacuum to remove water?
Avoid using a regular household vacuum. If using a wet-dry vacuum, unplug first and use caution around water and electrical components.
Only use a wet-dry vacuum designed for liquids, and unplug first.
How long does manual drainage take?
Time varies with access and clogs, but plan for under an hour in typical cases.
Most homeowners finish within an hour.
When should I call a pro?
If you repeatedly encounter drainage problems, if you hear unusual noises, or if there are leaks after draining, a licensed technician is recommended.
If problems persist, a professional should assess the unit.
What maintenance helps prevent future drainage issues?
Regularly clean the filter, inspect the drain hose, and run an empty cycle to verify drainage works, ideally monthly or after heavy use.
Keep the filter clean and run monthly checks to prevent clogs.
Watch Video
What to Remember
- Drain safely before inspection to avoid shocks.
- Check filter, sump, and hose for clogs.
- Test drainage with an empty cycle after reassembly.
- Document recurring issues for future service.
- Call a pro if the issue persists after manual drainage.