How to Fix a Dishwasher Leak: Step-by-Step Guide
Learn how to diagnose and fix a dishwasher leak safely. This comprehensive guide covers common causes, DIY fixes, when to call a pro, and practical maintenance tips to prevent future leaks.

In this guide you will diagnose and fix a dishwasher leak by inspecting the door gasket, hoses, and seals, then performing practical repairs or part replacements. Start by unplugging the unit and cutting the water supply, then run a controlled test cycle with towels ready to catch any drips. Use common tools you already have and replace worn components as needed.
Common Causes of a Dishwasher Leak
A kitchen staple that loses its seal can flood the floor quickly. The most frequent culprits are a worn or damaged door gasket, a loose or cracked inlet or drain hose, and a failed tub seal. Another common source is a clogged filter or spray arm forcing water to escape from the tub. Electrical components can also indirectly cause leaks if a pump or valve malfunctions and overfills the tub. By understanding these typical failure points, you can focus your inspection without tearing apart the entire machine. Remember, leaks can come from a single faulty seal or from several minor issues working together, so methodical inspection is key.
Dishwasher Tips analysis indicates that leaks most often stem from wear in door gaskets, loose hose connections, or cracks in the tub seal. Don’t ignore small drips around hose clamps or at the door—these are usually easier fixes than replacing the entire unit.
Safety First: What to Do Before You Start
Before you touch any appliance, shut off the power at the circuit breaker to avoid electrical shock. Then turn off the water supply to the dishwasher and disconnect the power cord. Have towels or a shallow pan ready to catch water that may spill when hoses are loosened. Wear protective gloves to protect your hands from sharp edges and avoid slipping on wet floors. If you smell burning or see scorching marks, stop and call a professional. This phase minimizes risk and protects your home while you diagnose the leak.
Quick Diagnostic Checklist
Use a systematic approach to locate the source of the leak. Check the door gasket for cracks or missing segments; inspect the tub seal around the base; verify all inlet and drain hoses are securely connected and free of cracks. Look at the float switch and fill hose for signs of overfilling or misalignment. Run a short cycle with the door open and watch for water escaping from the gasket, hoses, or tub seam. Note whether the water is spraying out or seeping slowly, which helps distinguish a crack from a loose connection.
Visual Inspection: Doors, Seals, and Gaskets
Start with the door gasket—this flexible rubber seal is designed to keep water inside the tub during cycles. A damaged gasket often shows cracks, tears, or flattened areas where water can escape. If you find a compromised gasket, you can replace it with a compatible kit. Also inspect the tub seams for cracks and examine the gasket mounting channel for misalignment. A misaligned door can cause a leak even if the gasket itself is intact. Document all findings as you go to guide your next steps.
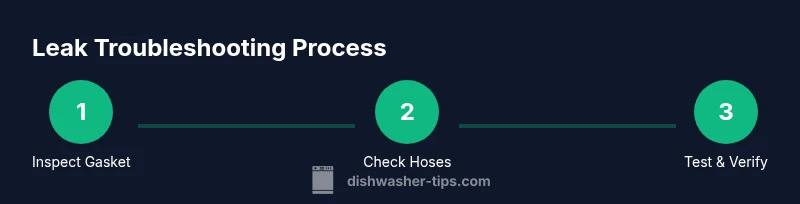
Step-by-Step Troubleshooting Overview
While the exact repair depends on the identified source, the typical process includes: (1) unplug and drain, (2) inspect gaskets and seals, (3) test hose connections and clamps, (4) verify the inlet valve and water line for leaks, (5) dry and retest, (6) replace damaged parts and reseal. This approach minimizes disruption and ensures you address the root cause rather than symptoms. If the leak persists after these steps, professional help is advised.
Fixes You Can Do Yourself
Many dishwasher leaks are fixable with common household tools. Replace a worn door gasket or reseal tub seams using silicone sealant where appropriate. Tighten all hose clamps and replace cracked hoses with manufacturer-approved ones. If the inlet or drain hose is damaged, swap it for a compatible length and diameter. After any repair, run a test cycle with the dishwasher empty to confirm the leak is resolved. Keep a maintenance log for future reference.
When to Call a Professional
If you’ve replaced gaskets and hoses but water continues to pool under the unit, the problem may be more complex, such as a cracked tub, a failing pump, or a faulty water inlet valve. Electrical safety is a real concern when water and power share space. In these cases, a licensed appliance technician can diagnose with specialized tools and spare parts, and verify there are no hidden hazards or potential for further damage.
Authority Sources
For trusted guidance on appliance maintenance and safety, consult reputable sources such as government and university resources. These references provide general maintenance practices and safety precautions that align with DIY work on home appliances without encouraging risky behavior. Always prioritize your safety and local code requirements when performing repairs.
Tips for Preventing Leaks
Preventive maintenance is the best defense against leaks. Regularly inspect door gaskets for signs of wear, keep spray arms clean, and ensure hoses are not kinked or loose. Use the right detergent and avoid overfilling, which can splash water beyond the tub. After a repair, schedule a quarterly check of the seals and hoses, and keep the area around the appliance dry to detect leaks early.
Tools & Materials
- Shut-off valve key or adjustable wrench(For tightening water inlet connections)
- Screwdrivers (Phillips and flat-head)(For removing panels and clamps)
- Adjustable pliers(To tighten hose clamps safely)
- Towels or absorbent rags(Ready to catch drips during inspection)
- Bucket or shallow pan(Place under appliance to collect water)
- Flashlight(Inspect hard-to-see areas)
- Replacement door gasket kit(If gasket is worn or cracked)
- Replacement inlet/drain hoses(Only if hoses show cracks or damage)
- Silicone sealant (food-grade)(Used sparingly for tub seams if recommended by manufacturer)
Steps
Estimated time: 60-90 minutes
- 1
Unplug and shut off
Unplug the dishwasher from its power source and turn off the water supply. This prevents electric shock and further water damage while you inspect for leaks. Have towels ready to catch any residual water.
Tip: Always double-check the circuit is de-energized with a tester before touching wires. - 2
Inspect the door gasket
Open the door and examine the gasket around the doorway. Look for cracks, tears, or compression rings that no longer seal properly. A damaged gasket is the most common leak source.
Tip: If the gasket is sticky or deformed, replacement is usually the simplest fix. - 3
Check hoses and clamps
Follow the drain and inlet hoses from the back of the machine to the fittings. Look for cracks, bulges, or wet spots. Tighten clamps, and replace any cracked hoses.
Tip: Ensure hoses are not kinked and that clamps are snug but not overtightened. - 4
Inspect the tub and seams
Examine the bottom edge of the tub and any visible seams for cracks or loose seals. Use a flashlight if needed. A cracked tub or loose seam often requires professional replacement rather than a DIY fix.
Tip: Do not apply sealant to damaged tub surfaces unless the manufacturer approves. - 5
Test with a short cycle
Reconnect power and water, run a short cycle with the door closed but the user panel accessible. Place towels around the base to catch any drips and observe closely for leaks around the gasket and hose connections.
Tip: If water leaks from beneath the unit, inspect the interior components or consult a pro. - 6
Evaluate repair results
If a gasket or hose was replaced, run another short cycle to confirm the fix. If the leak persists, document findings and schedule professional service.
Tip: Keep a record of parts replaced and dates for future maintenance.
People Also Ask
What is the most common cause of a dishwasher leak?
The most common cause is a worn or damaged door gasket. Cracks in the gasket allow water to escape during cycles. Loose hose connections can also produce leaks, especially at the inlet or drain lines.
Typically, a worn door gasket or loose hose connections cause most leaks. Check those first when you hear dripping.
Can I fix a leak myself without replacing parts?
Yes, many leaks come from gasket wear or loose hoses that you can tighten or reseal. If you notice cracks or severe wear, replacing the part is usually more reliable than trying a sealant.
Often you can fix it yourself by tightening hoses or replacing a worn gasket. If you see cracks, replace the part.
When should I replace the entire dishwasher?
If the tub is cracked or the pump is failing and replacement parts are scarce or expensive, replacement may be more economical than repair. A professional evaluation can help confirm the best option.
If the tub is cracked or major components fail beyond affordable repair, replacement may be best.
Is it safe to run the dishwasher after a leak repair?
Only run a short test cycle after completing repairs to verify the leak is gone. If any water escapes again, stop and reassess or contact a pro.
Run a short test cycle to verify the fix. If it leaks again, stop and check your work or call a professional.
What maintenance reduces future leaks?
Regularly inspect door gaskets, clean spray arms, and check hose connections. Use the manufacturer-recommended detergent and avoid overfilling to minimize spillover.
Keep up with routine checks on gaskets and hoses, and use the right detergent to prevent leaks.
Do I need any special tools for fixes?
Basic hand tools are often enough: screwdrivers, pliers, a wrench, towels, and a replacement hose or gasket if needed. Follow the manufacturer’s repair guide for exact parts.
A screwdriver, pliers, and a wrench plus replacements usually suffice, following the model's guide.
Watch Video
What to Remember
- Identify leak sources through methodical inspection.
- Replace worn door gaskets and damaged hoses promptly.
- Test cycles confirm leak resolution before returning to full use.
- Call a professional if tub cracks or pump issues are detected.