Why Do Dishwashers Leak? A Practical Troubleshooting Guide
Discover the common causes of dishwasher leaks, how to diagnose them, safe fixes, and practical prevention tips to protect your kitchen. Why do dishwashers leak? This urgent, step-by-step guide from Dishwasher Tips helps homeowners troubleshoot quickly and safely in 2026.

Most dishwashers leak for a few common reasons: a failing door seal, loose hose connections, overfilled or clogged drain, or a cracked tub. Start by inspecting the door gasket for tears, then check hoses and the sump for standing water. If leaks persist after these checks, turn off power and call a professional.
Common sources of leaks in modern dishwashers
Leaks won’t always look the same, but most originate from a handful of failure points that homeowners can inspect. If you’re asking why do dishwashers leak, the answer often lies in worn or damaged seals, loose connections, or drainage problems. The most frequent culprits are the door seal and gasket, the drain hose, the supply hose, and the tub itself. In many cases, mineral buildup, improper installation, or overloading the rack can push water toward seams and gaskets before it escapes to the floor. By understanding how water travels through a dishwasher, you can quickly spot symptoms and decide which part to test first.
- Water around the door: usually a door seal issue.
- Water under the unit after a cycle: could be a loose drain hose or a clogged drain.
- Foamy, bubbly discharge: often improper detergent use or over-suds.
- Puddles near the kitchen cabinet: could be a leaking inlet hose or a cracked tub.
This section sets the stage for a practical diagnostic flow; next we’ll focus on the door seal, hoses, and internal components. Always unplug the machine before inspecting electrical components and shut off the water supply.
Inspect the door seal, hinges, and door alignment
The door seal (gasket) is the first place leaks appear because it keeps water contained during wash cycles. Inspect the rubber around the door for rips, tears, cracks, or hardening with age. If you find damage, replace the gasket according to your model’s instructions. Also check the door hinges and the alignment of the door itself; a misaligned door can create a gap that leaks water even if the gasket looks fine.
To test, run a short cycle with the door slightly open at the end and watch for seepage along the rim. This can reveal whether the issue is cosmetic wear or a more serious misalignment. Note that some leaks only appear during high-pressure rinses, so observe carefully. If the gasket is intact but the door sits unevenly, you may need to adjust latch mounting or cabinet alignment.
Check hoses, clamps, and connections
Water supply hose, drain hose, and any refill or sensor hoses are fastened with clamps. Over time, clamps can loosen, hoses can crack, or fittings can corrode, leading to drips or streams during cycles. Inspect each hose for cracks, bulges, or soft spots; run your fingers along the hose to detect hidden wear. Tighten clamps by hand and with a screwdriver where appropriate, but avoid overtightening. If a hose shows damage, replace it. After replacement, ensure the hose ends are seated and the hose is routed away from sharp edges and hot components.
Inspect the tub, sump, and spray arms for cracks or damage
The tub and inner sump collect water; if either has a crack or a loose seam, you’ll see leaks around the base or under the unit. Examine the tub walls, corners, and sump for cracks, corrosion, or loose mounting screws. Also check spray arms for misalignment or damaged bearings; if spray arms rub or bind, water can escape through gaps. If you notice pooling near the sump or base, this may be a sign of a cracked tub or a failed seal at the bottom of the tub. Contact a professional if you find structural damage.
Drainage problems: clogs and pump failures
Many leaks come from drainage issues rather than direct hose leaks. Begin by inspecting the filter and drain pump: a clogged filter reduces water flow and can cause water to back up and overflow. Remove the filter and rinse it under running water; clear any debris from the sump. Check the drain hose for kinks and obstructions, and ensure the pump impeller turns freely. If you hear grinding or the pump fails to evacuate water, the pump or seal may be failing and require replacement. After cleaning, run a test cycle with a shallow amount of water to confirm the drain sequence works smoothly.
Detergent usage and foam: over-sudsing and inappropriate products
Over-sudsing can cause water to flow over the door or past seals, especially if you use the wrong detergent in a high-efficiency model. Use only dishwasher-approved detergents and the correct amount; pods can be convenient but must be used according to manufacturer instructions. If foam appears, pause the cycle, add a few minutes to allow foam to settle, and run a rinse cycle. High-foaming detergents and rinse aids that are incompatible with your machine can create bubbles that look like leaks but are actually overflow from the door area.
Maintenance and prevention: keeps leaks away
Routine maintenance helps prevent leaks and extends dishwasher life. Clean the filter monthly, inspect gaskets every 6–12 months, and check hoses for signs of wear. Make sure the dishwasher is level; an uneven machine tilts water toward wiring and insulation, increasing leakage risk. Avoid overloading the bottom rack, which can push water toward the seals. If your home has hard water, consider a water softener or a rinse aid to minimize mineral buildup that can corrode seals and fittings. Finally, keep a spare hose and clamps on hand for quick DIY fixes.
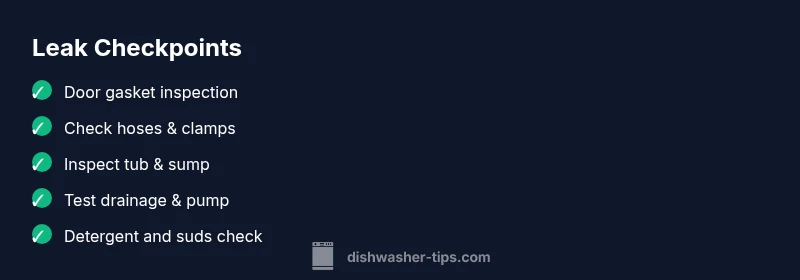
Steps
Estimated time: 45-60 minutes
- 1
Power down and secure water supply
Unplug the dishwasher at the outlet or switch off the circuit breaker. Shut off the water supply valve under the sink to prevent further leaks while you inspect. Have a towel or bucket ready for any residual moisture.
Tip: Never work on live electrical components; take your time and confirm power is off before touching wires. - 2
Inspect door gasket and alignment
Look for tears, cracks, or hardening in the door seal. If damaged, replace the gasket following the manufacturer’s instructions. Also verify the door sits evenly—misalignment can cause leaks even with a good gasket.
Tip: Use a flashlight to spot hairline cracks you might miss with normal lighting. - 3
Check hoses, clamps, and fittings
Trace both the water inlet and drain hoses from the back of the unit. Check clamps for looseness, examine hoses for cracks or bulges, and replace any suspect segments. Re-tighten clamps securely but avoid over-tightening.
Tip: Run a hand along each hose after reassembly to feel for soft spots you may miss visually. - 4
Inspect tub, sump, and spray arms
Examine the tub interior for cracks or loose seams. Remove spray arms to check for obstructions or damage. Ensure the sump and seals around the base are intact and properly seated.
Tip: If you find a crack, stop and consult a professional—replacing a tub is a major repair. - 5
Test drainage and pump function
Clean or replace the filter; run water through the drain path to ensure it flows freely. Listen for the pump during a cycle for signs of grinding or failure. If drainage seems weak, the pump or impeller may need replacement.
Tip: Document any unusual sounds or leaks for the technician. - 6
Run a controlled test cycle
With everything reassembled, run a short cycle with a towel under the unit to monitor for any fresh leaks. If leakage reoccurs, stop the cycle and seek professional help.
Tip: Keep kids and pets away during testing; repeated cycles can worsen a leak quickly.
Diagnosis: Visible leak under dishwasher or around door during/after cycle
Possible Causes
- highDoor seal wear or damage
- highLoose or damaged hoses and clamps
- mediumDrainage blockage or pump failure
- lowCracked tub or loose seals at tub seams
- lowImproper detergent use causing excessive suds
Fixes
- easyInspect door gasket for tears and replace if damaged
- easyTighten or replace inlet and drain hoses and clamps
- easyClear filters and drain pathway; test pump operation
- hardInspect tub and sump for cracks; replace tub if structural damage is found
- easyUse manufacturer-recommended detergent and correct dosage; switch to low-suds formula if needed
People Also Ask
What are the most common causes of dishwasher leaks?
The most frequent causes are worn door seals, loose hoses or clamps, drainage blockages, and, less often, cracked tubs. Regular inspections of seals and hoses can prevent most leaks.
The usual culprits are door seals, hoses, and drainage—check those first.
Can a leaking dishwasher be fixed without a professional?
Many leaks from hoses, clamps, and filters can be fixed by a homeowner with basic tools. Structural damage to the tub, or pump failures, typically requires a professional.
DIY fixes are possible for hoses and seals; more complex issues usually need a pro.
Why is there water under my dishwasher after a cycle?
Water under the unit often indicates a leaking inlet or drain hose, or a clogged drain causing backflow. Inspect hoses and the drain path first.
Water underneath usually means a hose issue or a clogged drain.
How do I reset the dishwasher to stop leaks?
Resetting can clear minor faults that trigger leaks, but won’t fix physical damage. Unplug for a minute or power cycle if your model supports it, then run a short test cycle.
Try a quick reset and test cycle if you suspect a transient fault.
When should I replace the dishwasher instead of repairing?
If leaks persist after multiple fixes, or the tub shows cracks or corrosion, replacement is usually the safest option. Compare repair costs to a new unit.
If leaks keep coming back after fixes, consider replacing the machine.
Watch Video
What to Remember
- Inspect seals and hoses first, as most leaks originate there
- Shut off power and water before any inspection
- Test after each fix to confirm leak resolution
- Call a professional for tub cracks or complex pump failures