How to Hook Up a Dishwasher: A Complete Setup Guide
Learn how to hook up a dishwasher safely with clear steps, required tools, and safety tips. This comprehensive guide covers water, drain, and electrical connections for homeowners and renters in 2026.

You will learn how to hook up a dishwasher to water, drainage, and electricity safely, with a clear checklist for install readiness. This quick guide covers identifying supply lines, securing the shutoff valves, routing the drain, and making basic electrical connections. By following these steps, homeowners and renters can complete a compliant hookup while avoiding leaks and improper wiring.
Safety and codes you should know
Installing a dishwasher involves water, power, and waste lines, so approaching the task with safety as the top priority is essential. According to Dishwasher Tips, safely hooking up a dishwasher begins with verifying local codes, securing shutoff valves, and selecting the right adapters. In 2026, many municipalities require a grounded outlet or dedicated circuit and proper venting for drainage. Start by locating the nearest shutoff valves and ensuring the electrical circuit is de-energized before you touch any wiring. Always consult your model’s manual for any model-specific requirements and clearances to avoid costly delays or leaks. Understanding these basics helps ensure a leak-free, compliant hookup from the first test.
- Safety first: shut off water at the supply valve and the circuit breaker before touching any plumbing or electrical components.
- Verify local codes and any homeowner association rules that may affect installation.
- Inspect hoses, gaskets, and fittings for wear; replace as needed to prevent leaks.
Planning the hookup: water, drain, and power layouts
Successful hookups start with a clear plan. Map where the water supply will connect, where the drain hose will exit, and where the power source sits. Measure distances to determine if an extended supply line or a new electrical outlet will be necessary. If your kitchen has a garbage disposal, confirm whether your dishwasher will connect directly to the disposal or through an air gap. Ensure there is space behind the appliance for service, and consider door clearance, side clearance, and cabinet alignment. A well-planned layout minimizes bend radius on hoses and reduces stress on fittings, lowering the risk of leaks over time. Involve a helper to hold hoses in place while you secure fittings.
Preparing your space and valves
Before connecting anything, prepare the workspace: clear the floor, remove adjacent drawers or shelves that could hinder access, and lay a towel or small bucket to catch incidental drips. Inspect the existing shutoff valves (water inlet and hot water) for corrosion or stiffness; replace if they’re stiff or leaking. Gather the necessary adapters and clamps that match your dishwasher’s inlet and drain diameters. If you’re dealing with copper tubing, have a pipe cutter and deburring tool ready. For electrical work, ensure you have a grounded outlet or a dedicated circuit, and verify the neutral and ground connections are correct to meet safety standards.
Step-by-step overview of the hookup
This middle section outlines the essential considerations for the hookup to avoid common pitfalls. Always start by turning off power and water, then connect the water supply using a new flexible hose with Teflon tape on threaded connections. Attach the drain hose to the waste line or air gap, ensuring the hose height allows gravity drainage without backflow. Finally, reconnect power with a properly rated outlet or dedicated circuit, confirming the circuit is protected by a suitable breaker. Plan for a test run with towels ready to capture any leaks.
Common installation scenarios and troubleshooting
Dishwashers vary by model, so expect small differences in hose sizes and mounting options. If you encounter slow draining or frequent leaks, recheck hose clamps and gaskets. A loose hose or a degraded gasket is a frequent source of leaks. If you don’t have an air gap, you may need to install one to prevent backflow. Grounding is critical for electrical safety; never bypass a ground connection. If you feel unsure about electrical steps, consult a licensed contractor or electrician. With careful inspection and testing, most hookups become leak-free after a complete cycle.
Tools & Materials
- Dishwasher(Ensure model is compatible with your kitchen hookup and includes drain hose and inlet fittings.)
- Grooved adjustable wrench(For hose clamps and fittings at water inlet and drain connections.)
- Phillips and flathead screwdrivers(Used to secure panels and fasten mounting brackets.)
- Teflon tape (PTFE)(Applied to threaded water connections to prevent leaks.)
- Drain hose kit or compatible hose(Check model requirements; use a hose with proper inner diameter (commonly 5/8 inch).)
- Adjustable pliers(Helpful for stubborn fittings and clamps.)
- Bucket and towels(Catch drips during disconnection and testing.)
- Electrical tester or multimeter(Verify power is off and test outlets before wiring.)
- Wire nuts and electrical tape(For safe splices if required by model or locale.)
Steps
Estimated time: 60-120 minutes
- 1
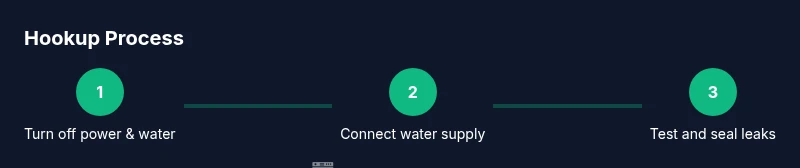
Turn off power and water
Locate and switch off the circuit breaker for the dishwasher area and close the water supply valve. Confirm there is no electricity reaching the circuit using a tester. This prevents shocks and water leaks during hookup.
Tip: Double-check the correct breaker with the dishwasher's dedicated circuit label. - 2
Check location and clearance
Measure the space behind the dishwasher to ensure there is room for service, hoses, and door clearance. If the unit sits too tightly against cabinets, rearrange or shift the appliance slightly to allow full access to fittings.
Tip: Leave at least an inch of clearance at both sides for ventilation and cable slack. - 3
Connect the water supply
Attach a new flexible water supply hose to the hot water valve using Teflon tape on threads. Tighten firmly but avoid over-tightening. Leave enough slack in the hose to prevent kinks during operation.
Tip: Do not reuse old supply hoses if they show signs of wear or damage. - 4
Attach the drain hose and air gap
Secure the drain hose to the dishwasher outlet and connect to either the waste line or an air gap. Ensure the hose length is sufficient to avoid backflow and route it to avoid sharp bends.
Tip: If your setup requires an air gap, install it per local code and secure with mounting hardware. - 5
Connect electrical power
If the dishwasher uses a cord-and-plug, plug into a properly grounded outlet; otherwise, connect to a dedicated circuit following local electrical codes. Ensure the ground is intact and copper conductors are clean.
Tip: Use a dedicated circuit where possible to prevent nuisance tripping. - 6
Test the hookup and leak check
Turn on water and power, run a short empty cycle, and inspect all connections for leaks. Check the door seal and hose clamps, tightening as needed. Keep towels handy for any initial drips.
Tip: If you see moisture, power down and re-tighten connections before repeating tests.
People Also Ask
What tools do I need to hook up a dishwasher?
A basic toolkit and plumbing supplies are required, including wrenches, screwdrivers, Teflon tape, hose clamps, and a drain hose. Always consult your model's manual for specifics.
You'll need a basic toolkit, plumbing supplies, and your dishwasher manual for model-specific requirements.
Can I hook up a dishwasher to a garbage disposal?
Many dishwashers connect to a disposal or to a dedicated drain with an air gap. If your setup lacks a disposer vent, use an air gap and follow local codes.
Dishwashers can connect to disposals or dedicated drains with an air gap; follow local codes.
Is a GFCI outlet required for dishwasher installation?
In many areas, dishwashers require a grounded outlet and may need a dedicated circuit. Check local electrical codes and ensure proper grounding.
Check your local electrical codes; grounding is essential for safety.
What if water leaks after hookup?
Turn off water and power, inspect hose clamps and gaskets, and re-tighten connections. Run a test cycle again to confirm.
If you see leaks, shut off power and water, re-tighten fittings, and retest.
How long does installation typically take?
Most installations take about 60-120 minutes, depending on plumbing and electrical readiness and any required adjustments.
Usually around an hour to two hours, depending on setup.
Watch Video
What to Remember
- Plan ahead with shutoffs and space for the unit
- Secure water, drain, and power connections correctly
- Test the installation and check for leaks
- Follow local codes and safety guidelines
- Call a pro if you’re unsure about electrical work