How to Put Your Dishwasher on Cleaning Cycle
Learn how to put your dishwasher on a cleaning cycle with a clear, step-by-step approach. This guide covers prep, cleaners, execution, and post-cycle care to remove buildup and keep dishes clean.

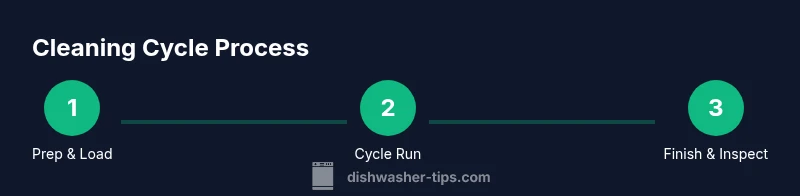
To run a cleaning cycle, first verify the dishwasher is empty and doors latch securely. Remove debris from the filter, run a cleaning product or white vinegar option if your model supports it, and select the Cleaning or Self-C Clean cycle. Start the cycle and let it run untouched. This helps dissolve buildup and freshen seals.
How the Cleaning Cycle Works
A cleaning cycle is designed to tackle residue, mineral buildup, and odors that a normal wash cycle may leave behind. Unlike a standard load with dishes, the cleaning cycle runs the interior with hotter water, longer agitation, and sometimes a dedicated cleaning agent. The goal is to dissolve stuck-on grease, flush out trapped debris, and refresh rubber seals and spray arms. According to Dishwasher Tips, establishing a regular cleaning routine is a smart maintenance habit, especially in homes with hard water or heavy usage. You’ll often notice improved drying performance and fewer lingering smells after a proper cleaning cycle. If your dishwasher has a dedicated ‘Self-Clean’ or ‘Maintenance’ option, that mode is specifically tuned for this purpose and should be considered the default approach for routine upkeep. Some models use a built-in cleaning function that relies on hot water alone, while others depend on a tablet or powder cleaner placed in the detergent compartment. Always consult your user manual to confirm the recommended method for your model.
Preparation and Safety Essentials
Preparation is the key to an effective cleaning cycle. Start with an empty dishwasher—no dishes, utensils, or debris that could clog the pump or spray arms. Remove large particles and clean the filter, as a clogged filter impedes water flow and reduces cleaning efficiency. Inspect the door gasket for cracks or tears, and ensure the spray arms can rotate freely. If you share your home with hard water, consider using a rinse aid or a cleaner formulated for hard-water deposits to prevent white film after the cycle. The Dishwasher Tips team emphasizes that safety and proper prep prevent damage and ensure consistent results. If you have pets or children nearby, consider running the cycle when the area is clear to avoid accidental exposure to hot components.
Choosing the Right Cleaner and Optional Alternatives
There are several cleaner options, and each has its own caveats. Dishwasher-safe tablets or powders formulated for cleaning cycles are the most straightforward choice. If you don’t have a dedicated cleaner, some models tolerate a small amount of white vinegar, though frequent use can affect rubber seals on certain gaskets. Baking soda can help with odors but is less effective at heavy buildup and may leave a temporary residue. Always check your dishwasher’s manual before combining cleaners or using alternatives. A good rule of thumb is to use products specifically labeled for dishwasher cleaning and to avoid mixing cleaners with bleach unless explicitly advised by the manufacturer. The right cleaner, used as directed, can significantly improve interior cleanliness and odor control.
Step-by-Step: Initiating and Running the Cleaning Cycle
Running the cleaning cycle correctly is crucial for success. Place the appropriate cleaner in the designated compartment or use a cleaning-only cycle if your model provides one. Do not place dishes in the unit during this cycle, unless your manual explicitly allows it; most models require an empty tub for the cleaning phase to maximize effectiveness. If your model supports it, select a Cleaning or Maintenance mode with a hot-water setting. Start the cycle and let it run its full course without interruption. If your unit has a pre-wash or extra-rinse option, enable it only if you notice persistent residue after initial runs. The goal is thorough interior cleaning while protecting seals and components from heat and chemical exposure.
Post-Cycle Care: Rinsing, Drying, and Inspection
After the cycle finishes, wait a few minutes for the interior to cool before opening the door. Wipe down the gasket, door margins, and the interior walls to remove any remaining moisture or cleaner residue. Rinse and wipe the filter and spray arms again if you notice buildup persists. Leave the door slightly ajar for air circulation to prevent mold growth. If you observed odor or residue, consider a second, shorter cleaning cycle on a hot water setting with a milder cleaner. Regularly cleaning the seals and filter reduces the chance of leaks and improves overall performance.
Troubleshooting Common Issues During Cleaning Cycle
If the cycle doesn’t start, check that the door latch is fully engaged, the control panel is unlocked, and there is power at the outlet. If the cycle runs but finishes early or leaves residue, the filter or spray arms may be clogged, or the cleaner may not have dissolved properly. In hard-water areas, mineral buildup can affect flow and temperature; consider a longer cycle or a stronger cleaner option designed for hard water. If odors persist after multiple cleanings, inspect the door gasket for cracks and check the drain for standing water after the cycle. If problems persist, consult the model’s support page or contact a technician.
Safety, Maintenance, and Manufacturer Tips
Always follow the manufacturer’s guidelines for cleaners and cycle selection. Avoid adding objects into the detergent cup beyond the manufacturer’s recommendation. Use caution with hot cycles, and never attempt repairs beyond basic cleaning and part maintenance described in the manual. Regular maintenance, including cleaning the filter and spray arms, can extend the life of your dishwasher and prevent leaks. Using approved products and adhering to safety warnings protects the appliance and household members.
Authority Sources and Further Reading
For model-specific instructions, always consult your dishwasher’s manual and the manufacturer’s support site. You can also review independent expert guidance from university extension programs and government energy sites for best practices in appliance maintenance and energy-efficient operation. See the recommended sources for additional context and cross-model guidance.
Tools & Materials
- Dishwasher-safe cleaner tablet or powder(Follow label directions; choose products labeled for cleaning cycles and compatible with your model.)
- White vinegar (optional)(Only use if your manual approves it; avoid mixing with bleach or specialized cleaners.)
- Soft cloth or sponge(For wiping seals, door margins, and interior walls after the cycle.)
- Old toothbrush(Helpful for scrubbing tight corners and around the spray arms.)
- Gloves(Protect hands from hot water and cleaners during prep and post-cleaning wipe-down.)
Steps
Estimated time: 40-60 minutes
- 1
Unload and inspect interior
Remove all items and racks as needed. Quickly inspect the tub for debris, stuck particles, and any signs of wear on the door gasket. If you notice tears or deformities, note them for later inspection. This ensures the cleaning cycle starts with a clear interior.
Tip: Take photos of any gasket wear before attempting a self-service fix, so you can reference them later. - 2
Clean the filter and spray arms
Remove and rinse the filter under warm water. Check spray arms for clogs and clear any mineral or food buildup with a small brush or pin. A clean water path improves cleaning efficiency during the cycle.
Tip: Use a soft brush to avoid scratching delicate plastic components. - 3
Add cleaning agent
Place the recommended cleaner in the detergent cup or run a cleaning-only cycle with the product specified by your model. Do not mix cleaners unless the manual allows it. This step kickstarts the chemical process that dissolves residue.
Tip: Avoid overloading the cleaner; follow the label’s dosage recommendations. - 4
Select the cleaning cycle
Choose the Cleaning or Self-Clean cycle, or the hot-water option if your model provides it. Ensure there is no load inside and set any additional rinses if your model supports them. This optimizes heat exposure and cleaning duration.
Tip: If your unit has a hard-water setting, enable it to improve mineral removal. - 5
Run the cycle and monitor
Start the cycle and let it run to completion. Do not pause or open the door mid-cycle to avoid releasing hot steam and interrupting cleaning action. A full run ensures thorough buildup removal.
Tip: If you hear unusual noises, cancel the cycle and recheck the filter and spray arms before restarting. - 6
Post-cycle rinse and wipe-down
After completion, wait a few minutes, then open the door and wipe down interior surfaces. Rinse the filter again and inspect hoses and seals for signs of wear. Leave the door ajar to air-dry and prevent mold.
Tip: Dry seals thoroughly to prevent water pooling and odor.
People Also Ask
Can I run a cleaning cycle with dishes inside?
No, cleaning cycles are designed for an empty tub to maximize interior cleaning and prevent contamination of residues on dishes.
No—these cycles should run empty unless your manual says otherwise.
What cleaners are safe for a dishwasher cleaning cycle?
Use dishwasher-safe cleaners or products approved by your manufacturer. In some models, vinegar is acceptable in small amounts; always verify your model’s guidance.
Use products labeled for dishwasher cleaning and follow your model's instructions.
How often should I run a cleaning cycle?
Most households benefit from a cleaning cycle every few months or when you notice buildup or odor. Always tailor to your water hardness and usage.
Every few months or when buildup is evident.
Why is there a lingering odor after cleaning cycle?
Persistent odor can indicate mold or residue in the gasket or filter. Clean seals, wipe the interior, and consider a second short cleaning cycle.
Odors usually come from mold or residue—re-clean seals and run a short cycle if needed.
My dishwasher won’t start the cleaning cycle; what now?
Check that the door latch is fully engaged, the control panel is responsive, and there’s power to the unit. If needed, reset the control or consult the manual for troubleshooting steps.
Check door latch, power, and reset if necessary.
Should I run a second rinse after cleaning cycle?
Only if you notice residue or unusual film after the cycle. Otherwise, a single thorough cleaning is typically sufficient.
Only if there’s residue left after the first cycle.
Watch Video
What to Remember
- Empty the tub before starting.
- Use a manufacturer-approved cleaner and follow directions.
- Clean filters and spray arms regularly.
- Inspect seals and dry interior after cycle.