Kitchenaid Dishwasher Diagnostic Mode: Complete Troubleshooting Guide
A practical guide to entering, exiting, and interpreting KitchenAid dishwasher diagnostic mode. This step-by-step approach helps homeowners diagnose faults, interpret codes, and determine when to reset or call a pro.

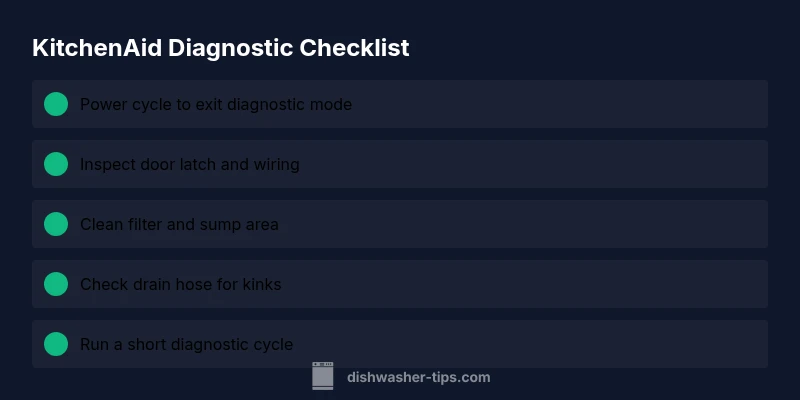
Exit diagnostic mode quickly by holding Cancel/Drain for 3–5 seconds or cycling power (unplug for 60 seconds, then plug back in and press Start). If codes persist, note them and consult the manual or Dishwasher Tips guide to interpret the fault family and plan the repair.
Why KitchenAid Diagnostic Mode Matters
In a bustling kitchen, unresolved faults can stall a cycle, waste water, and leave dishes half-clean. For homeowners, understanding the kitchenaid dishwasher diagnostic mode is essential to avoid guesswork and prevent damage. This built-in self-test state surfaces fault codes, sensor readings, and system status, helping you distinguish transient glitches from persistent failures. According to Dishwasher Tips, recognizing this mode early saves time and money by guiding you to the correct fault family instead of chasing symptoms. The approach below uses a clear, repeatable sequence so you can decide whether a reset, a part replacement, or a service call is required. When you treat diagnostic mode as a tool—not a scare—you protect the appliance and your sanity.
Understanding What Diagnostic Mode Reveals
Diagnostic mode surfaces information that is more informative than a blinking light or a single error message. You’ll typically see error codes that point to a fault family (drain, sensor, inlet, or door), a log of cycle events, and sometimes LED patterns or audible cues. The goal is to place faults into a subsystem, so you aren’t chasing random symptoms. Dishwasher Tips emphasizes documenting the exact code(s), the cycle stage, and recent load conditions. With that context, you can validate whether a reset might clear a transient fault or whether a component replacement is warranted.
How to Enter Diagnostic Mode on KitchenAid Dishwashers
Model differences matter, so consult your manual for the precise sequence. A common method involves pausing a cycle, closing the door, and using a short button combination to trigger the self-test. You may see diagnostic LEDs flash, hear beeps, or see a code displayed on a screen. If you can’t access the codes, a power cycle or a full reset often helps re-enter the normal operating state. Always write down any codes you observe and the cycle stage; this data helps you or a technician reproduce the problem later and reduces unnecessary parts testing.
Interpreting Common Diagnostic Codes
Codes fall into families: sensor faults (temperature, water level), drain/pump faults (blocked hose or impeller issues), and door/latch faults (misalignment or faulty switches). The diagnostic goal is to identify the faulty subsystem rather than swapping random parts. If a sensor fault appears, inspect wiring and connectors first, then reseat and retest. For drain issues, check the filter, sump, spray arms, and drain hose for obstructions. Always log the code and context to speed up future diagnosis or technician visits.
Step-by-Step Fixes for Frequent Issues
Step 1: Power cycle and reset. Turn off the machine, unplug for 60 seconds, then plug back in and run a test cycle. Step 2: Inspect the door latch. A misaligned or sticky latch can trigger faults—adjust or replace as needed. Step 3: Check the filter and sump area. Remove debris, rinse, and reassemble. Step 4: Clean spray arms and verify water flow isn’t blocked. Step 5: Verify drain hose and sink connection are clear and not kinked. Step 6: If sensor wiring looks damaged, reseat connectors and test again. Step 7: Run a short diagnostic cycle to confirm results. Step 8: If issues persist, contact a qualified technician. Pro tip: always power down before handling components.
Safety Precautions and When to Call a Pro
Electricity and water demand caution. Always unplug the unit before opening access panels. If you notice burnt smells, active leaks, or scorch marks, stop and contact a licensed technician. Do not bypass safety switches or use damaged wires. If the diagnostic codes point to a likely control-board fault or the unit is under warranty, consult the manufacturer or a certified repair service. Diagnosing faults often reveals the need for a replacement part rather than a simple reset, so prioritize safety and accuracy.
Maintenance to Prevent Diagnostic Mode Triggers
Regular cleaning of filters, seals, and spray arms reduces recurring faults. Keep the interior dry after cycles to prevent moisture-related sensor issues and inspect inlet valves for wear. Use the recommended detergent and avoid overloading, which can stress pumps and trigger drain codes. In hard-water areas, periodic descaling may be necessary; verify whether your model supports water-softening settings. Consistent maintenance minimizes diagnostic sessions and extends lifespan.
How Diagnostic Mode Helps with Long-Term Reliability
Diagnosing issues early supports proactive maintenance planning and budgeting for parts before a total breakdown. The data gathered during diagnostic runs helps you select the right replacement parts rather than guessing. Maintaining a small log of codes and cycle contexts creates a resource you can share with a technician, which speeds repairs and improves first-pass success.
Exit Diagnostic Mode and Verify Normal Operation
After addressing the fault, exit diagnostic mode per your model’s instructions and run a full wash cycle to verify normal operation. Look for leaks, odd noises, or poor cleaning. If the diagnostic indicator reappears or new codes appear, repeat the diagnostic flow and adjust your repair plan. Returning to normal operation reduces confusion and helps you preserve performance.
Steps
Estimated time: 30-45 minutes
- 1
Power cycle the dishwasher
Unplug the unit, wait 60 seconds, then plug back in. Run a test cycle to see if the code clears or reappears. This resets transient faults.
Tip: Label the time and code observed for reference. - 2
Inspect the door latch
Open and inspect the door latch and strike for misalignment or wear. Clean any buildup and tighten connections; replacement may be required if the latch feels loose.
Tip: A loose latch is a common source of false fault codes. - 3
Clean the filter and sump area
Remove debris from the filter and sump, rinse thoroughly, and reinstall. A clogged filter can trigger drain-related fault codes.
Tip: Do this at least every 1–2 months in heavy-use kitchens. - 4
Check spray arms and water flow
Inspect spray arms for clogs and ensure water is spraying properly during a cycle. Remove obstructions and re-test.
Tip: Spin spray arms by hand to confirm free movement. - 5
Inspect drain hose and plumbing
Trace the drain hose to the sink, ensuring there are no kinks or blockages and that clamps are secure.
Tip: A kinked hose can simulate a drain fault. - 6
Re-seat controls/wiring
Power down, open the console if safe, and reseat any connectors connected to the control board. Look for damaged insulation or loose pins.
Tip: Handle wiring gently to avoid damage. - 7
Run diagnostic cycle again
Initiate a short diagnostic cycle per model instructions and observe for repeated codes.
Tip: If a code reappears, document it with cycle information. - 8
Decide on next steps
If codes persist after these steps, decide between professional service or replacement parts based on code families.
Tip: Prioritize safety and warranty terms when choosing service.
Diagnosis: Customer reports the dishwasher enters diagnostic mode or displays error codes during or after a cycle.
Possible Causes
- highPower issue or unstable outlet
- mediumDoor latch or user interface fault
- lowClogged drain, filter, or spray arms
Fixes
- easyPower cycle the unit by unplugging for 60 seconds and plugging back in
- easyInspect door latch connections and reseat any loose harnesses; replace if damaged
- easyClean filters, sump, and spray arms; remove all debris and test drain flow
- easyCheck drain hose for kinks or blockages and clear the line
- mediumIf codes persist, reseat control board connections and perform a calibration test
- hardReplace faulty control board or sensors as indicated by codes
People Also Ask
What does diagnostic mode mean on a KitchenAid dishwasher?
Diagnostic mode is a built-in self-test that surfaces fault codes and sensor data to help identify the faulty subsystem. It is not a guarantee of a fix, but it points you toward the likely cause. Use the codes in conjunction with cycle context to plan your repair.
Diagnostic mode shows fault codes and sensor data to help identify the issue. Use the codes with cycle context to plan your repair.
How do I exit diagnostic mode on a KitchenAid dishwasher?
To exit, perform a power cycle or follow the shutdown steps in your model’s manual. Typically this means powering off the unit, waiting a moment, and starting a normal wash cycle. If the mode persists, contact support.
Exit by powering off, waiting, then starting a normal cycle. If it keeps showing, contact support.
Can I fix all diagnostic-mode issues myself?
Many issues can be addressed with basic maintenance and safe resets, but persistent codes often require part replacement or professional service. Always weigh safety, warranty, and skill level before attempting complex repairs.
Some fixes are DIY, but persistent codes may need a pro. Consider safety and warranty before you proceed.
What should I do if codes indicate a drain problem?
First, inspect and clean the filter and sump, then check the drain hose for kinks or clogs. Rerun a test cycle to verify flow. If the problem remains, there may be a more serious drain pump issue.
Clean the filter, check the drain hose, and test again. If it persists, a pump issue might be involved.
Is it safe to operate the dishwasher after diagnosing?
Yes, once you’ve cleared codes and verified normal operation with a test cycle, you can run a full cycle. Monitor for leaks, unusual noises, or recurring codes, and stop if any concerns arise.
Yes, but watch for leaks or new codes after testing.
How often should I run a diagnostic check?
Run diagnostics when you notice persistent faults or unusual behavior, and after completing major maintenance that could affect sensors or drainage.
Use diagnostics when faults persist or after major maintenance.
Watch Video
What to Remember
- Exit diagnostic mode safely before testing normal operation
- Document codes and correlate with cycle stage
- Follow a logical power-cycle-first approach
- Inspect and clean filters, hoses, and spray arms regularly
- Know when to call a pro and when to DIY