LC Code on Samsung Dishwasher: Urgent Troubleshooting Guide
Urgent guide to LC code on Samsung dishwashers: meaning, quick fixes, diagnostic flow, and when to call a pro. Learn how to identify leaks, reset the system, and prevent future LC errors in 2026.

According to Dishwasher Tips, LC on Samsung dishwashers usually signals a leak detection or water-sensor issue. Start with safety: unplug the unit and inspect the door seal, drain pan, and hoses for visible leaks. If the code stays, check the float switch and sensor area, then consult the model manual for exact meaning. If unresolved, contact Samsung support or a pro.
LC Code Meaning on Samsung Dishwashers
The LC error code appears on Samsung dishwashers when the built-in safety or leak-detection system detects a potential water issue. The exact meaning can vary by model and firmware, so always reference your user manual or Samsung support site for model-specific definitions. In many cases, LC indicates a leak or water-sensing fault that triggers a halt to protect floors and cabinetry. As of 2026, the recommended response is to stop the cycle, inspect for obvious leaks, and systematically check seals and connections before attempting a reset. This isn’t a universal language across all Samsung models, so cross-check with your specific model number and firmware notes. Having the correct model information helps you interpret error codes accurately and prevents unnecessary part replacements. The Dishwasher Tips team emphasizes using model-specific guidance to avoid misdiagnosis and wasted repairs. A quick model lookup can often reveal whether LC is tied to the door gasket, a loose clamp, or a trapped leak in the tray.
Quick Diagnostic Flow Overview
When LC appears, you should move through a rapid, model-agnostic checklist to determine the likely cause and next steps. Start with the simplest, lowest-cost checks before moving to more involved diagnostics.
- Symptom: LC code displayed on screen during or after a cycle.
- Possible causes: (1) Visible leak around door seal or tub, (2) Faulty float switch or water level sensor, (3) Loose or cracked drain hoses, (4) Minor control-board glitch triggering a safety lock.
- Immediate actions: Unplug the unit, remove standing water if safe, and dry the area to observe for fresh leaks. Then perform a visual inspection of gaskets and accessible hoses. A quick reset after inspection can sometimes clear a false LC if no leak is present.
If the code reappears after basic checks, advance to targeted troubleshooting by component area (door seal, float sensor, drain system, and control electronics). Keeping notes of observations and model details helps when you contact support. The goal is to distinguish between a simple seal repair and a more involved sensor or board replacement. The best practice is to validate the model’s documented LC meaning before replacing parts, reducing the risk of unnecessary costs for non-defective components.
Step-by-Step Fix: Start with Quick Fixes
Quick fixes are designed to mitigate risk and often resolve LC without major disassembly. Begin with the least invasive, most reliable fixes.
- Step 1: Power down and unplug the dishwasher. Safety first: shut off the water supply to the machine if you notice active leaks.
- Step 2: Dry the area and inspect the door gasket and seals for tears, warping, or missing adhesive. A worn gasket is a common LC trigger.
- Step 3: Check the drain pan and vicinity for standing water or damp residue that points to a leak path. Remove any debris that could block water flow.
- Step 4: Inspect accessible hoses and clamps for looseness or cracks. Re-seat clamps and replace damaged hoses as needed.
- Step 5: Inspect the float switch and the water level sensor housing for obstruction or sticking. Move the float up and down to ensure smooth operation.
- Step 6: Power the unit back on and run a short cycle with a minimal load to observe any fresh leaks. Do not run a full cycle if you observed active leakage during inspection.
- Step 7: If the LC persists, reset the control via the service menu (per your model manual) and run another diagnostic cycle to confirm persistent leakage or sensor fault.
- Step 8: If you still see LC after all quick fixes, plan for component-level testing or replacement, starting with door seal, float sensor, and then the control board. The most expensive fixes are usually sensor modules or control boards, so verify warranty status before purchasing parts.
- Step 9: Document all findings, including observations and attempted steps, and contact Samsung support or a certified technician with your model number, firmware version, and a note of what was observed during testing.
In-Depth Troubleshooting for Common Causes
Despite model differences, several root causes recur when LC appears. A systematic approach helps you isolate the issue without unnecessary parts swapping.
- Door gasket or seal failure: Even a tiny nick can allow water to escape during wash cycles, triggering LC. Inspect for tears or shrinkage. Replace if necessary and re-seat the door correctly.
- Leaks from hoses or clamps: Inspect every visible hose connection from the tub to the valve. Tighten clamps and look for pinhole leaks in metal or flexible lines. If hoses show wear, replace with OEM equivalents.
- Drain system blockages or siphon issues: A clogged filter, blocked drain hose, or improper drain height can cause standing water that triggers a sensor. Clear obstructions and ensure the drain hose is configured correctly.
- Float switch or sensor fault: The float mechanism must rise with water level, and sensors must read correctly. If you detect resistance or erratic readings, test with a multimeter if you have experience, or replace the sensor module.
- Control board or firmware glitch: Occasionally, a software hiccup causes a false LC indication. Perform a firmware reset or update if available. If the problem repeats, it may require board replacement.
The costs of fixes depend on the exact component involved. Parts for gaskets or hoses are typically inexpensive, while sensor modules and control boards can be more costly. Budget ranges, not exact figures, generally span from low to mid hundreds depending on parts availability and whether professional labor is involved. The Dishwasher Tips analysis notes that model-specific parts pricing and labor rates will dramatically influence the final cost, so always request a written quote before approving repairs.
- Step-by-step testing templates can expedite diagnosis. Create a simple checklist of observed symptoms, dates of occurrences, and any temporary workarounds you tried. This information helps a technician pinpoint the precise repair path and reduces diagnostic time.
Safety, Costs, and When to Call a Pro
Safety must be your top priority when LC appears. Water and electricity can create serious hazards, so never bypass safety steps or ignore visible leaks. If you notice active leakage that wets the floor or audible hissing from electrical components, shut off power and water, then call a professional.
- Do-it-yourself fixes may save upfront costs but risk voiding warranties if components are damaged during disassembly. If your unit is under warranty, contact Samsung support as a first step.
- Typical repair cost ranges (for planning only): parts replacement can range from several tens to a few hundred dollars, while labor may vary from roughly $100 to $400 depending on complexity and local rates. These are general ranges and depend on model and region.
- When to call a pro: if the LC code reappears after quick fixes, if you lack experience with electrical components, or if the suspected issue involves the control board or sensors. A certified technician can diagnose and replace the correct parts safely and maintain warranty eligibility where applicable.
Prevention tips to minimize future LC events include regular door seal inspections, avoiding overloading the dishwasher which can stress seals, and running periodic clean cycles to prevent debris buildup in the sump and drain. Keeping a maintenance log helps you spot recurring issues before they escalate into costly repairs. If you’re in doubt about any repair, reach out to Samsung support or a licensed technician to avoid further damage.
Prevention and Maintenance After an LC Event
Once you have resolved an LC issue, implement a routine maintenance plan to reduce the likelihood of recurrence. Prevention is cheaper than repair, and it also protects your kitchen from water damage and mold growth. Here are practical steps:
- Schedule a quarterly visual inspection of door gaskets, seals, and clamps. Look for cracks, stiffness, or discoloration and replace as needed.
- Clean the filter and sump area regularly to prevent clogs that can trigger sensors. A clogged sump can confuse water level readings and trigger LC.
- Use manufacturer-recommended detergents and rinse aids to reduce suds and residue that might affect sensors.
- Confirm that the drain hose is not kinked and that the installation height conforms to the model’s requirements.
- If you’ve had multiple LC occurrences, consider a professional inspection of internal hoses and the wiring harness to identify potential wear points that are not visible from the outside.
Maintaining a proactive schedule and keeping spare gaskets and clamps on hand can minimize downtime. The Dishwasher Tips team reiterates that model-specific maintenance guidelines are essential, so refer to your manual for periodic service windows and approved parts.
- Quick tip: keep a small moisture indicator near the base of the unit to alert you at the first sign of seepage. This helps you catch leaks early and limit damage.
Real-World Scenarios and Pro Tips
Readers share a variety of LC experiences that illustrate common patterns and effective responses. For many homeowners, LC begins with a minor seal issue that escalates if ignored. In several cases, a simple gasket replacement resolved the problem without more invasive repairs. In others, the LC persisted due to a faulty float switch or a degraded drain hose. In those scenarios, replacing a sensor or a control board typically resolves the issue but requires professional service. Real-world logs emphasize the importance of documenting the exact model, firmware version, and the observed sequence of events leading to the LC occurrence. This information helps a technician pinpoint the most likely root cause and streamline the repair process.
- Practical tip: before calling a pro, perform a controlled test under dry conditions to confirm that the leak source is consistent. If the source changes with each cycle, the problem may be electrical or sensor-related rather than a physical leak.
- Realistically, most LC problems are solved by gasket or hose replacements and sensor checks. Complex electronics can be expensive, so consider warranty status and the cost-benefit of repair versus replacement.
- The community consensus: keep the model number handy, note firmware revisions, and request a written estimate before any parts replacement. This minimizes surprises and helps you compare options from Samsung support and independent technicians.
Quick Reference Checklist
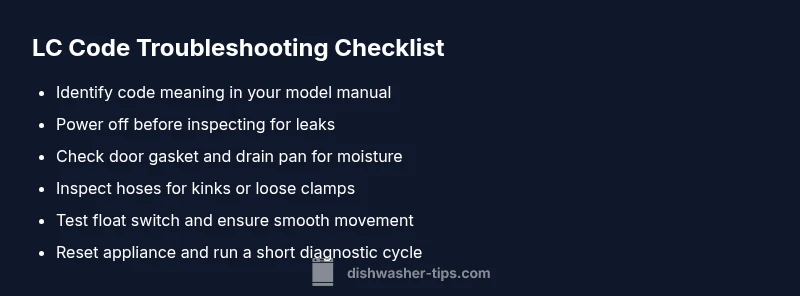
- Confirm LC meaning via your model manual or Samsung support site.
- Power down before any inspection, then check door seal and drain pan for moisture.
- Inspect hoses and clamps for wear, cracks, or looseness; secure or replace as needed.
- Test float switch and water level sensor movement; replace if binding or unresponsive.
- Run a short diagnostic cycle after any quick fix; escalate to pro if LC returns.
NOTE: This block provides a practical, readable reference for ongoing LC troubleshooting and maintenance. Always tailor actions to your specific Samsung model and firmware version. The Dishwasher Tips approach emphasizes model-specific guidance and safety-first practices.
Steps
Estimated time: 45-75 minutes
- 1
Power down and safety check
Unplug the dishwasher and shut off the water supply to prevent further leakage during inspection. Clear the surrounding area of any standing water to reduce the risk of slips or damage. Check that the circuit is de-energized before touching any components.
Tip: Use a flashlight to inspect seams and corners you can’t see from eye level. - 2
Inspect the door gasket
Open the door and examine the gasket for cracks, tears, or hardening edges. A damaged seal is a common LC trigger. If you find damage, replace the gasket following the model's service manual instructions.
Tip: Take a photo of the gasket placement before disassembly for easier reassembly. - 3
Check drain pan and visible areas
Look for moisture, pooling, or corrosion in the drain pan and around the tub. Even small puddles suggest a hidden leak. Clean and dry the area, then retest for leaks after a short run.
Tip: Place towels to capture any residual moisture during testing. - 4
Inspect hoses and clamps
Follow the drain and supply hoses from the tub to the valve. Look for cracks, pinholes, or loose clamps. Replace worn hoses and tighten clamps to factory torque specs.
Tip: Run a gentle hand-over check to feel for soft spots on hoses. - 5
Test the float switch and sensor housing
Manually move the float up and down; it should move freely without sticking. Inspect the sensor housing for debris or corrosion. If the float doesn’t return to its base position, the sensor may need replacement.
Tip: Disconnect power before handling sensors and use anti-static precautions. - 6
Reset and run a diagnostic cycle
After cleaning and checks, reset the appliance per the owner’s manual. Run a short cycle to observe whether LC reappears. Do not launch a full cycle if leaks are detected during the test.
Tip: Keep a notes log of cycle results for future troubleshooting. - 7
Evaluate the need for sensor or board replacement
If LC persists after quick fixes, the problem likely lies with the sensor or control board. Replacement may be needed. Obtain a precise model-compatible part and verify warranty coverage before purchase.
Tip: Ask for a written estimate before ordering parts. - 8
Plan professional assessment if needed
If you’re unsure about handling electronics or the code returns, schedule a service appointment. Technicians can diagnose with specialized tools and ensure safe repair.
Tip: Keep your model number and firmware version handy for the technician. - 9
Document and close the loop
Record all findings, parts replaced, and the results of tests. This documentation helps you avoid repeated troubleshooting and supports warranty or service claims.
Tip: Store digital copies of receipts and notes for future reference.
Diagnosis: LC code displayed on Samsung dishwasher indicating a leak or related issue
Possible Causes
- highLeak detected by the sensor
- mediumFaulty float switch or water level sensor
- lowDoor gasket leak or poor seal
Fixes
- easyInspect for visible leaks around door seal and drain pan
- easyCheck drain hose for kinks and secure clamps
- easyTighten or replace door gasket if damaged
- hardReplace faulty sensor or control board (professional)
People Also Ask
What does LC mean on a Samsung dishwasher?
LC is a fault code that typically indicates a leak detected by the sensor or a water level issue. Always confirm the code meaning with your model’s manual, as variants exist across firmware revisions. Start with a visual inspection of seals and hoses before deeper diagnosis.
LC usually means a leak or water level issue. Check seals and hoses first, then consult your model’s manual for specifics.
Is LC dangerous to ignore?
Yes. Ignoring LC can lead to water damage, mold growth, and electrical hazards. Don’t run the dishwasher if there is a visible leak or if you can’t identify the leak source. Seek professional help if you’re unsure.
Ignoring LC can cause damage and hazards. Stop using the machine and call a pro if unsure.
What should I check first when LC appears?
Begin with a safe power-down, then inspect the door gasket, drain pan, and accessible hoses for leaks. A quick gasket replacement or hose tightening often resolves the issue. If the leak source isn’t obvious, proceed to sensor and board checks.
Power down, check door gasket and hoses first, then look at sensors if needed.
Can LC be cleared by resetting the machine?
Resetting can clear a false LC in some models, but not a real leak. If the code returns after reset, you should perform a physical inspection or contact support to avoid hidden damage.
Reset may clear a false LC, but don’t ignore a real leak.
When should I call a professional?
Call a professional if LC persists after quick fixes or if you’re unsure about handling sensors and the control board. A pro can safely diagnose and replace components with proper tools and warranty considerations.
Call a pro if LC persists after quick fixes or you’re unsure about electronics.
Are there cost ranges I should expect for LC repairs?
Repair costs vary by part and labor. Expect lower costs for gasket or hose fixes and higher estimates for sensor or control-board replacements. Use ranges as planning tools and request written estimates before approving work.
Costs vary; expect more for sensors or boards, less for gaskets or hoses.
Watch Video
What to Remember
- Power off and inspect for leaks immediately.
- LC often signals a leak or sensor fault.
- Check door seals and hoses before replacing parts.
- Escalate to a pro for sensor/board issues.
- Document findings to guide repairs and prevention.