Water at the Bottom of the Dishwasher: Troubleshooting Guide
Diagnose and fix water pooling at the bottom of your dishwasher with practical checks, a clear step-by-step flow, and prevention tips from Dishwasher Tips.

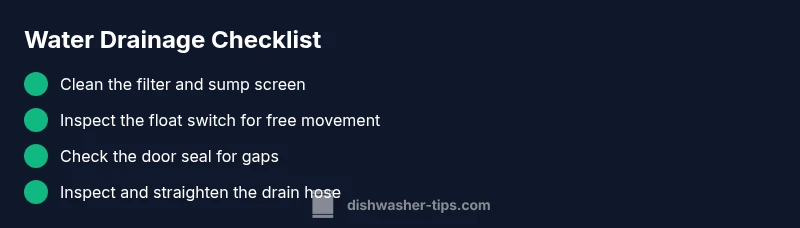
Water at the bottom of the dishwasher is a common symptom of drainage or seal problems. Start with simple checks: clean the filter and float switch, inspect the door seal, and make sure the drain hose isn’t kinked. Run a hot-water cycle to flush the sump. If water remains, move to the diagnostic flow or contact a pro.
Why water collects at the bottom of a dishwasher\n\nWater pooling at the bottom is a common symptom that something in the drainage path isn’t functioning as it should. According to Dishwasher Tips, the most frequent causes are a blocked filter or sump, a faulty float switch, a worn door seal, or a kinked drain hose. The sump is the lowest chamber that gathers wash water before it’s pumped out; if debris blocks the filter, water can’t drain cleanly and collects instead. Begin with simple checks: unplug the machine, wipe out standing water, and inspect for obvious blockages in the filter area. Examine the filter and sump screen for trapped food debris, then rinse them under running water. Inspect the door seal around the perimeter for cracks or gaps; a compromised seal can let water escape and pool in the base. Follow the drain hose from the base to the wall connection to ensure it isn’t kinked, crushed, or blocked. If your model has an air gap, confirm it’s clear and correctly installed. Avoid using excessive detergent, which can create suds that hinder drainage and trap water in the sump.
Quick checks you can perform right now\n\nBefore you dive into deeper repairs, try these quick, non-destructive checks. First, power off and unplug the dishwasher to avoid shocks. Then scoop out any standing water with towels. Remove and clean the filter, then reinsert it securely. Run a short, hot-water wash to flush the sump and see if water drains away. Check the door gasket while the machine is open: run your finger around the seal to feel for cracks or stiffness. Inspect the drain hose for kinks or clogs; if the hose is easily accessible, detach and gently flex it to clear any blockages. If you have an air gap, ensure it’s free of debris and reassemble correctly. Finally, verify you aren’t overloading the dishwasher or using a detergent with too much foam; overly sudsy cycles can trap water in the base.
Common culprits and how to verify them\n\nTo narrow the cause, test each component in turn. The filter and sump screen: a clogged screen is by far one of the most frequent offenders; after cleaning, run a test cycle to observe drainage. Float switch: a stuck float can keep the sump from emptying; gently press the float arm up and down to feel resistance; if it doesn’t move freely, replacing the switch is often inexpensive. Door seal: a damaged gasket can leak water into the base; inspect for cracks or tearing and replace if needed. Drain hose: a crushed, kinked, or blocked hose prevents proper drainage; detach and inspect, then straighten or replace as necessary. Air gap: on homes with a sink-side air gap, a clog there will back up water into the dishwasher; disassemble and clean out any lint or debris. Dishwasher design varies; newer models include internal check valves that can fail, but the basic diagnosis remains the same: drainage flow is blocked somewhere along the path. Dishwasher Tips analysis shows that most drainage issues originate in the drainage path or seals and are often repairable without professional service.
Cleaning and restoring the drainage path\n\nIf a blockage is found, follow these steps to restore flow safely. Start with the filter and sump area: rinse under warm water until all debris is cleared. Reassemble and run a short cycle with no dishes to verify drainage. If you still see water, check the drain hose connection at the back of the unit and at the sink or drain; remove any clamps if needed and re-seat it snugly. For older models with an air gap, remove the cap and clean out any sediment. If you’re comfortable, remove the rear access panel to inspect the pump and check for a loose or leaky connection. Safety note: unplug the machine before touching electrical components, and avoid using metal tools on plastic parts to prevent damage.
When to call a professional help\n\nIf water continues to pool despite the steps above, it’s time to call a technician. Continuous leaks could indicate a worn door seal that needs replacement, a failing pump, or a cracked sump. A pro can perform leak testing, replace seals and hoses, and diagnose electrical faults safely. If you notice water around the base after they leave, or a burning smell, stop using the machine and contact emergency service. Keep receipts and model information handy for warranty or service eligibility.
Preventive habits to avoid future bottom-water problems\n\nAdopt a simple maintenance routine that reduces the chance of water pooling. Clean the filter weekly (or per use for heavy loads), and run a quick hot-water cycle monthly to flush the sump. Inspect door seals for cracks every few months and replace as soon as wear appears. Route the drain hose properly and check for kinks; if your home has an air gap, ensure it’s clean and correctly installed. Use the right amount of detergent to prevent excessive suds, and avoid adding debris like toothpicks or utensils into the dishwasher that can clog drains. Finally, store a small maintenance kit for quick in-home checks and schedule annual professional inspections if your appliance is older.
Steps
Estimated time: 20-60 minutes
- 1
Power off and remove water
Unplug the unit and wipe out any standing water. This prevents electric shock and gives you a clean work area. Gather towels and a shallow tray for any drips.
Tip: Have a bucket handy for any residual drainage. - 2
Inspect and clean the filter
Remove the filter and rinse it under warm running water. Use a soft brush to dislodge stubborn debris. Reinstall the filter securely before testing.
Tip: A clean filter dramatically improves drainage. - 3
Test the float switch
Manually press the float up and down to ensure it moves freely. If it sticks or feels jammed, the switch may need replacement.
Tip: A stuck float can keep the sump from emptying. - 4
Check the door seal
Inspect the gasket around the door for cracks or tears. Clean any residue and replace if you see gaps that let water escape.
Tip: A good seal prevents base leakage. - 5
Inspect drain hose and connections
Trace the hose from the base to the wall or sink. Look for kinks, compression, or loose clamps. Straighten and reseal as needed.
Tip: Ensure hose routing follows the manufacturer’s path. - 6
Run a test cycle
With nothing but water in the dishwasher, run a short cycle to confirm drainage. If water still pools, the issue may be deeper or electrical.
Tip: Document any leaks or noises during the test.
Diagnosis: Water pooling at the bottom after a cycle
Possible Causes
- highClogged filter or sump screen
- mediumFaulty float switch or defective sensor
- mediumDamaged door seal or float mechanism leak
- lowKinked or blocked drain hose
- lowClogged air gap (on older models)
Fixes
- easyClean filter and sump screen; remove debris
- easyInspect and test float switch; replace if stuck
- easyCheck door seal for gaps; replace if damaged
- easyUnkink and route drain hose; ensure proper connection
- easyInspect and clean air gap; reseat if present
- easyRun a focused drain cycle and monitor drainage
People Also Ask
Why is water at the bottom after a cycle?
Water at the bottom typically means drainage isn’t finishing. Common causes are a clogged filter, a stuck float switch, a faulty door seal, or a blocked drain hose. A systematic check can identify the culprit.
Water at the bottom usually means the dishwasher isn’t draining properly. Check the filter, float switch, seal, and drain hose one by one.
Can a clogged filter cause pooling water?
Yes. A clogged filter can prevent proper drainage and cause water to pool in the bottom. Clean the filter and run a test cycle to confirm drainage improves.
A clogged filter can block drainage and cause pooling. Clean it and test again.
What should I clean first when water pools?
Start with the filter and sump screen, then check the drain hose and door seal. Cleaning these components often resolves most drainage problems.
Begin with the filter and drain hose. If the water still pools, inspect the door seal.
Is it safe to run the dishwasher if there's water in the bottom?
If water remains after a cycle, stop using the dishwasher and troubleshoot. Running it with standing water can damage electronics and worsen leaks. Seek a solution before resuming.
No—stop and troubleshoot. Running with water pooled can cause damage.
When should I replace the door seal?
Replace the door seal if you see cracks, tears, or gaps after cleaning. A damaged seal is a common source of leaks and pooling.
Replace the door seal if it’s cracked or torn.
Watch Video
What to Remember
- Identify drainage path blockages first
- Test filter, float switch, and door seal in order
- Call a pro if leaks persist after basic checks
- Maintain regular cleaning to prevent future pooling