What to Do When Your Dishwasher Leaks: Urgent Troubleshooting
Facing a dishwasher leak? This urgent troubleshooting guide from Dishwasher Tips walks you through quick fixes, diagnostics, and prevention to stop leaks fast and protect your home.

At the first sign of a leak, identify the source and stop water flow. Most dishwasher leaks come from the door gasket, hoses, or tub seal. Start with the simplest checks: inspect the door seal and hose connections, then observe for pooling. If water continues, turn off power at the breaker and proceed with deeper diagnostics.
What to Do Dishwasher Leaking: Urgent Overview
When a dishwasher leaks, time is of the essence. Water damage can spread quickly across cabinets, flooring, and electronics, turning a small problem into a costly repair. For homeowners, the immediate question is clear: what to do dishwasher leaking? The fastest path to safety and stopping the damage is a two-step approach: secure power and water, then inspect the most common leak sources. In most homes, the culprit is a worn door gasket, a loose or cracked supply hose, or a degraded tub seal. Start with the simplest checks you can do in minutes, then move to more involved steps only if the leak persists. Remember: never ignore a pool of water near your dishwasher, and always prioritize safety by unplugging the unit before touching any internal components. By staying methodical, you can prevent water damage and curb the cost of a full appliance service.
Common Leaks: Door Gasket, Hoses, and Seals
Dishwashers are sealed, but several wear points can leak water during cycles. The most frequent sources are the door gasket (the rubber seal around the door), the drain hose and inlet hose clamps, and the tub seal at the back. Cracks or deformities in the door gasket cause water to escape at the door seam, especially if the door isn’t latching firmly. A loose hose clamp or a damaged hose can spray water onto the floor or underneath the unit. The tub seal, which sits where the tub meets the frame, can degrade after years of use, particularly in high-usage homes or in areas with hard water. Accessing these parts usually involves removing the lower panel or the base kick plate. Checking for cracks, stiffness, or discolored areas is a reliable first step. If you spot obvious damage, plan to replace the component; if not, you may need to perform a deeper test to track the exact leak path.
Immediate Actions to Take When You Notice a Leak
Time matters when water is actively leaking. Begin by ensuring safety: unplug the machine from the outlet and, if feasible, shut off the water supply to the dishwasher (the inlet valve behind the unit or under the sink). Place towels or a shallow tray to catch drips and prevent water damage to the floor. Do not run the dishwasher again until you identify the source. If water is pooling on the floor, note the location of the drip and observe whether it occurs during fill, wash, or drain cycles. A quick visual sweep around the door gasket, hoses, and the bottom of the tub can reveal the path of the leak. If you have a visible crack or a soft, swollen area on the door gasket, that’s a high-probability clue. Record the symptoms for reference when you search for parts or call a technician.
Diagnostic Flow: From Symptom to Source
A structured diagnostic flow helps you avoid guesswork and unnecessary repairs. Start with a symptom note: where is the water pooling — at the door, under the unit, or around the base? Then test likely causes:
- Door gasket: with the door open, run a quick spray at the door seam and observe if water escapes at the hinge area.
- Hoses and clamps: inspect the drain hose and supply hose connections for looseness, kinks, or cracks; tighten clamps and replace any damaged hoses.
- Tub seal and interior fittings: look beneath the tub for wet spots that indicate a seal failure, or signs of corroded metal around the back.
- Inlet valve and float switch: ensure the inlet valve is not dripping and the float is free from debris.
For each finding, compare to known symptoms and decide whether to replace parts or escalate to professional service.
Step-by-Step Fixes for the Most Likely Causes
Follow these steps in order to address the most common leak sources. If a step requires tools you don’t have or seems unsafe, stop and call a pro.
-
Inspect and replace the door gasket: Turn off power and water, remove the door panel, inspect the gasket for cracks, stiffness, or deformation, and replace with a compatible seal. Tip: test door closure by pressing a thin sheet of paper between gasket and frame.
-
Tighten or replace hoses and clamps: Check all hose connections at the back of the dishwasher; tighten clamps with a screwdriver. If hoses are brittle or cracked, replace them.
-
Check the drain hose path: Ensure the drain hose is not kinked or crushed; re-route if needed to avoid water backing into the tub.
-
Inspect the tub seal: If you notice wetness at the bottom edge of the tub, remove the inner panels to access the tub seal; reseal or replace as needed.
-
Verify the inlet valve and float: Clean the float and float switch, and inspect the inlet valve for drips; replace if sluggish or leaking.
-
Run a controlled test: Reconnect power and water, run a short cycle with a bucket under the unit to catch any residual drips, and observe for a fresh leak. If nothing appears, monitor for a few days.
Estimated total time: about 60-90 minutes, depending on your familiarity and accessibility.
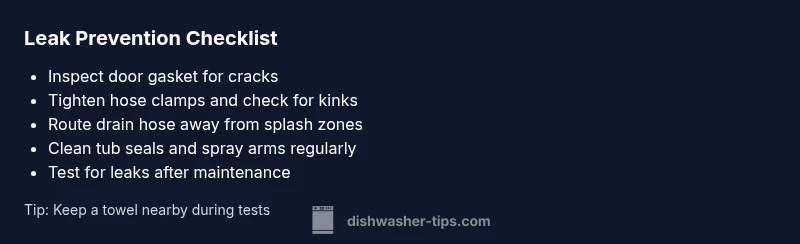
Prevention and Maintenance to Stop Future Leaks
Once you’ve fixed the root cause, shift to prevention. Regularly inspect door gaskets for warping or stiffening; clean seals with mild soap and water to maintain pliability. Check hose connections every 3-6 months and replace worn hoses promptly. Use correct detergent and avoid overloading; improper loading can cause spray arms to slam water toward the door, increasing seal wear. Hard water can accelerate mineral buildup on seals and nipples; consider a water softener or rinse aid if recommended for your area. Finally, keep the area around the dishwasher dry and ventilated to prevent mold and corrosion that can mask leaks. Maintaining a simple log of maintenance tasks helps you spot patterns before a leak becomes serious.
Steps
Estimated time: 60-90 minutes
- 1
Shut off power and water, access parts
Unplug the unit or switch off the circuit, then turn off the water supply. Remove the lower kick plate to access hoses and seals. This reduces risk and gives a clear view of leak paths.
Tip: Safety first: verify unit is de-energized with a non-contact tester. - 2
Inspect door gasket
Look for cracks, stiffness, or gaps. Clean the gasket and surrounding area, then perform a test by hand-squeezing the door to identify leaking seams.
Tip: Use a soft brush and mild soap; avoid harsh solvents. - 3
Tighten or replace hoses and clamps
Check all hose connections at the back and under the base. Tighten clamps with a screwdriver and replace any cracked hoses.
Tip: Do not overtighten plastic fittings; snug is enough. - 4
Check drain hose path
Ensure the drain hose is not kinked or crushed and is properly routed to prevent backflow into the tub.
Tip: Use zip ties to secure hoses away from hot surface areas. - 5
Inspect tub seal and back fittings
If you see wetness around the tub edge, you may need to reseal or replace the tub seal. Access may require removing interior panels.
Tip: Refer to the manufacturer’s seal kit for compatibility. - 6
Test inlet valve and float
Clean the float and check the valve for drips or debris. Replace if the valve leaks or sticks.
Tip: Take photos of parts before disassembly for reference. - 7
Run a control test
Reconnect power and water, run a short diagnostic cycle with a bucket to catch potential leaks, and observe for a sustained leak.
Tip: Only run a short cycle initially to minimize risk.
Diagnosis: Water leaking from dishwasher during or after a cycle
Possible Causes
- highDoor gasket wear or damage
- highLoose or damaged hoses and clamps
- mediumTub seal failure
- lowInlet valve or float switch issue
Fixes
- easyReplace door gasket if cracked or stiff
- easyTighten clamps or replace damaged hoses and drain hose
- mediumReplace tub seal or reseal area around tub
- mediumInspect inlet valve and float; clean debris or replace valve
People Also Ask
What are the most common causes of a dishwasher leaking?
The most frequent sources are worn door gaskets, loose or cracked hoses, and tub seal failures. Inspect these parts first, as they’re often the root of the problem. If you find obvious damage, plan to replace the part.
Common leaks usually come from the door gasket, hoses, or tub seal. Check these first and replace damaged parts.
Can a leaking dishwasher damage my floor?
Yes. Water on floors can seep into cabinets, baseboards, and flooring materials, potentially warping wood and promoting mold. Promptly addressing the leak limits damage and cleanup cost.
Yes, leaks can damage flooring—act fast to minimize water damage.
Should I replace the door gasket myself?
If you’re comfortable with basic appliance repair, replacing a door gasket is one of the easier fixes. Make sure you use a compatible seal and follow the manufacturer’s instructions.
Door gasket replacement can be a doable DIY task if you follow the instructions.
How long does a leak repair take?
Simple gasket or hose fixes can take under an hour. More complex repairs like tub seal replacement may require 1-2 hours and some extra parts.
Repairs can range from under an hour to a couple of hours, depending on the issue.
When should I call a professional?
Call a pro if the source isn’t obvious, the leak persists after basic fixes, or you’re unsure about safety during disassembly. A licensed technician can diagnose and replace internal seals safely.
If in doubt or safety is a concern, contact a professional.
Watch Video
What to Remember
- Shut off water and power at the first sign of a leak.
- Inspect door gasket, hoses, and tub seal as primary checks.
- Follow a structured diagnostic flow to locate root cause.
- Call a professional if you’re unsure or unsafe.