What to Do If Your Dishwasher Is Leaking: Quick Fix Guide
Learn what to do if your dishwasher is leaking with a clear, step-by-step troubleshooting guide. Safety first, quick checks, diagnostic flow, and practical fixes from Dishwasher Tips to stop leaks fast.

If your dishwasher is leaking, start with safety: unplug the unit and shut off the water supply. Check the door gasket for damage, inspect the drain hose connections, and verify the fill hose is secure. These are the most common culprits. If the leak persists, inspect the water inlet valve and consider calling a pro.
What to Do When a Dishwasher Leaks: Immediate Safety and Quick Diagnostics
If you’ve noticed water pooling around or under your dishwasher, the first question is safety. This is where many homeowners are tempted to rush into fixes, but the right approach begins with calm, deliberate steps. According to Dishwasher Tips, leaks in household dishwashers most often stem from simple components that wear out or loosen over time. What to do if dishwasher is leaking isn’t a mystery if you follow a methodical checklist: ensure power is off, cut the water supply if possible, and begin with the most accessible parts—the door gasket and hose connections. In this initial phase, you’ll also want to confirm that the dishwasher was not overfilled during the last cycle, which can push water toward seals. With a clear plan, you can distinguish between a quick-adjustment fix and a fault that needs professional service. This block sets the tone for a thorough, non-alarm approach that minimizes damage to your kitchen floor and reduces the odds of a recurring leak.
Understanding the Core Causes: Why a Dishwasher Leaks and How to Spot Them
Leaking water is almost always traceable to a few common points: the door gasket, drain hose, water inlet hose or valve, and the tub or sump. The general rule of thumb is to start with the easiest-to-access parts and work inward toward the pump. A worn, cracked, or dirty door seal can allow water to escape during a wash cycle. A loose or cracked drain hose or a poorly clamped inlet hose can dump water outside the tub area. Debris in the filter and spray arms can contribute to improper drainage, increasing water pressure against seals. In some cases, the leak comes from a tiny crack in the tub or a loose mounting bracket that shifts under pressure. By understanding these sources, you’ll know exactly what to check first and how to interpret what you find during inspection. The Dishwasher Tips team emphasizes focusing on the most likely culprits first to save time and expenses.
Quick Visual Checks: What to Inspect Before You Disassemble Anything
Perform these checks with the machine unplugged and the water supply shut off. Look for obvious signs of wear: a cracked door gasket, swollen or missing clips on the drain hose, or loose hose clamps at the back of the unit. Inspect the spray arms for cracks or misalignment, as a misfiring spray arm can spray water toward seals rather than into the tub. Check the filter screen at the bottom for debris that could impede drainage and cause water to pool. If you see colored water or staining around a connection, that’s a clue that the gasket or hose needs tightening or replacement. Document the locations of any moisture so you can revisit them after you perform fixes. Remember, small leaks are often the first signal of a larger issue, so treat every sign seriously.
Diagnostic Flow: Symptom to Diagnosis to Solution in a Safer, Logical Way
The diagnostic flow starts with the symptom: where is the water coming from and when does it appear? If the leak happens during the wash, suspect door seals, hoses, and the tub linkage. If it appears after the cycle ends, the problem might be with the drain hose or the drain pump. For each suspect, test a simple, safe fix and then re-run a controlled cycle to observe results. If the leak persists after tightening connections and replacing visibly damaged components, it’s time to escalate. This approach aligns with the structured guidance from Dishwasher Tips and avoids unnecessary part replacement. Always document your steps and outcomes so you can share them with a professional if needed.
Step-by-Step Fixes: Practical Repairs for the Most Common Leaks
Below are concrete fixes that address the most frequent leak causes. Start with the simplest solutions and move to more involved repairs only if needed. For a worn door gasket, replace it following the manufacturer’s instructions and re-seal the door using a light layer of silicone-safe lubricant on the gasket. For loose or damaged drain and fill hoses, tighten clamps and connections, and replace any cracked hoses. If you suspect the water inlet valve is leaking, inspect the valve for cracks and replace it if necessary. Finally, if you discover a cracked tub or sump, replacement is often required and should be performed by a professional. Throughout the process, run a short test cycle with towels or a tray to catch drips and verify that the leak has stopped before resuming full operation. This phase is the core of the troubleshooting journey and helps you avoid overestimating the seriousness of the problem.
Safety, Prevention, and Maintaining a Leak-Free Kitchen
Even after you’ve fixed a leak, it’s essential to adopt preventive habits to reduce the likelihood of recurrence. Keep the area around the dishwasher dry after cycles, check door seals periodically for signs of wear, and inspect hoses every few months. Clean the door gasket with a mild, non-abrasive cleaner to remove any grime that could impede a proper seal. Make sure the unit is level so water doesn’t pool on one side and push against seals unevenly. Finally, keep a simple maintenance routine: run an empty cycle with a cup of white vinegar or a dishwasher-safe cleaner every few months to prevent mineral buildup that can affect seals and flow. The goal is to sustain reliability and minimize downtime, so you can rely on your appliance without worrying about sudden leaks.
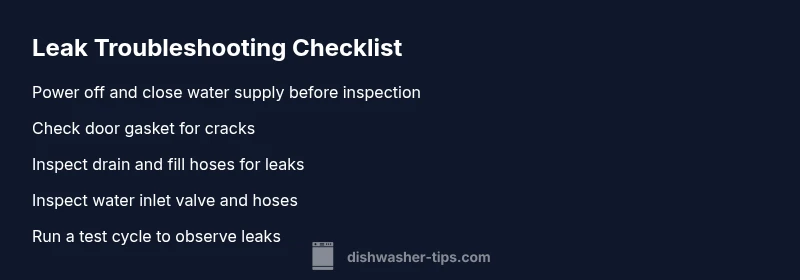
Steps
Estimated time: 45-60 minutes
- 1
Power down and isolate water
Unplug the dishwasher or switch off the dedicated circuit. Locate and close the water shutoff valve feeding the dishwasher. This ensures you won’t have live electricity or flowing water while inspecting components.
Tip: If you must use an access panel, wear gloves and keep a dry towel nearby. - 2
Inspect the door gasket
Carefully examine the gasket around the door for cracks, gaps, or sticky residue. Clean any buildup and test the door for a proper seal by gently closing it with a folded piece of paper at the seam to see if there’s drag or gaps.
Tip: Replace a damaged gasket promptly to prevent ongoing leaks. - 3
Check drain and fill hoses
Inspect all visible hoses for kinks, cracks, or loose clamps. Tighten clamps securely and replace any hose that looks worn. Ensure drain hose routing is correct and not submerged or crushed.
Tip: Use a flashlight to illuminate hose connections for a thorough check. - 4
Review the water inlet valve
Look for condensation or signs of leakage around the inlet valve and fill hose where water enters the tub. If you see dampness or staining, the valve or its seal may be failing and require replacement.
Tip: If you’re not comfortable verifying the electrical components, skip this step and call a pro. - 5
Run a controlled test cycle
With the unit reconnected, run a short test cycle empty to observe whether water still leaks. Place underlay towels or a shallow tray beneath the machine to catch any drips for early detection.
Tip: Keep a log of where you see leaking during the test to pinpoint the source. - 6
Decide when to call a professional
If leaks persist after addressing seals and hoses, or if the tub is cracked, professional service is recommended. A licensed technician can safely replace seals, valves, or replace a cracked tub.
Tip: Document all checks and replacements to share with the technician.
Diagnosis: Water leaking from dishwasher during cycle or after cycle
Possible Causes
- highDamaged or worn door gasket/seal
- highLoose or damaged drain hose connection
- mediumFaulty water inlet valve or inlet hose
- lowCracked tub or sump
Fixes
- easyReplace door gasket or door seal; clean and reseal as needed
- easyTighten or replace drain and fill hoses; reseat clamps securely
- mediumReplace faulty water inlet valve and check the inlet hose for leaks
- hardIf the tub or sump is cracked, consider replacement or professional service
People Also Ask
What is the most common cause of a leaking dishwasher?
The most common causes are worn door gaskets and loose drain hoses. Start by inspecting these parts and replacing if needed. If leakage continues, proceed with the diagnostic flow to rule out less obvious causes.
Most leaks come from worn door gaskets or loose drain hoses. Check those first, then follow the diagnostic flow if needed.
Can I fix a leaking dishwasher myself?
Yes for simple issues like gasket replacement or hose tightening. However, avoid electrical work unless you’re trained. If the leak persists, consider calling a professional.
You can often fix gaskets and hoses yourself, but call a pro if it keeps leaking.
Is a leak dangerous to safety?
Water near electrical components can pose a shock risk. Always unplug and shut off power before inspecting, and keep the area dry until you’ve identified the source.
Yes, leaks can be dangerous near electricity. Power off first.
How can I tell if the leak is from the door or the tub?
Observe where water drips during and after cycles. Water dripping from the door seam usually points to the gasket, while water near the tub area suggests internal seals or the tub itself.
Watch where the water comes from—door seals mean gasket; tub area means internal seals or tub.
When should I call a professional?
If leaks persist after you’ve replaced seals and tightened hoses, or if you notice cracks in the tub, a professional repair is recommended to prevent further damage.
Call a professional if leaks persist after checks or if you detect a cracked tub.
Will a leak always mean a replacement?
Not always. Many leaks are fixable with affordable parts like gaskets or hoses. A professional can assess whether a repair or replacement is more cost-effective.
Most leaks aren’t automatic replacement; repairs are often available.
Watch Video
What to Remember
- Power down and secure safety before inspecting.
- Door gasket and hose connections are the most common leak sources.
- Follow a diagnostic flow to identify the exact source.
- Replace damaged gaskets or hoses to stop leaks quickly.
- Call a professional if leaks persist after checks.