Whirlpool Dishwasher Not Spraying Water: Quick Troubleshooting Guide
Urgent troubleshooting guide for Whirlpool dishwashers not spraying water. Diagnose root causes, follow a safe step-by-step plan, and prevent future clogs to get dishes clean again.

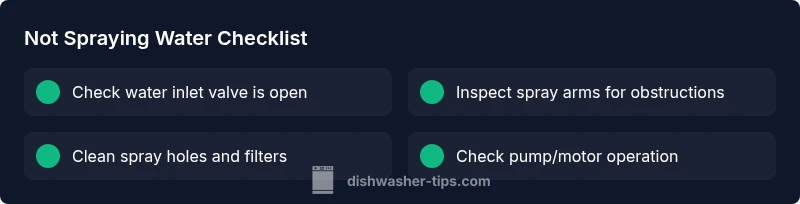
Start with the simplest fixes: inspect the spray arm for obstructions, check that the water inlet is open, and verify the pump is operating. If the arm doesn’t spin or the spray holes are clogged, clean or replace parts as needed. If spraying still fails, proceed with the diagnostic flow below.
Why Whirlpool Not Spraying Water Happens
If your Whirlpool dishwasher not spraying water, you need an urgent plan to restore cleaning performance. This issue is surprisingly common and often stems from simple blockages or worn parts. According to Dishwasher Tips, the most frequent causes are a clogged spray arm or spray holes, a blocked water inlet, or a failing pump. A malfunctioning float switch or control board can also halt the spray cycle altogether. Start by confirming basic conditions: is there water in the bottom of the tub? Is the spray arm able to spin freely? Are the spray holes clean and open? If you notice any visible debris, remove it carefully and rerun a short cycle to observe changes. Addressing these issues quickly is essential to prevent dishes from piling up and to avoid more extensive repairs.
The Dishwasher Tips team emphasizes that systematic checks pay off and often reveal a quick fix you can perform safely at home.
Quick Checks You Can Do Before Disassembling
Begin with low-effort steps before taking anything apart. Ensure the dishwasher is plugged in and the circuit is live. Confirm the water supply valve is fully open and the hose isn’t kinked. Check the filter and sump area for debris—often a clogged filter reduces spray pressure. Spin the spray arm manually to see if it turns freely; any resistance or wobble indicates a blockage or worn spray arm bearing. If the spray arm is stuck or the holes are clogged, clean with warm water and a soft brush. If basic checks don’t restore spray, move to more thorough inspections. Maintain a calm, methodical approach to avoid misplacing parts.
Dishwasher Tips notes that many visits to the repair technician start with these accessible checks.
How the Spray Arm and Bearings Affect Water Spraying
The spray arm is the direct source of water force inside the tub. If the arm is clogged, bent, or its bearing is worn, water won’t reach all dishes evenly, and you’ll notice weak or no spray. Check each hole along the arm for mineral buildup, which is common in hard water areas. Use a toothpick or small brush to clear obstructions, and then test rotation by hand. If the arm spins but water still doesn’t spray, the internal bearing or mounting nozzle may be damaged, requiring arm replacement. Remember that even a small misalignment can reduce spray efficiency. Regular inspection helps you catch wear before it becomes a bigger issue.
Dishwasher Tips analysis, 2026 highlights spray-arm upkeep as a frequent preventative measure for not-spraying-water scenarios.
Inlet Valve, Filter, and Pump: The Critical Water Path
Water must flow from the supply through the inlet valve, past the filters, into the sump, and up to the spray arms. Debris in the filter or a partially clogged inlet valve can throttle water flow, resulting in weak or absent spray. Inspect the inlet valve screen for debris and wipe it clean; replace the valve if the coil or seals show signs of failure. Clean the sump and filter assembly; a clogged filter can starve the pump, reducing spray pressure. If you notice insufficient water in the bottom, ensure the valve opens fully when the dishwasher starts. When in doubt, run a diagnostic test to gauge pump performance and verify the motor is functioning correctly.
Based on Dishwasher Tips Analysis, 2026, clog-related causes and valve issues are common culprits in not-spraying-water situations.
Step-by-Step Visual Inspection Guide
A visual, hands-on inspection approach helps you avoid unnecessary disassembly. Start with these checks in order:
- Remove the lower rack to access the spray arm and filters.
- Inspect the spray arm for cracks, blockages, and ensure it is securely attached.
- Clean all spray holes with a fine brush; run water through to confirm unobstructed flow.
- Check the water inlet hose for kinks and confirm the shut-off valve is open.
- Examine the filter and sump for buildup; rinse with warm water.
- Verify the pump area for debris; listen for the motor running during a cycle.
- Test the float assembly to ensure it isn’t stuck in the raised position.
- Reassemble and run a short cycle to observe the spray.
Tip: Document each step with photos to help if you need a replacement part.
Safety, Warnings, and When to Call a Pro
Working on a whirlpool dishwasher involves electrical components and water connections. Always unplug the unit or switch off the circuit breaker before any disassembly. Do not bypass safety devices, and avoid opening the main wiring harness. If you hear grinding sounds, smell burning insulation, or observe water leaks after an attempted repair, stop and call a licensed technician. Never operate with damaged power cords or cracked seals. If you’re unsure about the correct part numbers or electrical safety, it’s safer to book a professional service call rather than risk injury or additional damage.
Safety is the priority; when in doubt, contact professional support.
Prevention Tips to Reduce Recurrence
Mini-ritual maintenance can keep not-spraying-water issues at bay. Clean the filter and spray arm every 1–2 months if you run heavy loads. Use a descaler periodically to minimize mineral buildup in hard-water areas. Run a hot empty cycle with a dishwasher-safe cleaner to flush out debris and improve water flow. Check that the inlet valve and hose connections remain tight and free of leaks. Finally, ensure you use the correct detergent type and avoid overloading the dishwasher, which can clog spray arms and reduce spray efficiency.
Regular maintenance habits, as suggested by Dishwasher Tips, are essential for long-term reliability.
Whirlpool-Specific Design Considerations and Common Mistakes
Whirlpool models vary in design, but many share a common vulnerability to mineral buildup and clogged spray paths. A frequent mistake is neglecting the filter or misaligning the spray arm after loading. Whirlpools may use a dual rinse system or specific spray patterns; ensuring the arms are correctly seated is crucial. Don’t mix incompatible detergents, and avoid using products with heavy bleaching agents that can corrode seals. If your model relies on a single inlet valve, a partial blockage can cause spray inconsistencies. Following the user manual’s guidance for proper rack placement and spray arm reattachment can prevent misalignment and spray failures.
The Dishwasher Tips team recommends a model-specific maintenance checklist to prevent future spray issues.
Steps
Estimated time: 60-90 minutes
- 1
Power down and unplug the unit
For safety, switch off the circuit breaker or unplug the dishwasher from the wall outlet. This prevents electrical shock while you inspect the components. Check that the door is closed and the tub is drained before starting any work.
Tip: Always double-check power is off before touching internal parts. - 2
Remove lower rack and inspect spray arm
Pull out the lower rack and locate the spray arm. Gently wiggle it to see if it spins freely. Look for loose fittings, cracks, or obvious obstructions near the mounting point.
Tip: Note how the arm is attached so you can reassemble correctly. - 3
Clean spray arm holes
Soak the spray arm in warm, soapy water to loosen mineral buildup. Use a soft brush or a toothpick to clear clogged holes. Rinse thoroughly and recheck rotation.
Tip: Don't use metal tools that could scratch the arm. - 4
Check water inlet valve and supply hose
Inspect the inlet valve screen for debris and ensure the supply hose is straight and unobstructed. If the valve feels stiff or makes buzzing sounds, it may be failing.
Tip: Fully open the kitchen shutoff valve; a partially closed valve reduces flow. - 5
Inspect and clean filter and sump
Remove the filter basket and any debris in the sump. Rinse filters under warm water and replace correctly. A clean inlet path improves pump efficiency and spray performance.
Tip: Reinstall filters in the correct orientation to avoid bypassing debris. - 6
Test the pump and motor function
Run a quick diagnostic cycle if your model supports it, or observe the motor during a cycle. Listen for unusual noises and ensure the pump is drawing water and delivering it to the spray arms.
Tip: If you hear grinding, the pump may be worn and require replacement. - 7
Check float switch and control board
Make sure the float moves up and down freely and isn’t stuck. A stuck float can prevent the fill cycle from completing, affecting spray pressure. If the control board shows error codes, consult the manual for specific diagnostics.
Tip: Do not bypass safety switches; they protect against overflow. - 8
Run a test cycle and observe
Reassemble everything, plug the unit back in, and run a short wash cycle with a few dishes to verify the spray action. Watch for consistent spray from all arms and confirm no leaks.
Tip: If spray remains weak or absent, parts replacement may be needed.
Diagnosis: Whirlpool dishwasher won't spray water
Possible Causes
- highClogged spray arm or spray holes
- highBlocked water inlet valve or kinked supply hose
- mediumMalfunctioning wash pump or motor
- lowFaulty float switch or control board
Fixes
- easyClean the spray arm and holes; remove debris using a toothpick or small brush
- easyInspect the water inlet valve and supply hose for kinks; open shutoff valve fully
- mediumReplace inlet valve or repair pump if debris-free checks fail; run diagnostic tests for motor
- hardTest the float switch and control board; replace faulty components with proper replacements
People Also Ask
Why is my Whirlpool dishwasher not spraying water?
Common causes include a clogged spray arm, a blocked inlet valve, or a faulty pump. Additional issues may involve a stuck float switch or a failing control board. Start with simple checks and progress to more thorough inspections if needed.
Common causes are a clogged spray arm, blocked inlet, or faulty pump. Start with simple checks and progress to more thorough inspections if needed.
What should I check first when the spray water isn’t spraying?
Begin with basic checks: ensure water supply is open, inspect the spray arm for obstructions, and clean the filter. If these don’t fix the issue, move to valve and pump checks.
Start with water supply, spray arm, and filter, then proceed to valve and pump checks if needed.
How do I clean a Whirlpool dishwasher spray arm?
Remove the spray arm, soak it in warm, soapy water, and use a small brush to clear mineral buildup from each hole. Rinse well before reinstalling.
Remove and soak the spray arm, brush out buildup, rinse, and reinstall.
Can a clogged filter cause lack of spraying?
Yes. A dirty filter can restrict water flow to the pump and spray arms. Clean or replace the filter as needed to restore spray performance.
A dirty filter can cut water flow to the spray arms; clean or replace it.
When should I replace the inlet valve?
If the inlet valve shows persistent failure to open, makes buzzing sounds, or if tests indicate reduced water flow despite a clean hose, replacement is usually required.
If the valve won’t open or you detect reduced flow, consider replacement.
Is it safe to operate the dishwasher while inspecting electrical parts?
No. Always disconnect power before inspecting electrical components. If you’re unsure, pause and contact a professional to avoid shock or fire hazards.
Never operate with exposed electrical parts; disconnect power first and call a pro if unsure.
Watch Video
What to Remember
- Start with the spray arm and inlet checks to quickly diagnose not-spraying-water.
- Clean filters and spray holes to restore proper water flow.
- If basic fixes fail, test the pump and float switch before replacing parts.
- Regular maintenance prevents recurring spray-related issues.